¶ Introduction
Installing the Emity app on BrightSign players is quick and easy.
The migration can be carried out remotely, provided the player is connected to BrightSign Author, a free MDM tool that allows you to monitor and manage your entire fleet of players.
The entire process usually takes less than 5 minutes.
You will find the detailed installation steps below:
¶ List of compatible BrightSign players
The Emity solution is compatible with all BrightSign players from the Series 2 onwards.
However, the key factor is the version of BrightSign OS that can be installed on the devices. Indeed, some Series 2 players are limited to older versions (6.1 or 7.1), which makes them incompatible with our solution.
Emity is compatible from BrightSign OS 8.1 onwards. Nevertheless, to ensure optimal compatibility and stable performance, we recommend using version 8.5 or higher.
It is also strongly recommended to use a version higher than 8.5, particularly for security reasons. Indeed, certain vulnerabilities related to Chrome 87 (integrated into these versions) have been fixed in more recent versions of the system.
¶ Installation
¶ 🔩 Installing the player
Connect a display to your BrightSign box. Then go to BrightAuthor:connected, under the Admin - Activate tab.
The display will show an activation code. Simply enter this code into the BrightAuthor app to activate the player.
¶ Configuration
¶ ⚙️ Provisioning a player
Before you begin, you will need to apply a Setup to each of your players. If your players already have a Setup, you can skip this step. Otherwise, here is a tutorial on how to create a Setup in BrightAuthor:connected
In the BrightAuthor:connected app, go to the Admin - Setup tab. Here, you can edit the existing Default Setup or create a new one.
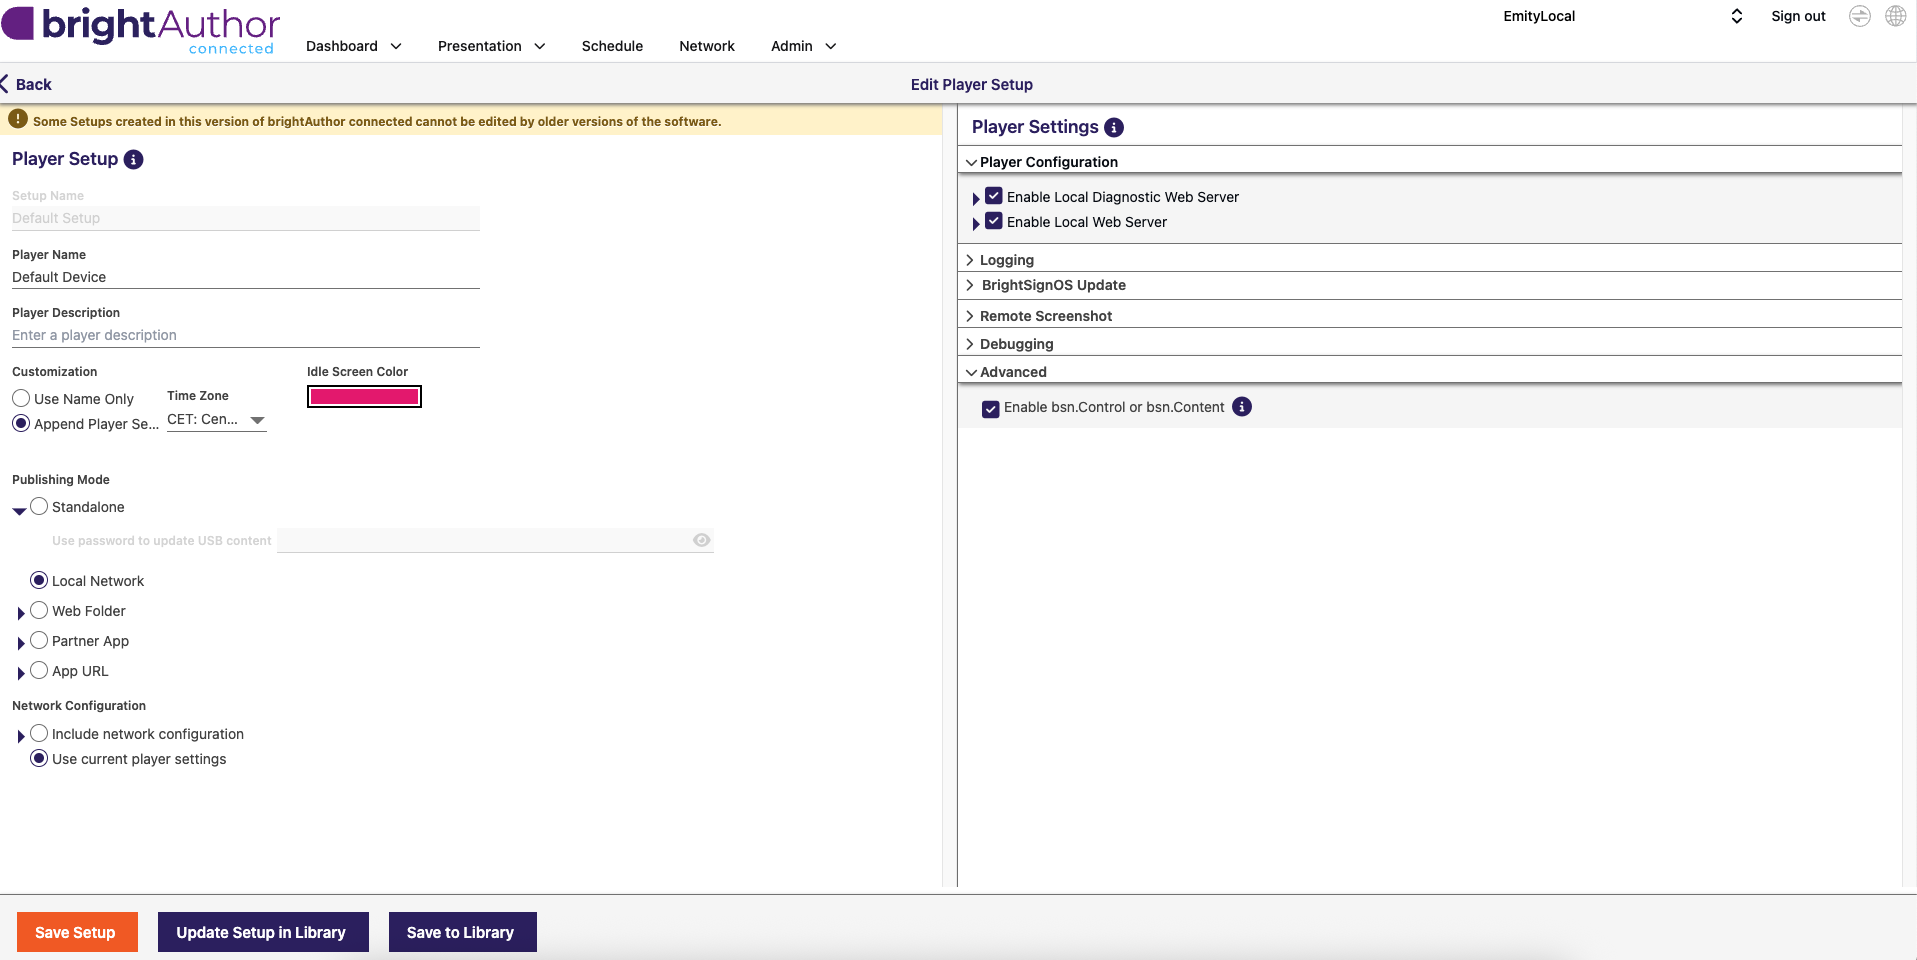
In the left-hand section (Player Setup), apply the following changes:
- Under
Customization, change theTime Zoneto match your time zone. This step is crucial for the correct functioning of playlist start times and screen sleep settings. - Under
Publishing Mode, keep‘Local Network’
InNetwork Configuration, select‘use current player settings’
On the right-hand side (Player Settings): apply these changes:
- In
Player Configuration, tick both the‘Enable Local Diagnostic Web Server’and‘Enable Local Web Server’boxes - Finally, in
Advanced, tick the box ‘Enable bsn.Control or bsn.Content’
¶ ⚙️ Apply an Application URL to a player
Still in the BrightAuthor:connected app, go to the Admin - Provision tab. Here, you can see a list of your activated players.
Select your player and apply the modified Default Setup (or the setup you created in the previous step).
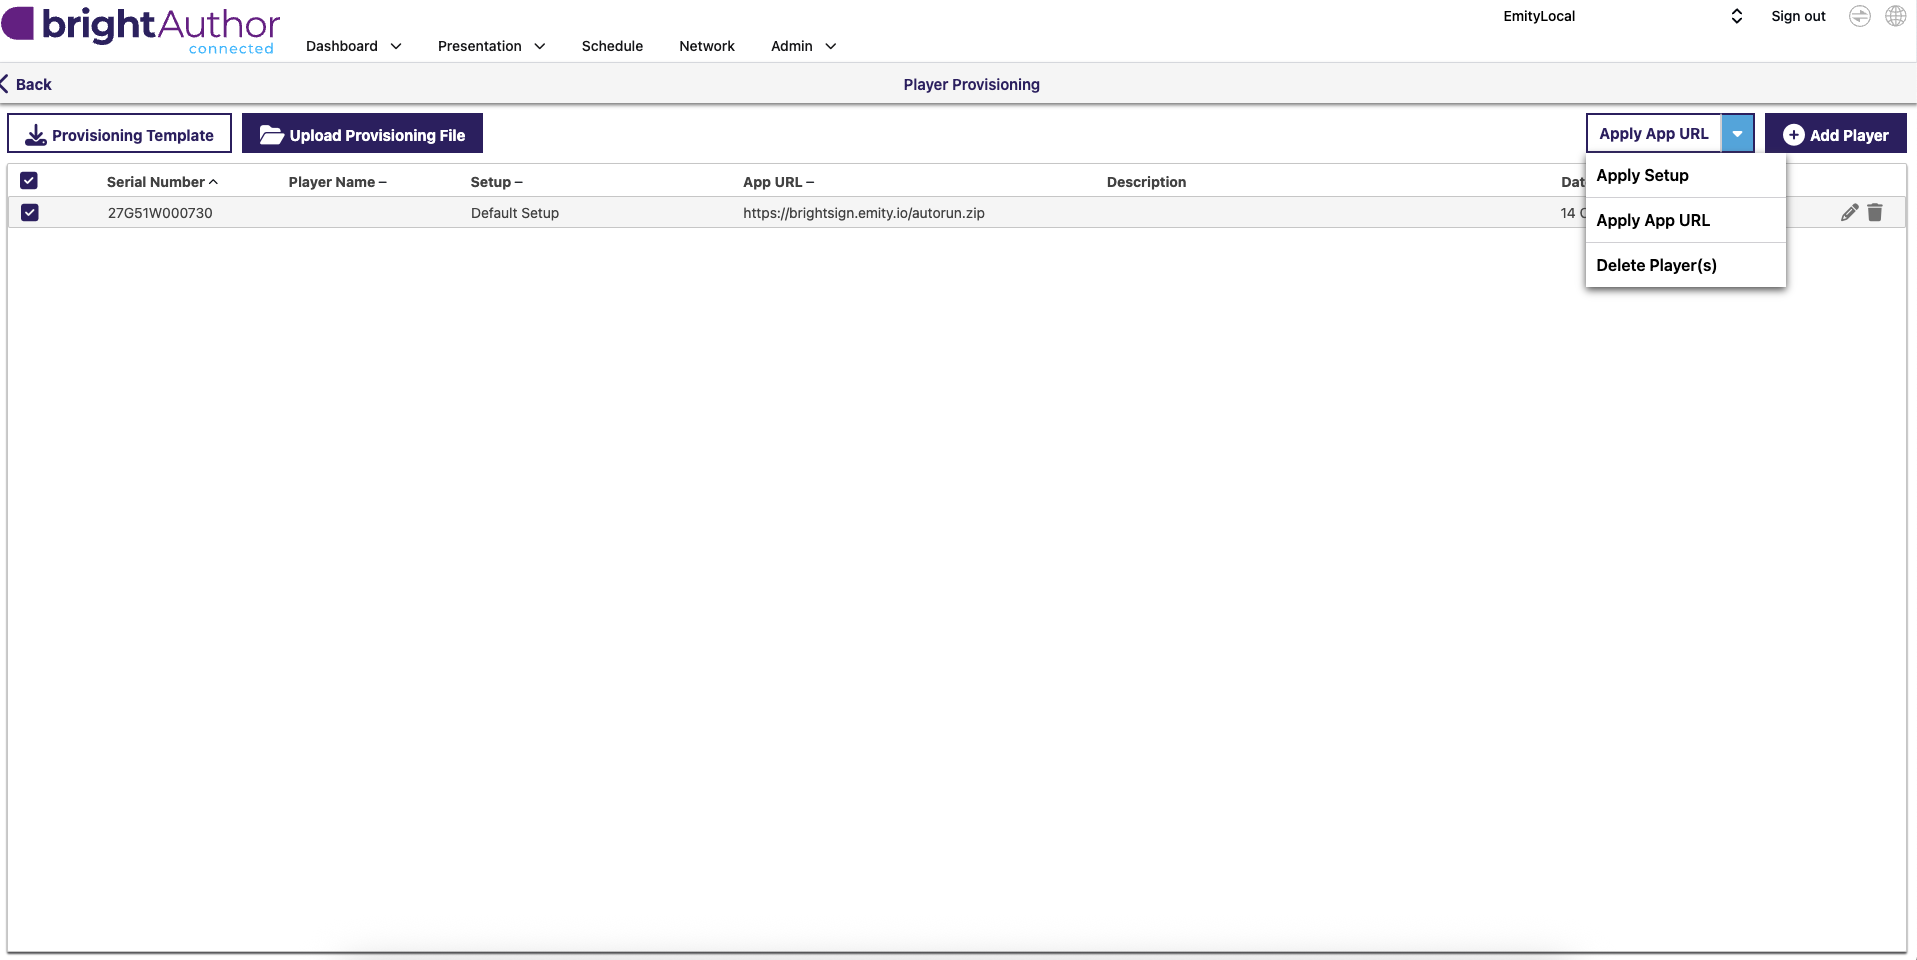
Now, with your player still selected, change the option on the button at the top right, next to Add Player, to Apply App URL.
Add the following URL: https://brightsign.emity.io/autorun.zip
If your player is already running, you will need to reboot it, which will involve clearing the current settings and data stored on the SD card. This means that the next time it starts up, your player will be configured using the settings you previously entered in the Setup menu and, with an empty SD card, will retrieve the information required to start up from the URL you specified in the previous step.
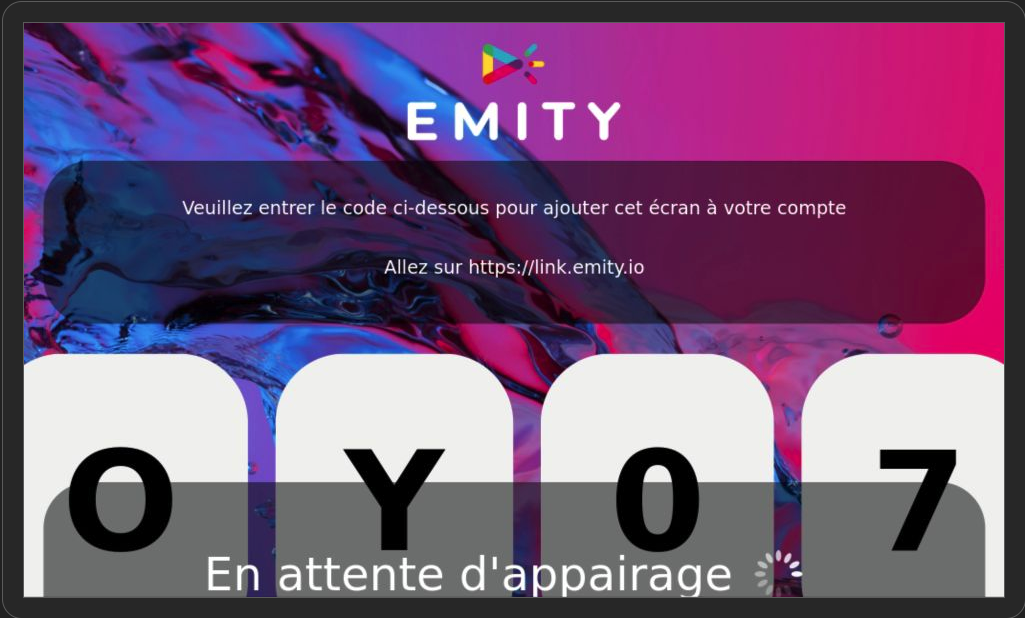
The player will now retrieve the file required to start up from the specified URL. This step may take several minutes.
The first time, the screen will display a code. Use this code to pair the screen with E-Manager
Once the screen has been added, it will complete its setup, and you will finally be able to link your E-Manager playlists to your BrightSign player.
![]()