Dernière mise à jour : juin 2025
¶ INTRODUCTION
Welcome to the E-CLICK user manual, your comprehensive solution for managing touchscreen kiosks and customer interaction via an intuitive web interface. This guide is designed to help you install, configure, and effectively use E-CLICK to maximize the efficiency of your customer touchpoints and improve queue management.
¶ SOFTWARE OVERVIEW
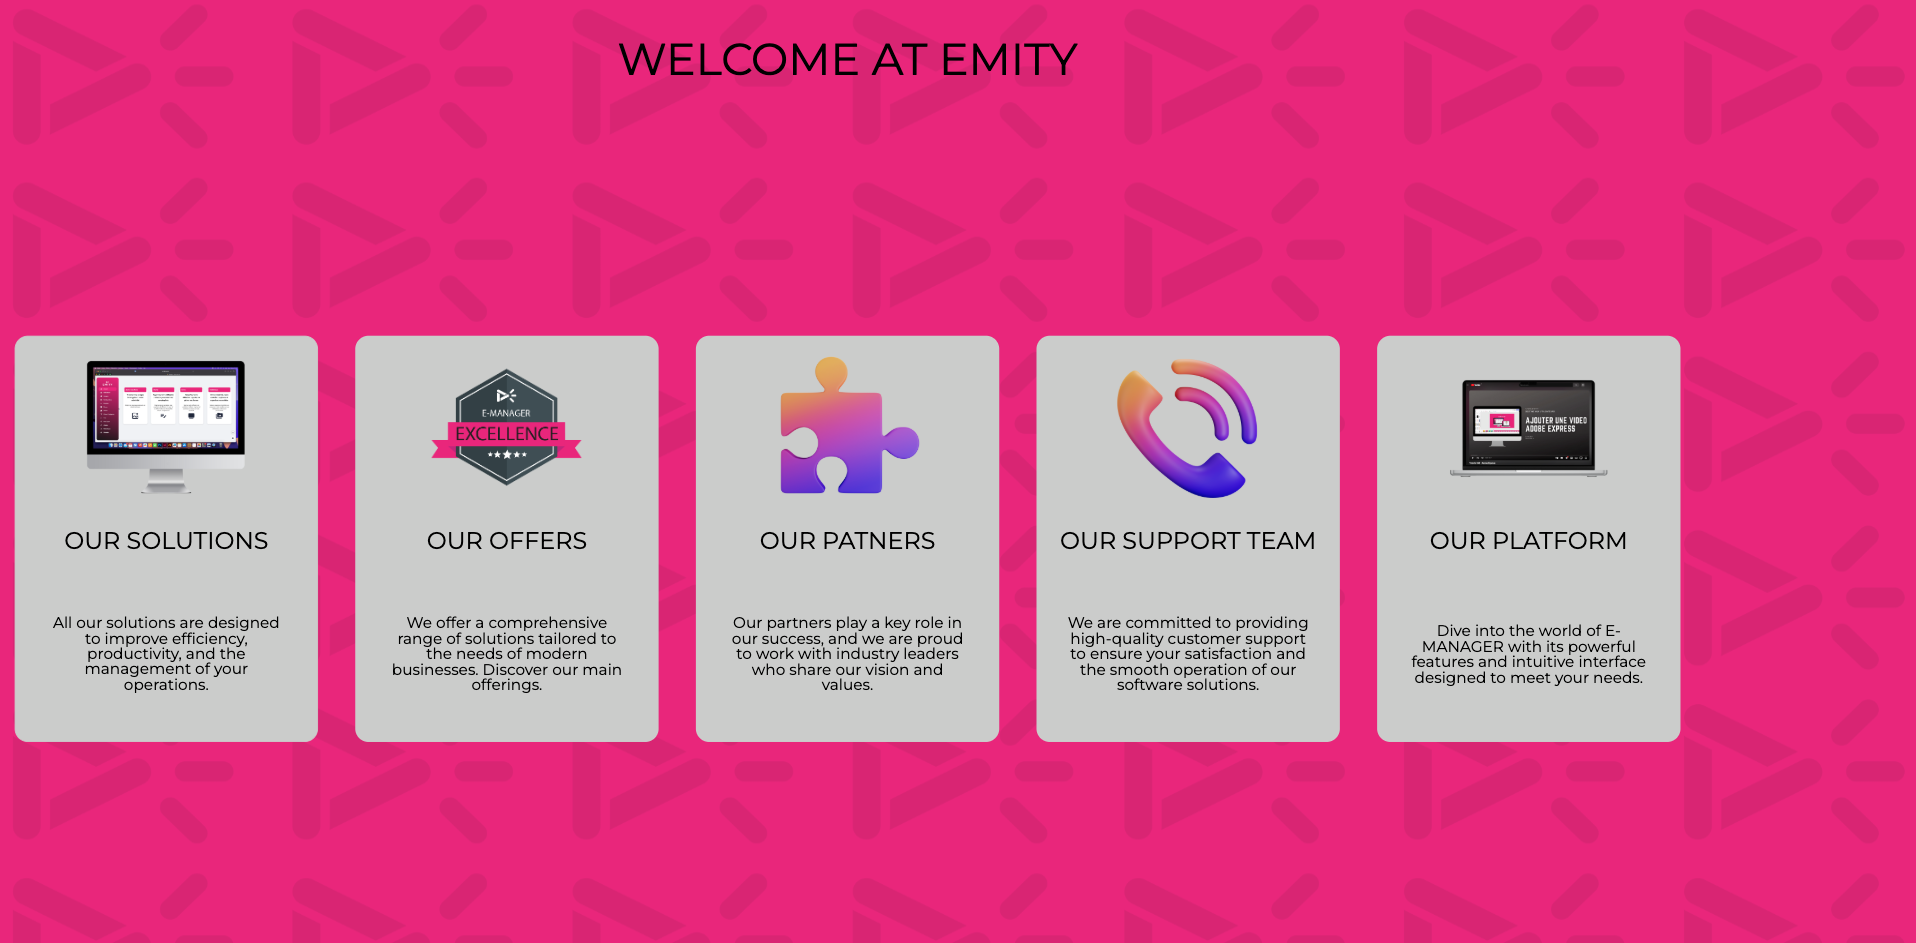
Thanks to the E-CLICK digital dashboard, you can control your interactive terminal or touchscreen anywhere, without interruption and on any device. Designed and developed by EMITY, E-CLICK is a multifunctional solution that allows you to manage all your touchscreen projects easily and efficiently.
This allows you to create and distribute your interactive content:
• Anywhere:
E-CLICK can be used on all devices (PC, smartphone) and all operating systems (Mac, Windows, Linux, iOS, Android).
• Continuously:
E-CLICK allows you to schedule content distribution 24/7. Futhermore, when your screen receives no interaction (within a set period of time), it can automatically display the dynamic content you have programmed.
• On all types of touch screens, of all sizes:
E-CLICK can manage a single screen or an entire fleet! Regardless of their size and quantity.
• Intuitive, our software is quick to learn and incredibly easy to use.
• Unique, E-CLICK allows you to broadcast your communication to your entire fleet of screens with a single click. This digital platform encompasses many different features and can therefore be adapted to all professional sectors.
¶ SUMMARY OF KEY FEATURES
E-CLICK is an innovative web solution that allows you to create and manage interactive touchscreen kiosks with virtual buttons, facilitating interaction with your customers.
Here is an overview of the key features:
- Creation of touchscreen kiosks: Configure interactive kiosks with customizable virtual buttons to display messages, documents, videos, and other content.
- Customer interaction management: Facilitate communication and customer engagement with an intuitive user interface.
- Queuing system: Efficiently manage queues by generating digital tickets, ensuring a smooth and organized customer experience.
- Check-in/check-out log: Optimize reception management at your site by allowing your visitors or employees to check in when they arrive and check out when they leave.
- Room reservations: Easily optimize the use of your spaces, especially your meeting rooms.
- Back Office: Access a comprehensive management interface to monitor and administer your queue tickets in real time, optimize operations, and improve customer satisfaction.
We invite you to explore this guide to discover how to optimize your use of E-CLICK software and transform your touchscreen kiosks into true interactive service points.
¶ LEXIQUE
upcoming
¶ ACCESS & CONNEXION
Use E-MANAGER without prior installation.
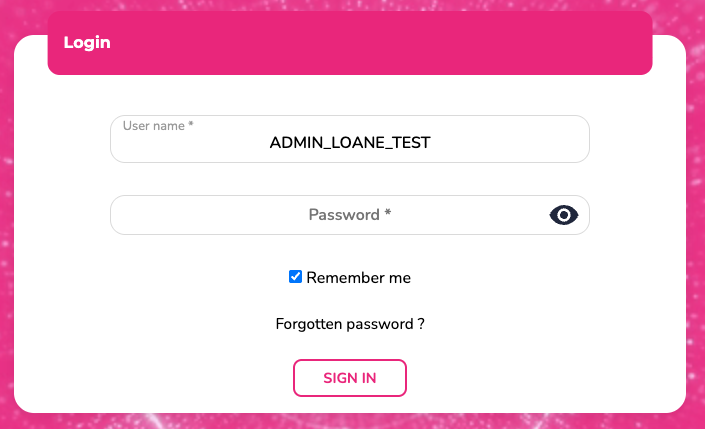
From a browser, go to:
• emity.io, under the “Login” section,
• or directly to https://link.emity.io/WebManager.
Enter your login details, which you received when your account was created by a third party.
At the bottom right, you will find this button:

Click on it and set your preferences: Light/dark mode and the platform language.
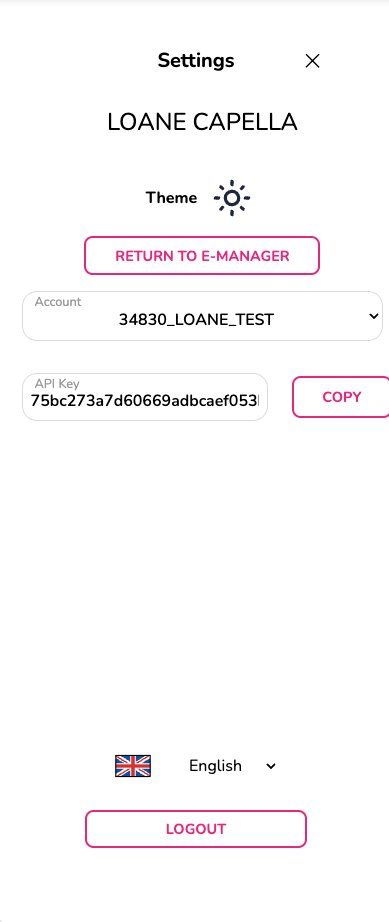
Our platform is available in various languages as : French, English, Spanish, Italian, Deutsch and German.
You can no longer create an account yourself. Please contact us or one of our distributors to access a free 3-month trial period.
An account will then be created in your name and you will receive a confirmation email to validate your registration and activate your E-Manager account. You can then start using the platform.
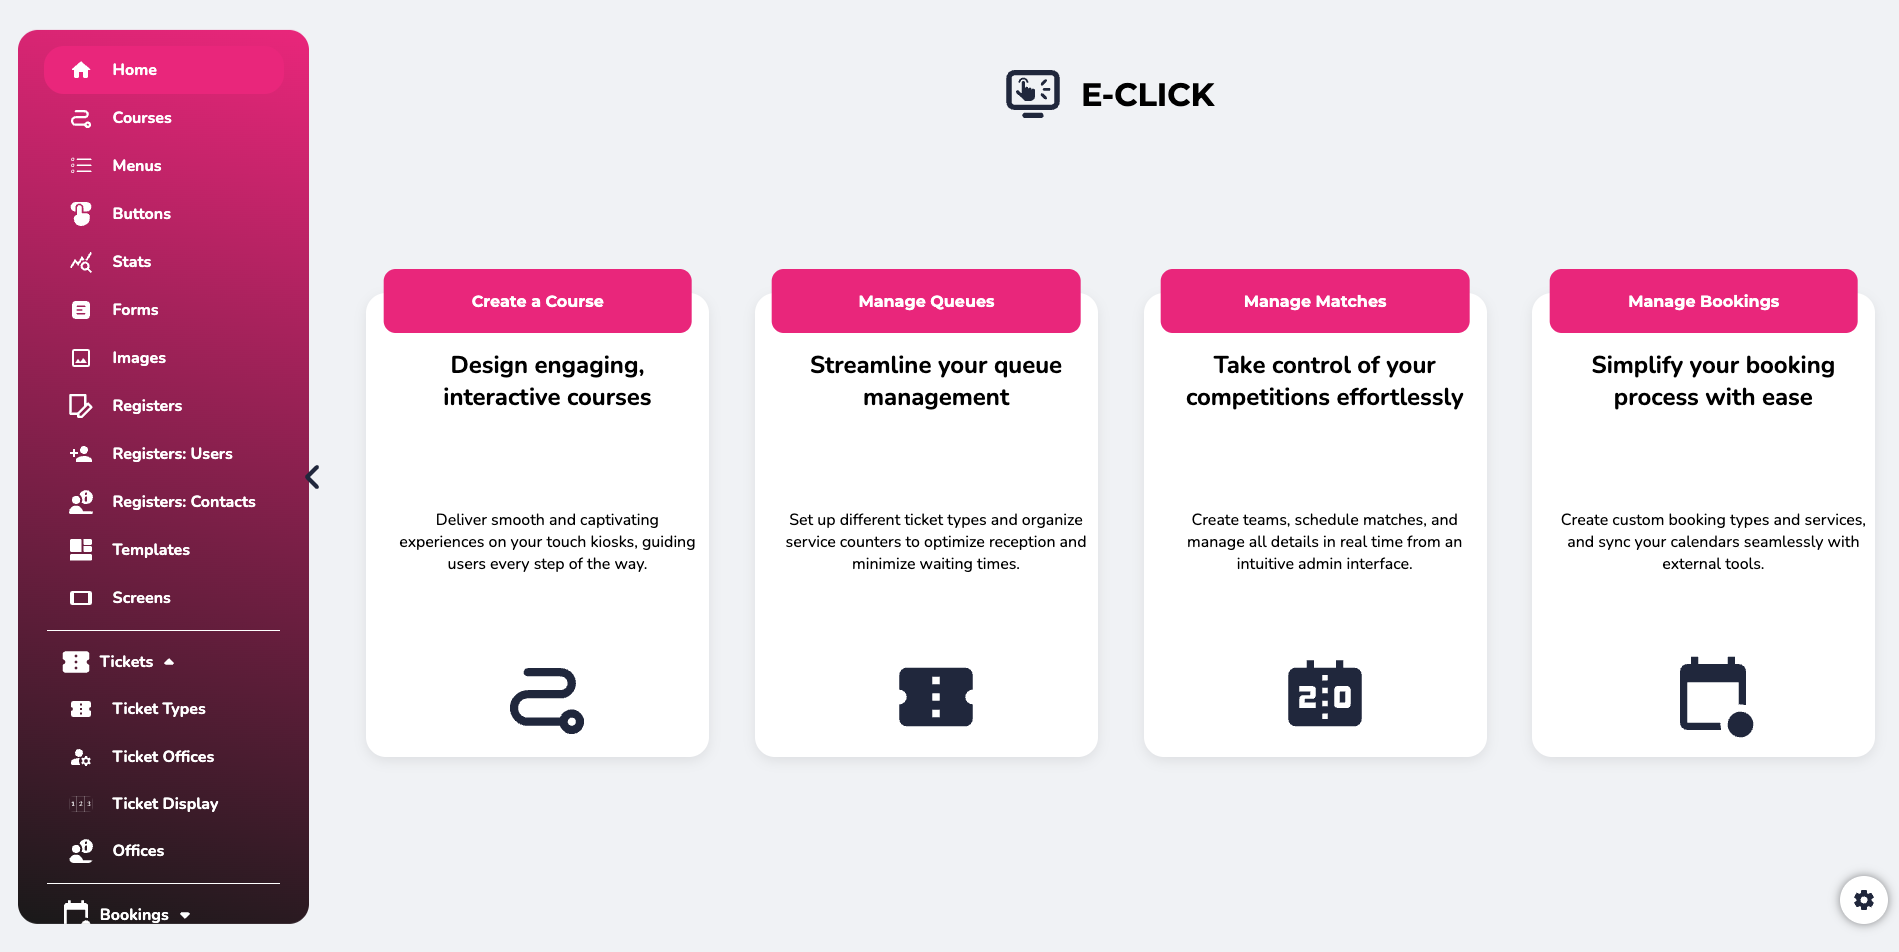
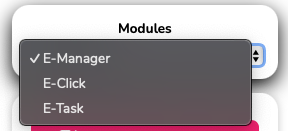
Select the desired module—in this case, E-CLICK—on the home page that appears when you log in.
The modules are not available by default; you must have access to them. Access is granted only by the sales department, following an order or trial account request.
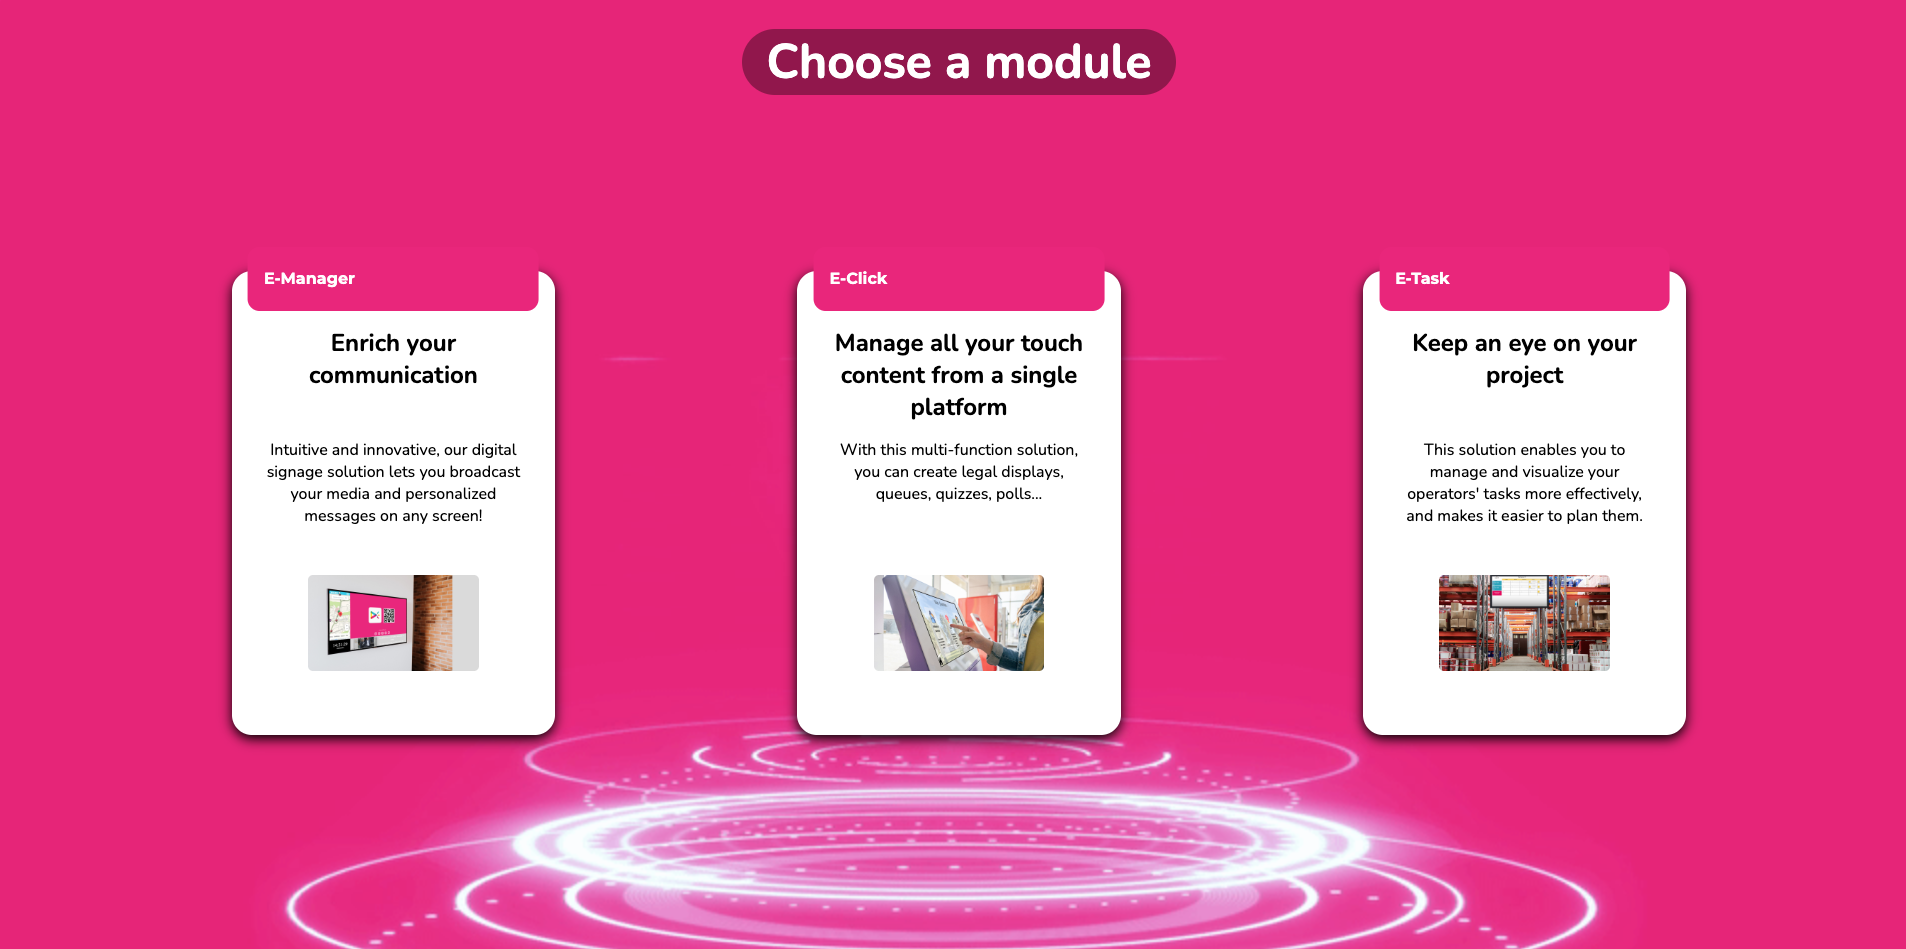
If you are already logged in to E-MANAGER, click on “Settings” on your home page to choose your E-CLICK module.
¶ TUTORIALS
This E-CLICK user manual is a written training resource. For a more interactive version, you can find all our video tutorials on the E-CLICK software:
• On the EMITY website, on the “Training” page
• On our YouTube channel.
New tutorials are regularly posted online and updates are also made on a regular basis.
¶ HOME PAGE
¶ LEFT SIDE MENU
-
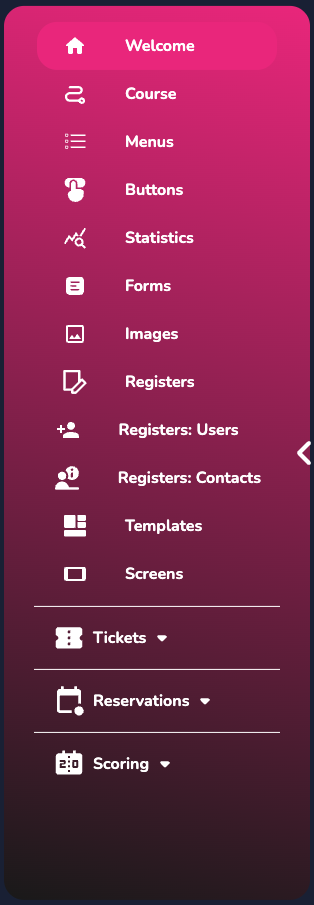
On the main page, there is a menu on the left divided into two parts, with the following main access points:
• Home, with four shortcut buttons.
• Courses, to directly access the management and creation of your interactive courses.
• Menus, to manage the content and description of your interactive terminal.
• Buttons, where you can modify their appearance (color, title size, border type, background opacity, etc.).
• Statistics (number of clicks per menu, per button, button click trends over a day).
• Forms: standardize requests to obtain the information you need (last name, first name, email, phone number).
• Images: customize your menu buttons.
• Registers: quickly access your data concerning a visitor register (already filled in).
• User register: quickly access your user data concerning a visitor register (already filled in).
• Contact register, to quickly access your contacts for a visitor register (already filled in).
• Templates, access pre-designed paths to facilitate their creation and implementation.
• Screens, find and add your screens to your touchscreen and interactive displays. -
The second part of this menu concerns the modules - See the “Modules” section.
¶ RIGHT SIDE MENU
At the bottom right of this home page, as well as on the other pages, you will find a “settings” button:

It will enable several actions.
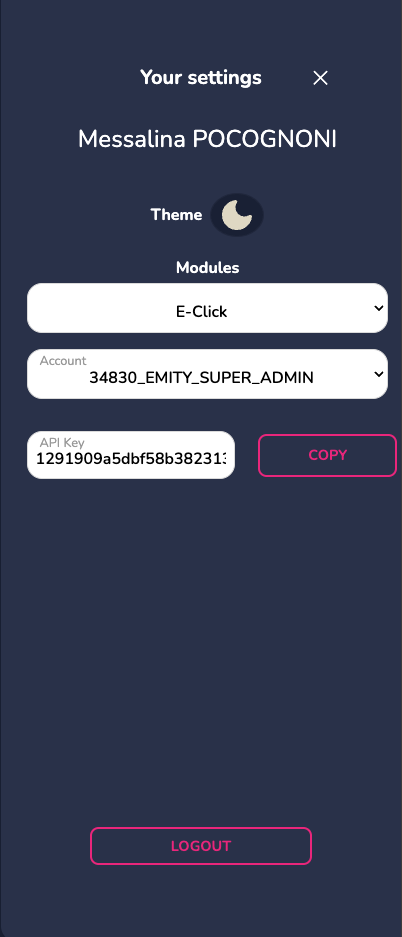
•Modules, to easily navigate between our different software programs while remaining
connected to your account.
• Theme, allows you to choose the platform's display mode, light or dark.
• Account, displays the name of the account you are logged into.
• API key, if necessary for your activity.
The ‘Logout’ button can also be found in this right-hand side menu.
¶ FEATURES
E-CLICK works through paths, menus, and buttons.
A path contains menus, and these menus contain buttons.
The buttons, can contain actions (PDF document, image, video, form, message, etc.).
¶ THE PATHS
- Presentation & Explanation
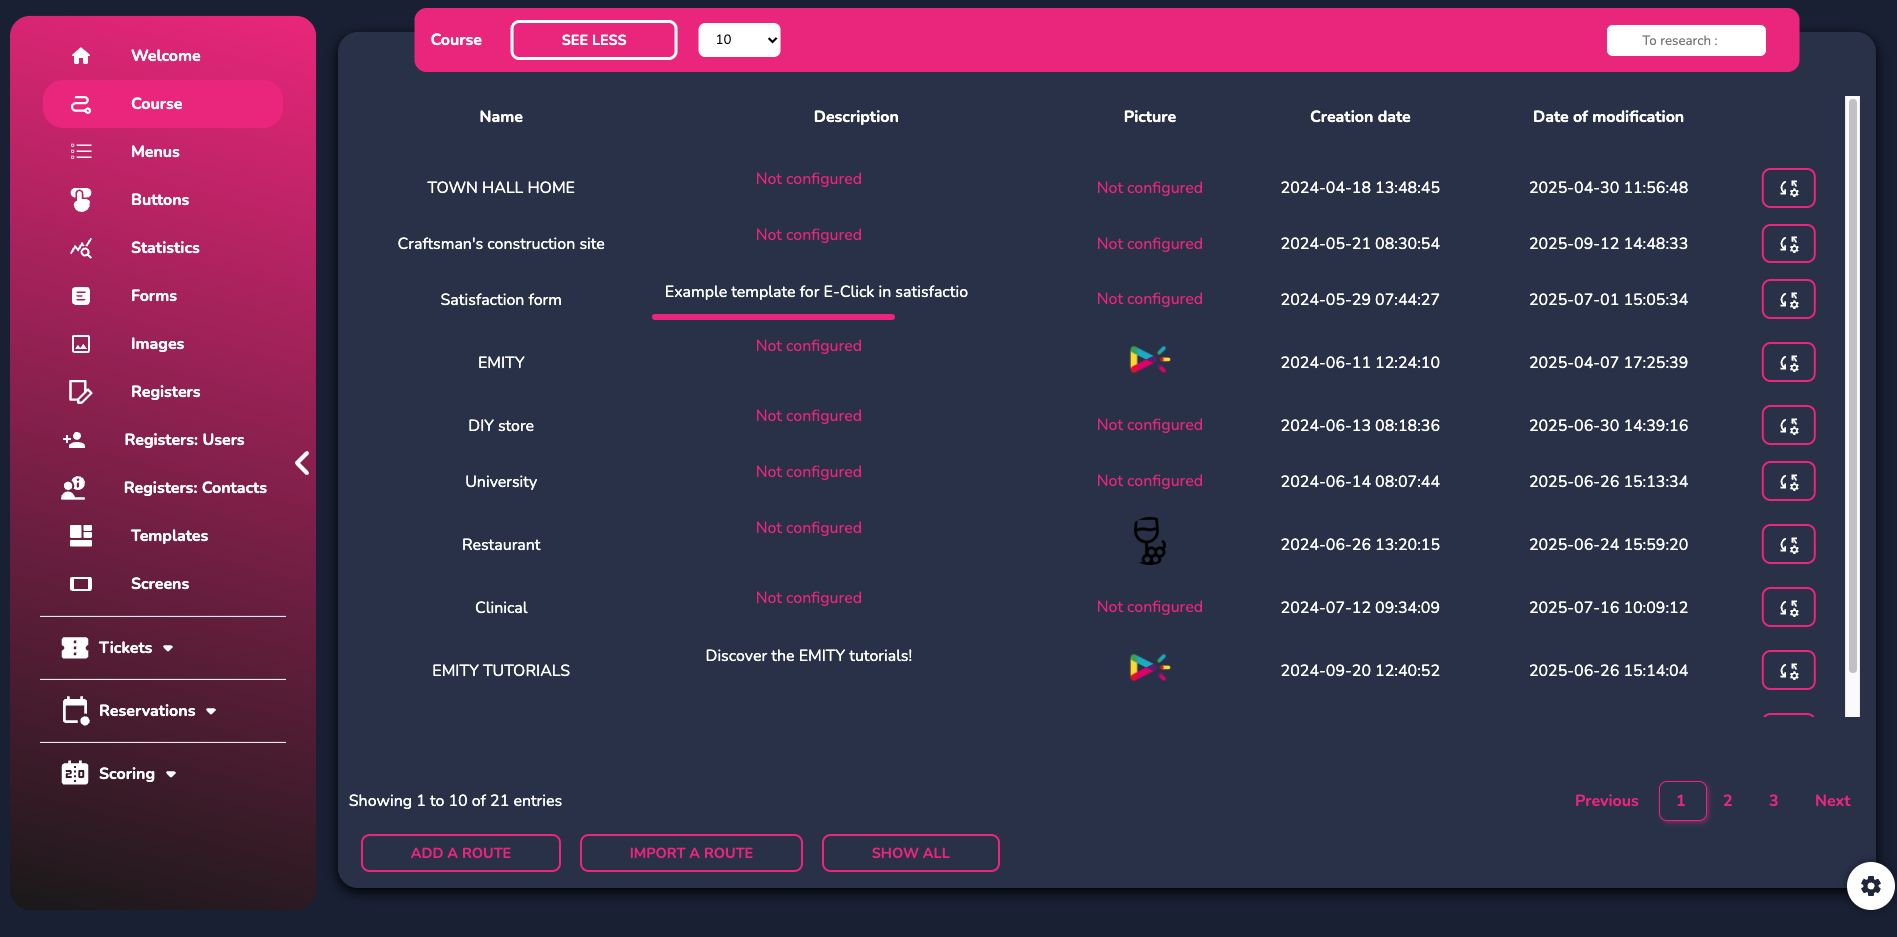
To access this feature, click on “routes.” You can either choose an existing route or create a new one.
If you want to add a new route, by clicking on this button:

Here are the creation steps to follow :
- Add the name and a description (not visible) to your route. Then click “Next.”
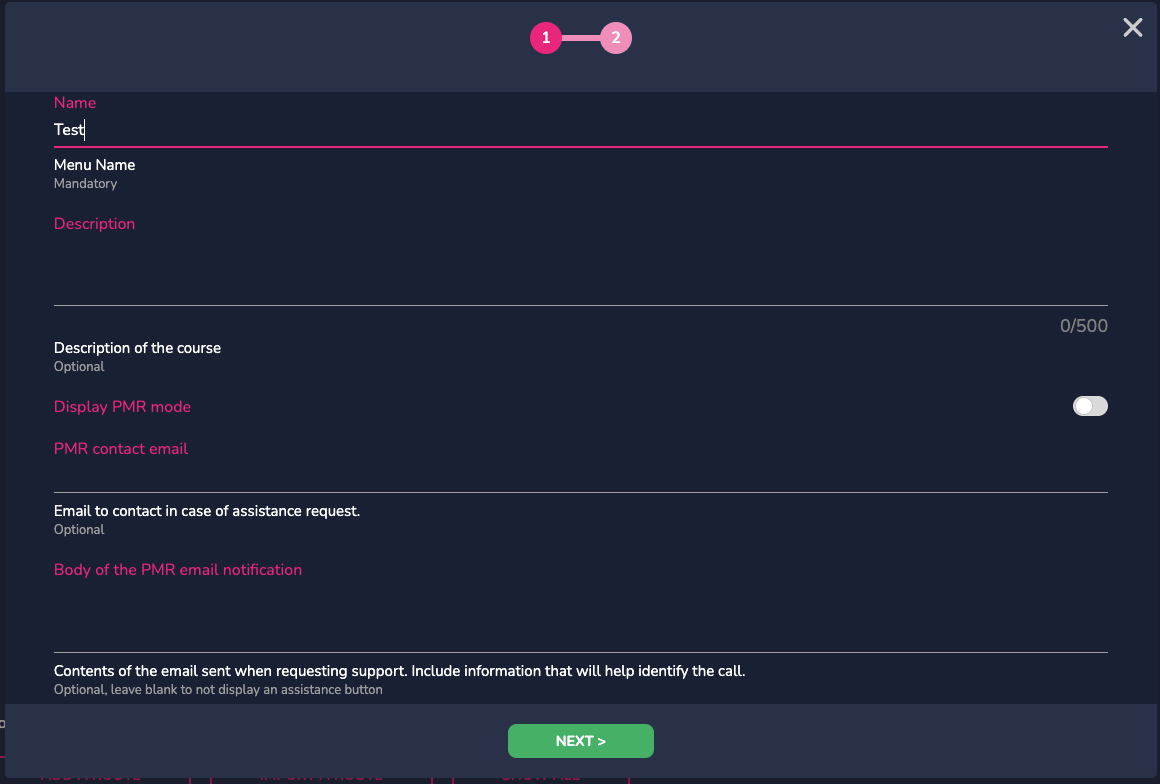
2. Define an image to illustrate your journey if you wish, and confirm your action.
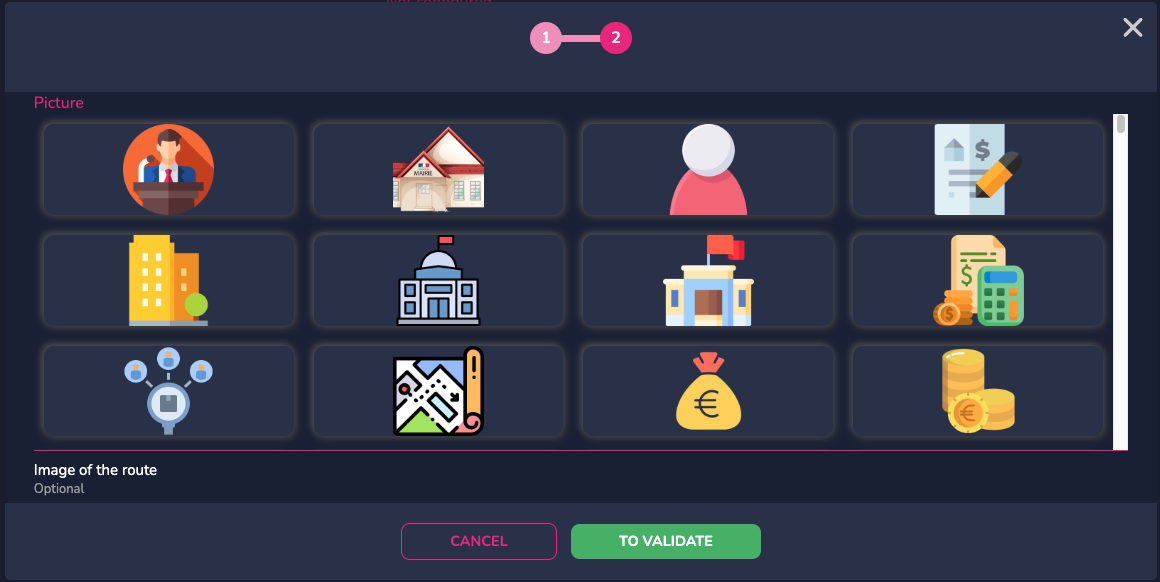
Your route has been created !
To the right of your new route, you will find the actions button:

 |
Start previewing your route. Updates are made automatically so you can modify the route and see the results in real time. |
 |
Edit the basic information about your route (name, description, image). |
 |
Duplicate your routes. |
 |
This button allows you to duplicate the settings configured in the course menus for each new menu that will be created on the same course. |
 |
Delete your routes. |
 |
Export your route. |
 |
Close the action modal window. |
- Creating a tree structure
There are several ways to start creating your tree structure. You can either create it on paper if your menu is fairly simple, or you can go to the website: https://miro.com/fr, to create it in a more readable format. You can create your account for free and create as many tree structures as you like. This will help you navigate more easily and visualize your menus and buttons in advance.
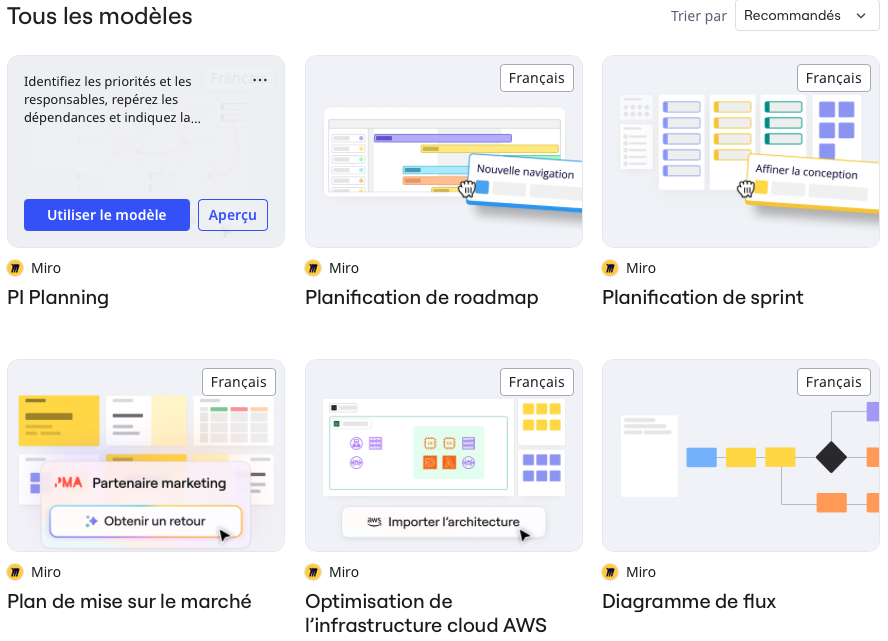
Once your account has been created, click on “New Table.”
Choose the tree structure you want and click on “Use this template.”
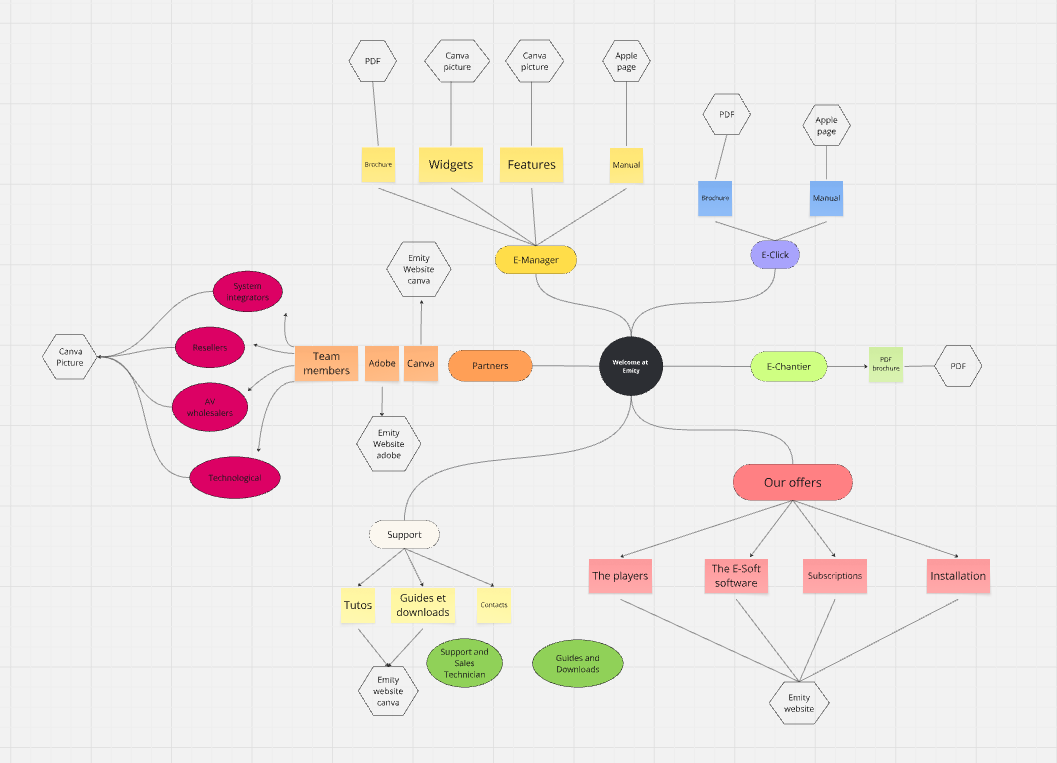
Define the name of your menus and submenus, your buttons, and the name of their contents.
¶ MENUS
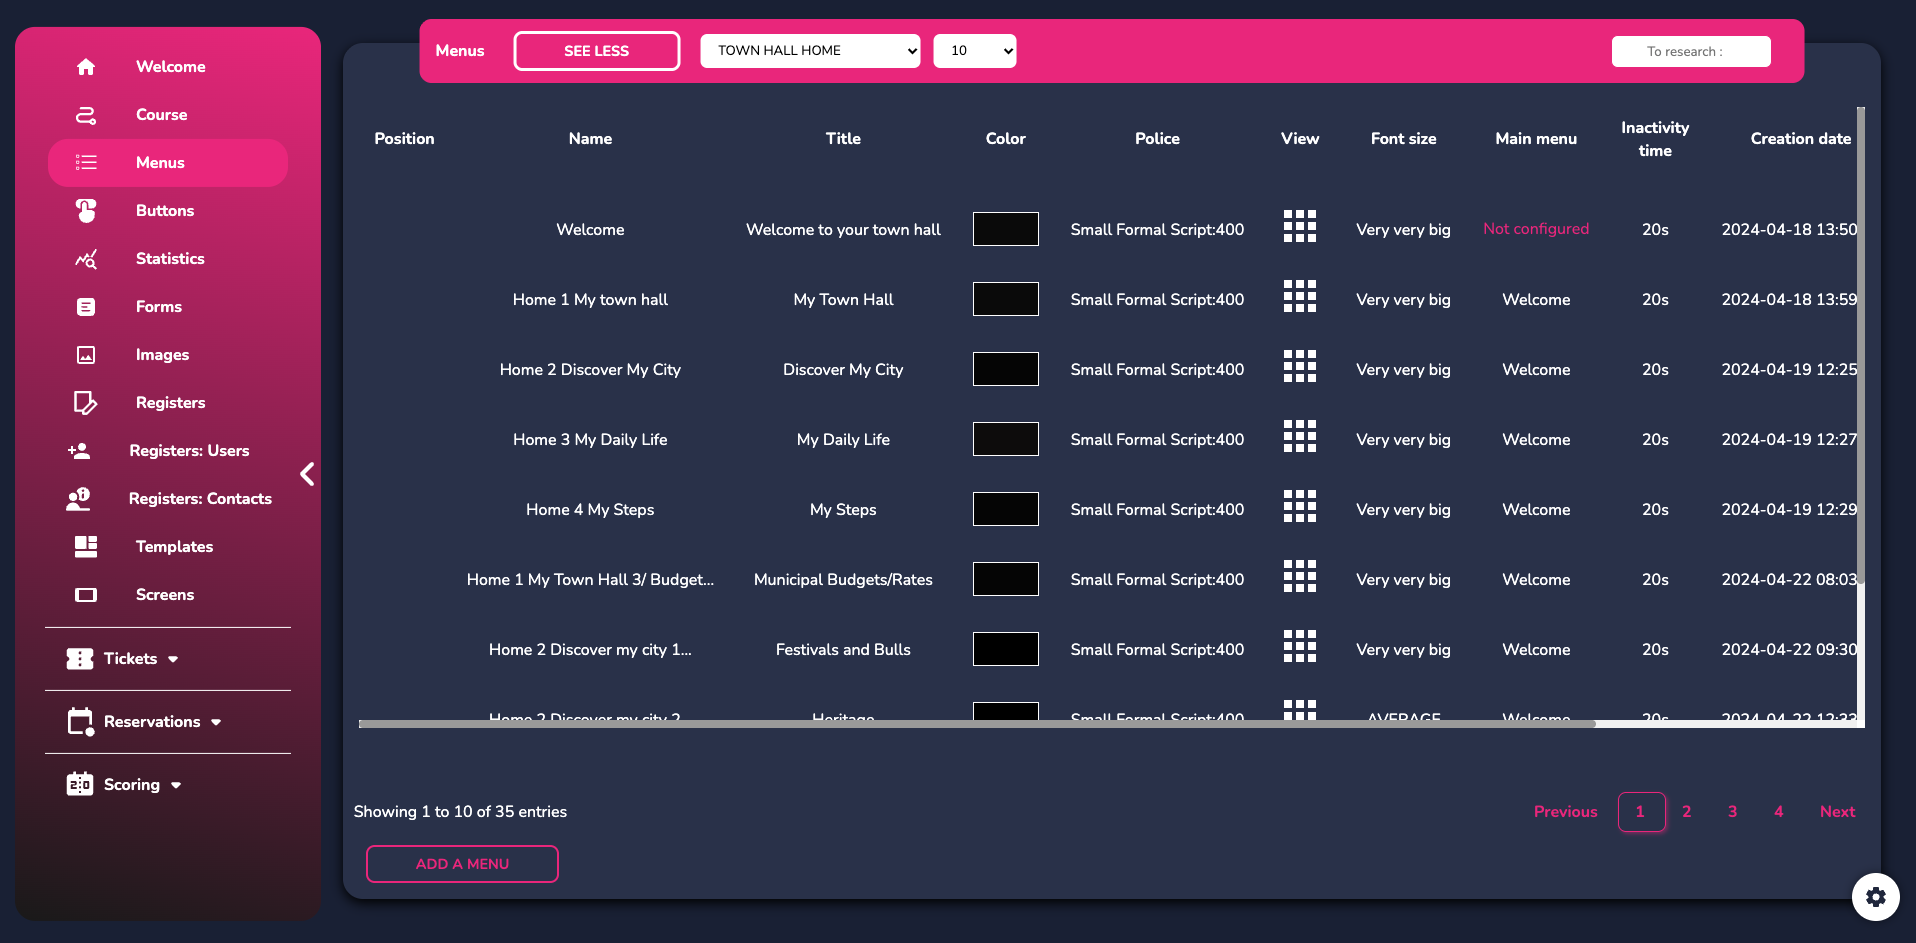
To create a menu, click on "add".
Here are the steps of creation :
- Define the name of your menu and the type of view: “map” or “list.”.
 VS.
VS.
- Enter the menu title (which will be visible on the screen), its color, font, and size.
- Import a background image for your menu.
- Define the main menu. This will determine where to redirect users when inactive. If you only have one menu, this action is unnecessary. But if you have multiple menus, this will automatically return users to the home screen after a period of inactivity. Set the inactivity time just below. When this time, expressed in seconds, expires, it will redirect users to the main menu.
Then click on « add ».
To the right of your new menu, you will find the actions button. :
 |
Edit the basic information for your menu (name, description, etc.). |
 |
Duplicate your menu. |
 |
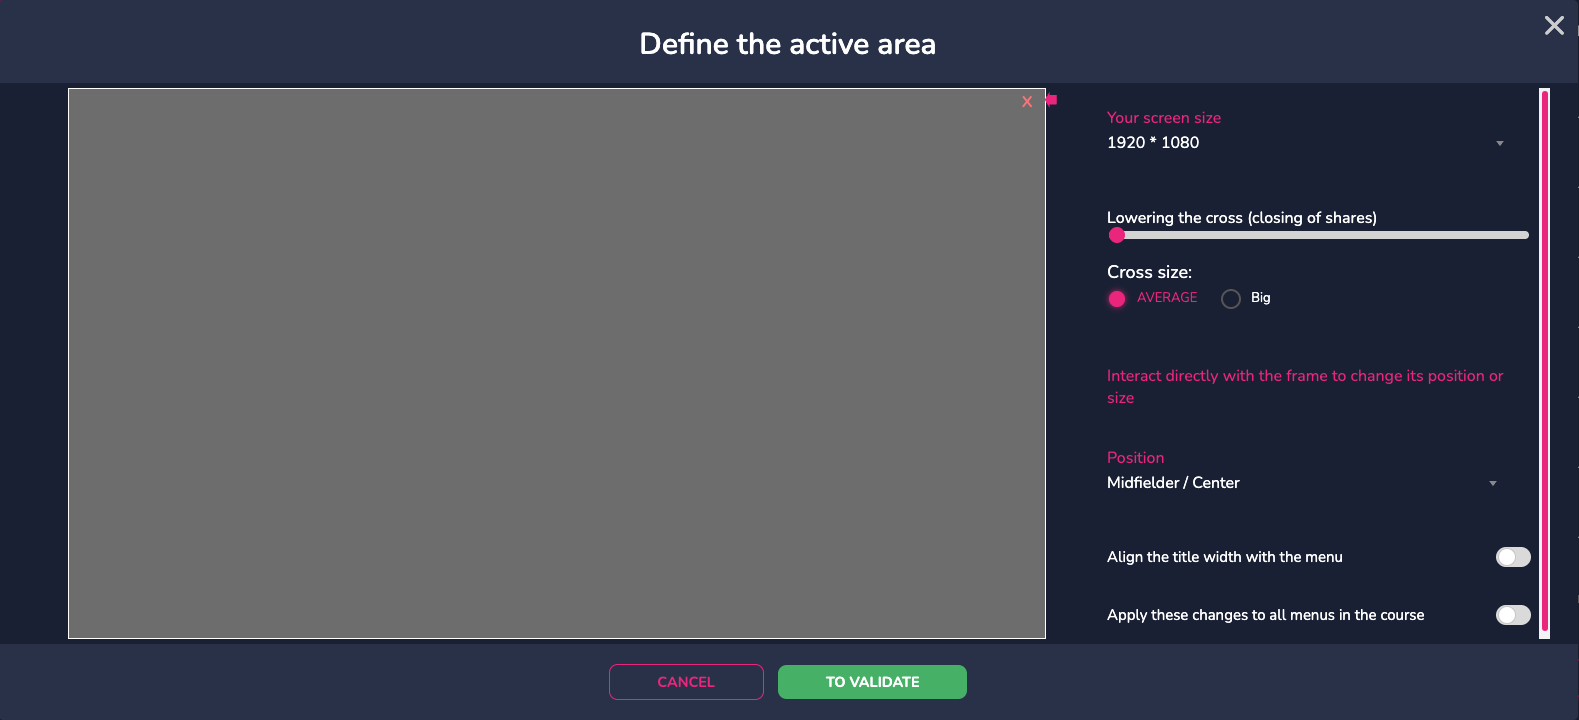
Define the active area of your menu, orientation, margins, etc. ** |
 |
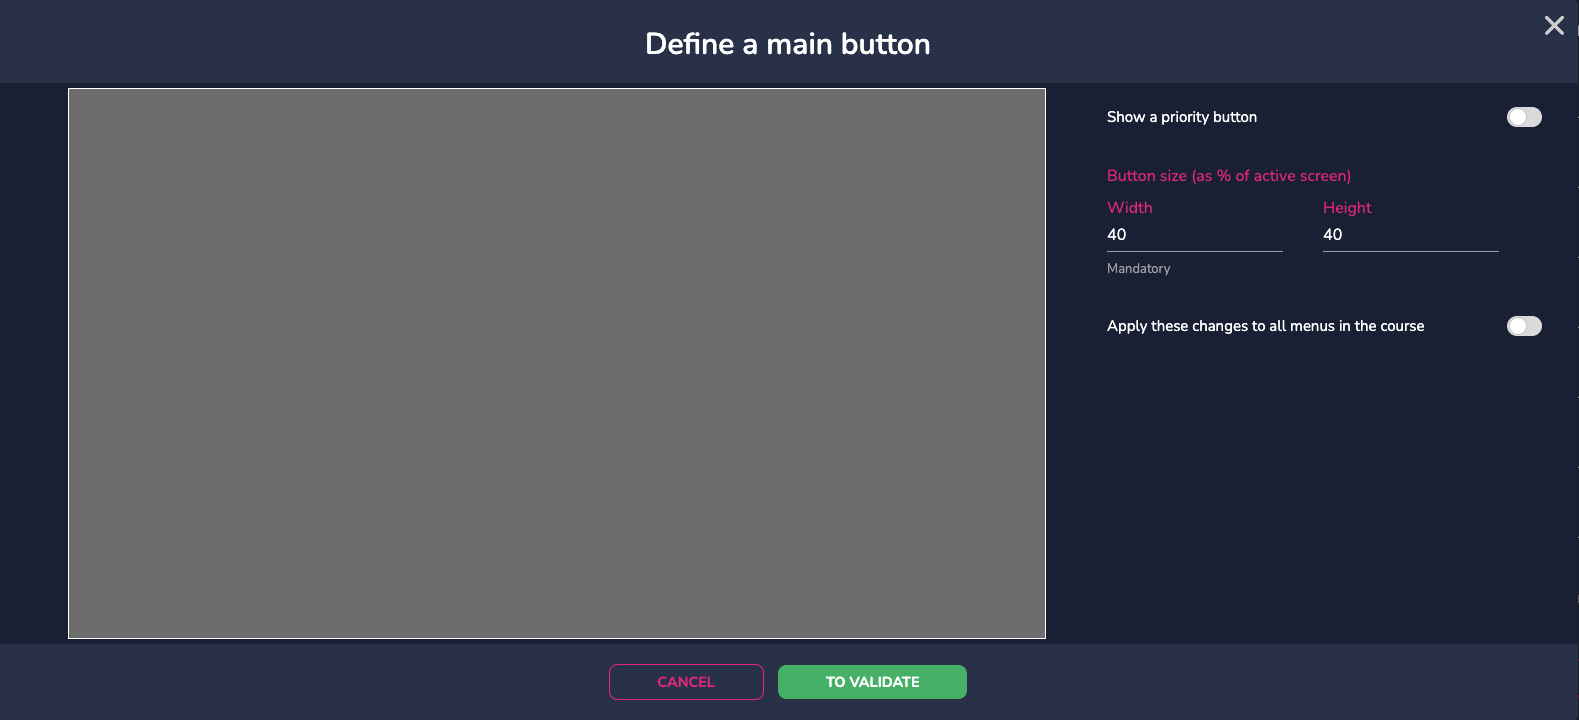
Define a main button for your menu, its size, and whether this action should be applied to all menus in the path. |
 |
Create a shortcut for your menu. These shortcuts are placed in the corners and center of your menus and redirect to other menus. **** |
 |
Delete your menu. |
 |
Close the actions menu modal. |
** : 
*** : 
**** : 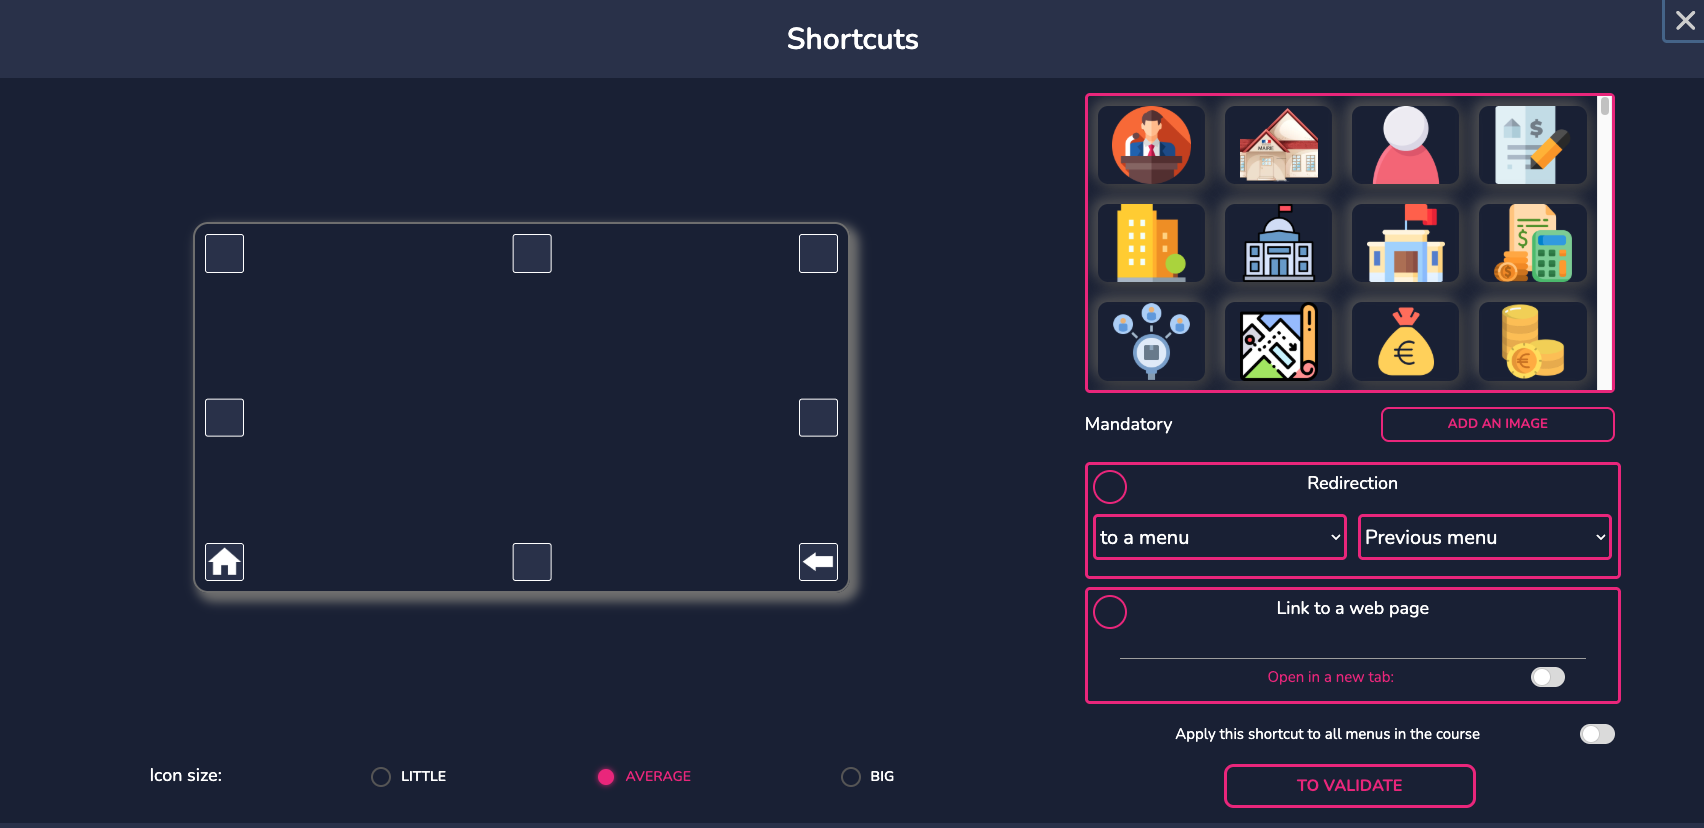
Click on the “Shortcuts” button and add one by clicking on the desired box on the right-hand screen.
Here, two shortcuts are created. The house icon takes you back to the home menu, and the arrow is a ‘back’ button to return to the previous menu.
If your menus are not in the desired order, use drag and drop to move them to the right place.
¶ THE BUTTONS
To create your buttons, simply click on the menu you just created.
Check the structure of your tree regularly to avoid confusion or errors. Follow these steps:
Go to the overview of your tree.
- Ensure that each branch and sub-branch is correctly named and organized.
- Correct any inconsistencies or classification errors beforehand.
- If in doubt, consult the detailed tree structure instructions.
- Maintaining a clear and well-structured tree structure is essential for efficient and error-free use.
Then click on "add a button".

You will follow several steps:
- Define the name of the button (it will not be displayed on the interactive terminal; it is only so that you can recognize it in E-CLICK).
- Define the title of the button (optional step—if a title is assigned, it will be visible on the screen).
- Define the button description (optional).
- Define the logo (optional).
- Click on “Add.”
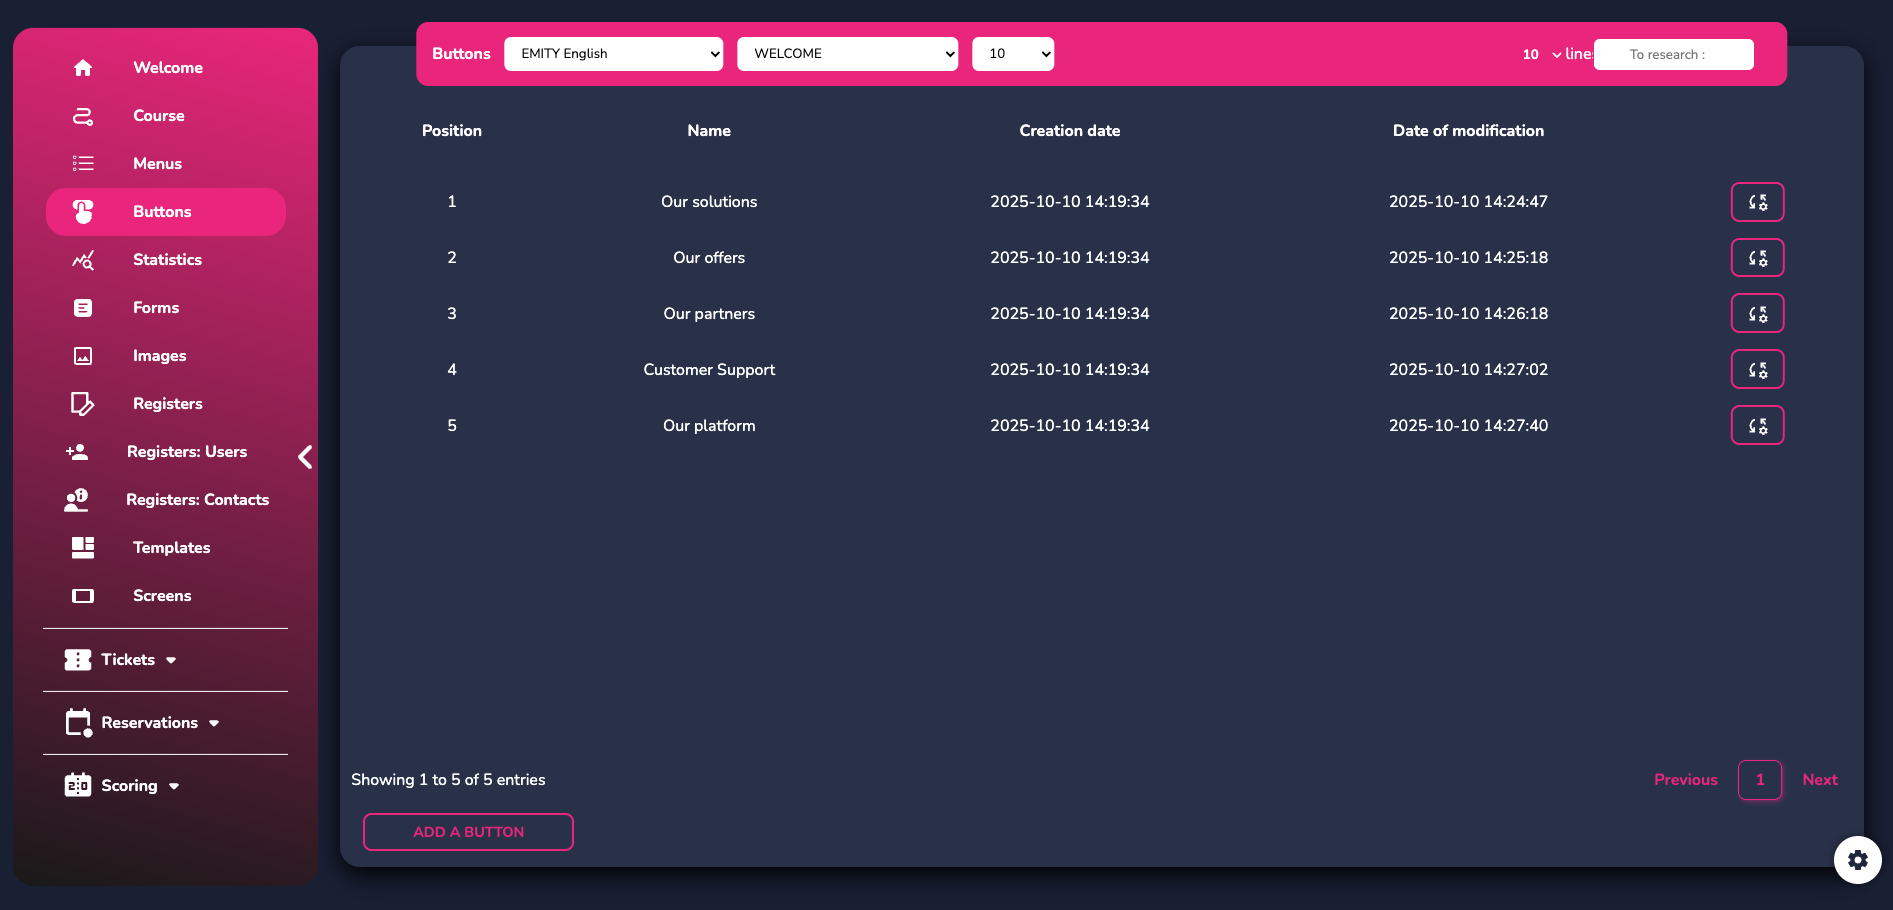
The buttons are numbered in ascending order. You can change their position by
dragging and dropping them with your mouse.
Your first button has been created. There are several functions available to manage it:
 |
Activate actions. You can add a title, a redirect, a time, images, PDFs, videos, websites, etc. The action is triggered when the button is clicked. |
 |
Change the appearance of the button (title color/size, text color/size, fonts, color, border thickness and roundness, background color/opacity, etc.). |
 |
Change the button (name, menu, title, and description). |
 |
Duplicate the button. |
 |
Remove the button. |
To create an action in your button, click on the first function.
 |
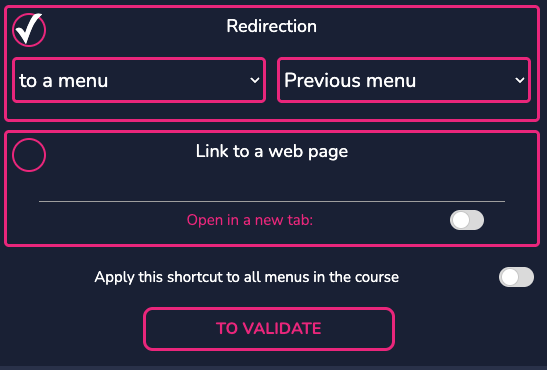
Redirection: Redirection allows you to redirect the user to another menu or path after user interaction. |
 |
Title: The title allows you to display a title when the button is clicked. Enter your title, then confirm. |
 |
Time: (in seconds). Allows you to add a delay before closing the pop-up or redirecting the user. Click on the up or down arrows to set the pop-up time, then click “Confirm.” |
 |
Additional pop-up actions for the button. See details below. |
**
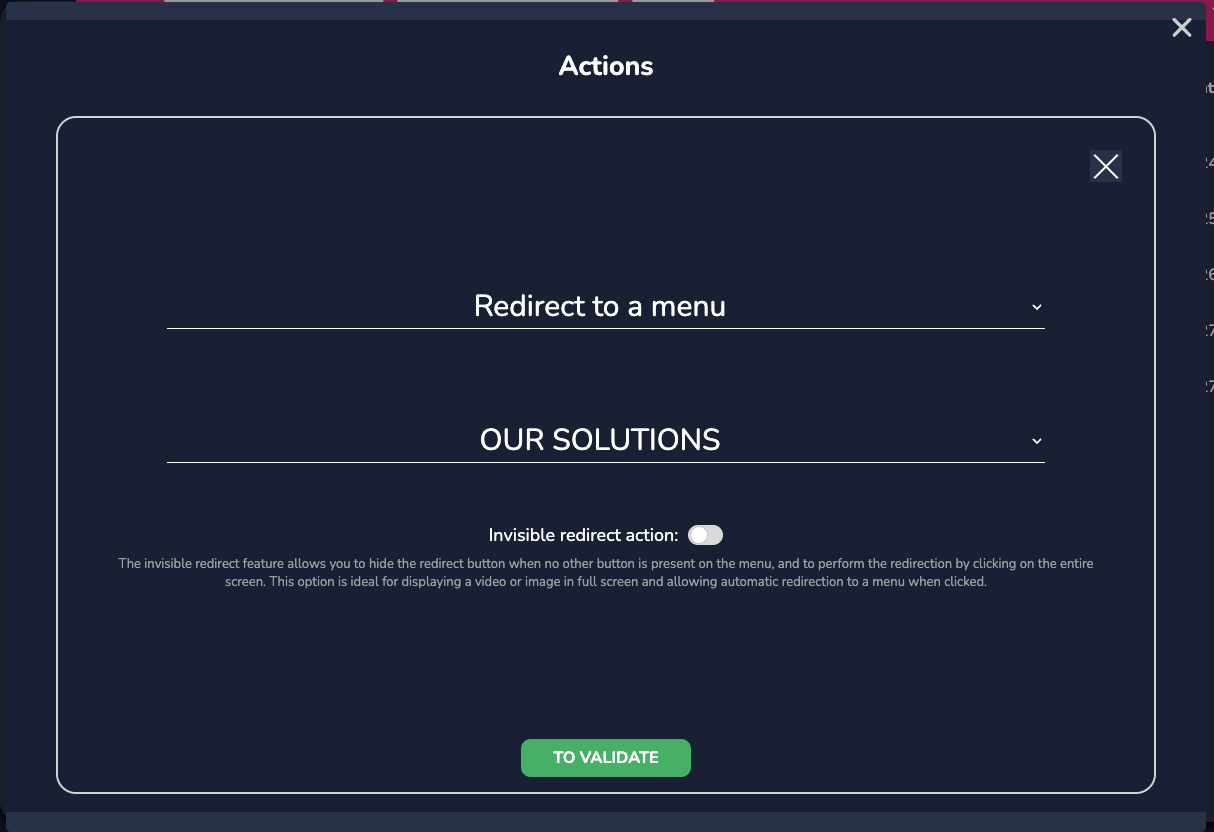
Select a menu/path from the list (or the “close path” action), then click “Confirm.” Only configure this action if you have multiple menus in your tree structure. An invisible redirection option is also available.
Find out more about these actions by clicking on them:
-
MESSAGE :
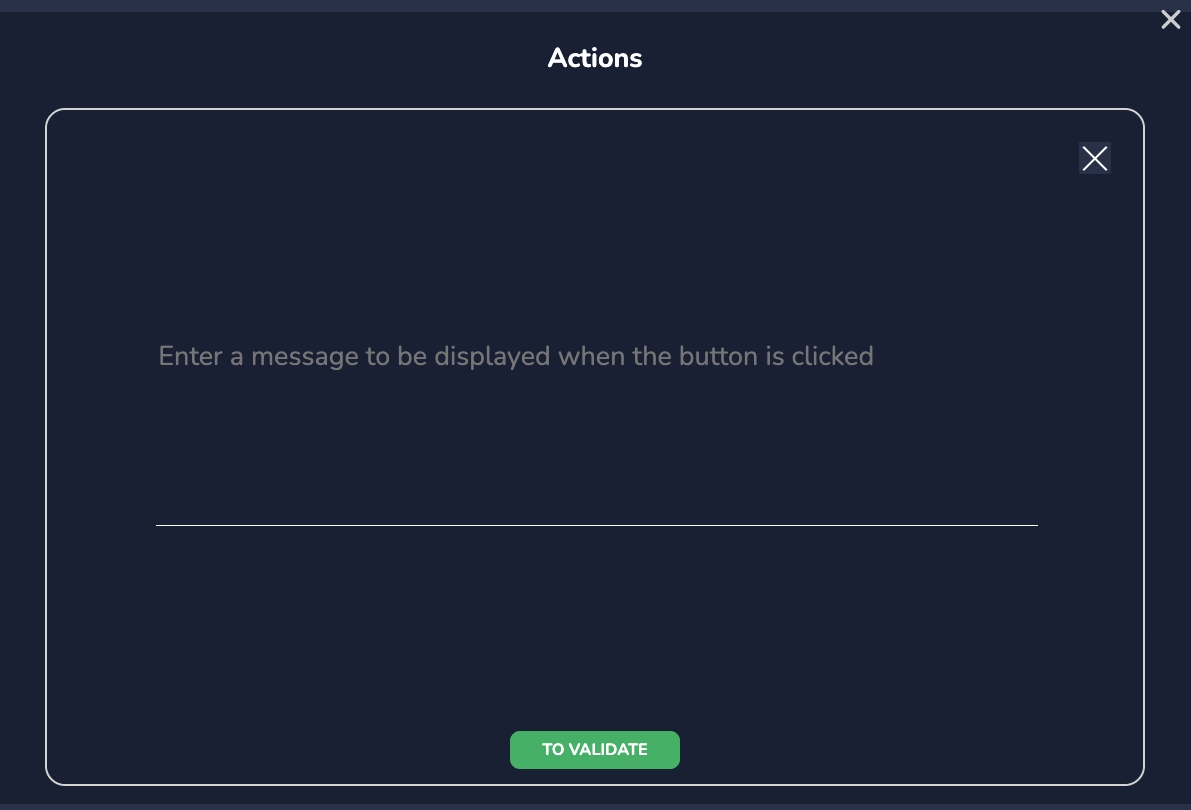
Allows you to display a message when the button is clicked. Enter the desired message and confirm. -
PDF :
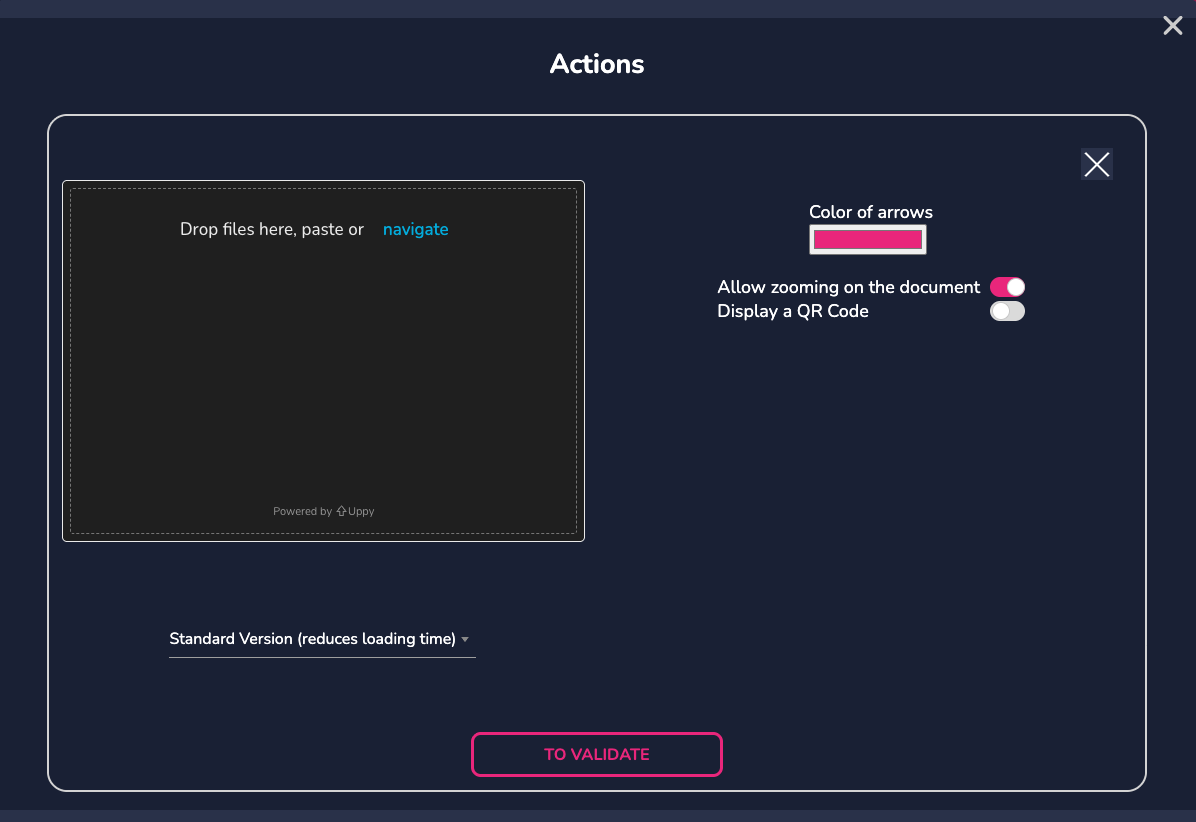
Display a PDF by importing your document from your PC or by dragging and dropping it. Once the PDF has been imported by the software, you have several display options.
First, on the right, you can change the color of the arrows to move to the next pages of the document, enable or disable zooming, and create/display a QR code to allow the PDF to be downloaded.
Below the document, you can choose to display the PDF in standard mode for faster loading, or in dynamic mode for interactive navigation. -
IMAGE & VIDEO
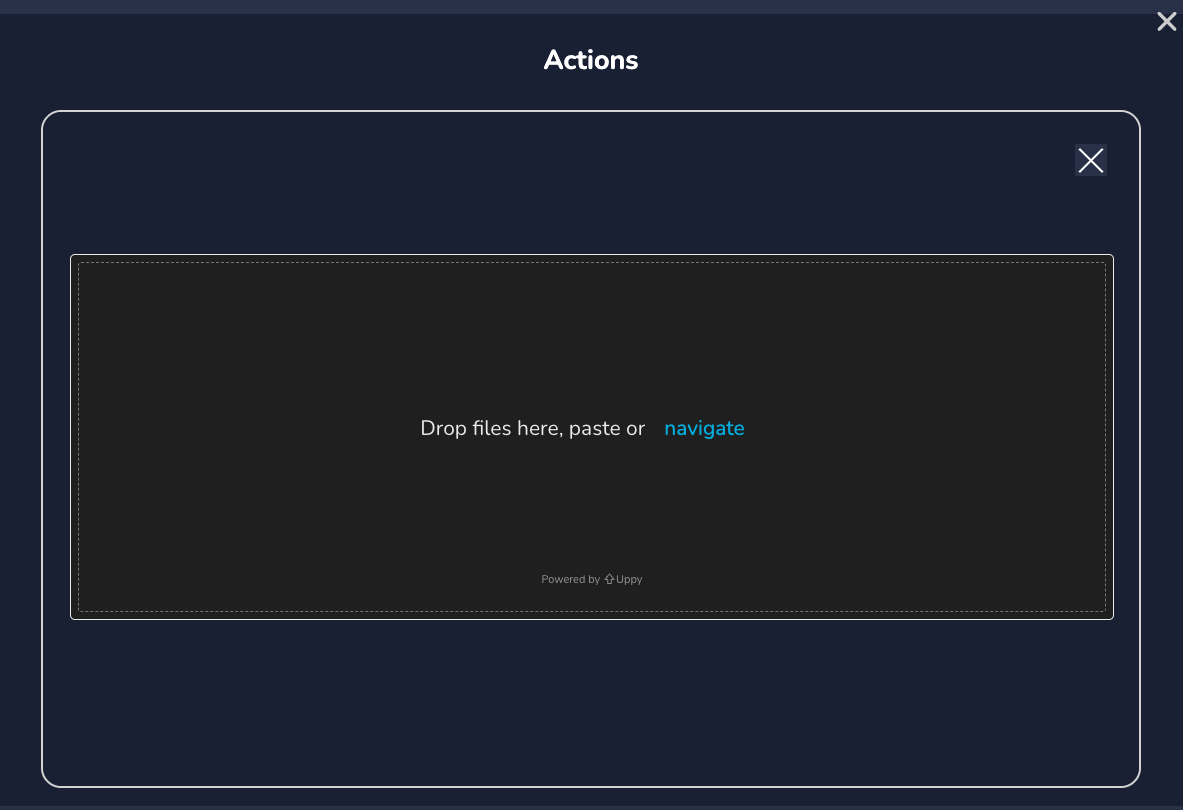
Allows you to display an image or video when the button is clicked. -
WEBSITE
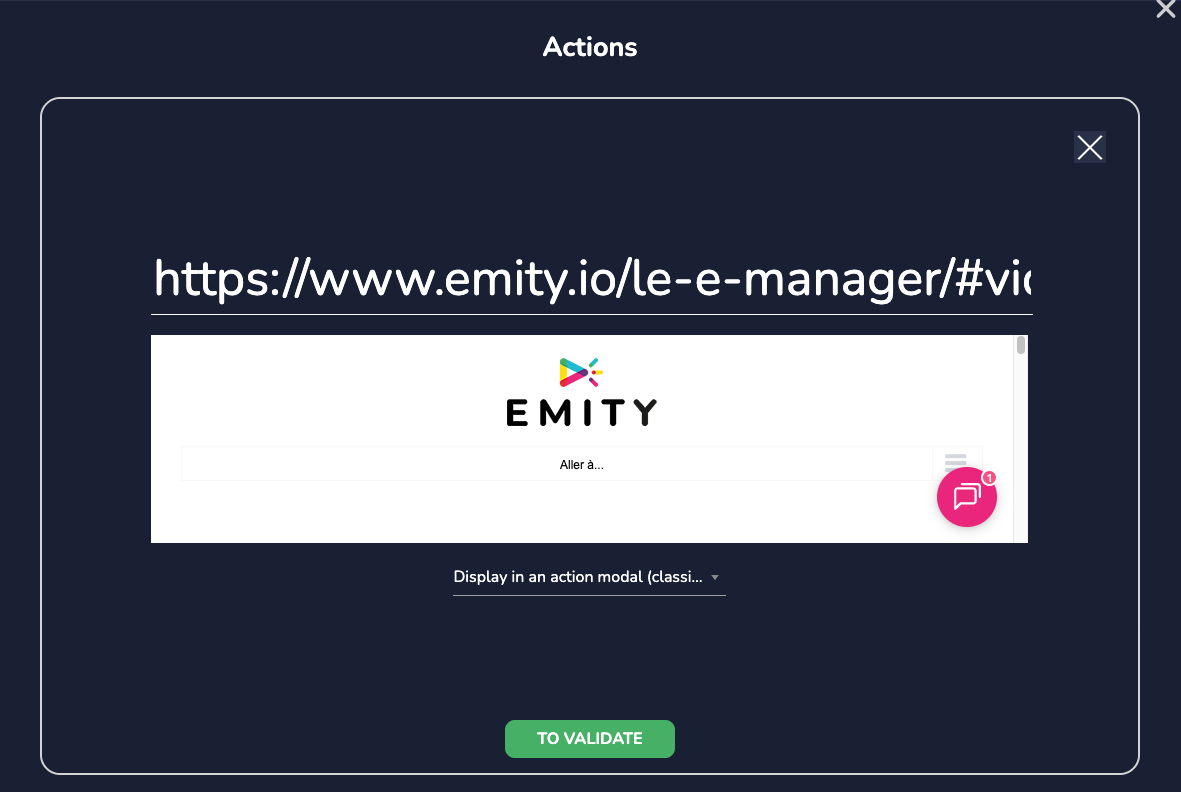
Allows you to share the website of your choice. For security reasons, some sites may not be compatible with this action. -
QUEUE
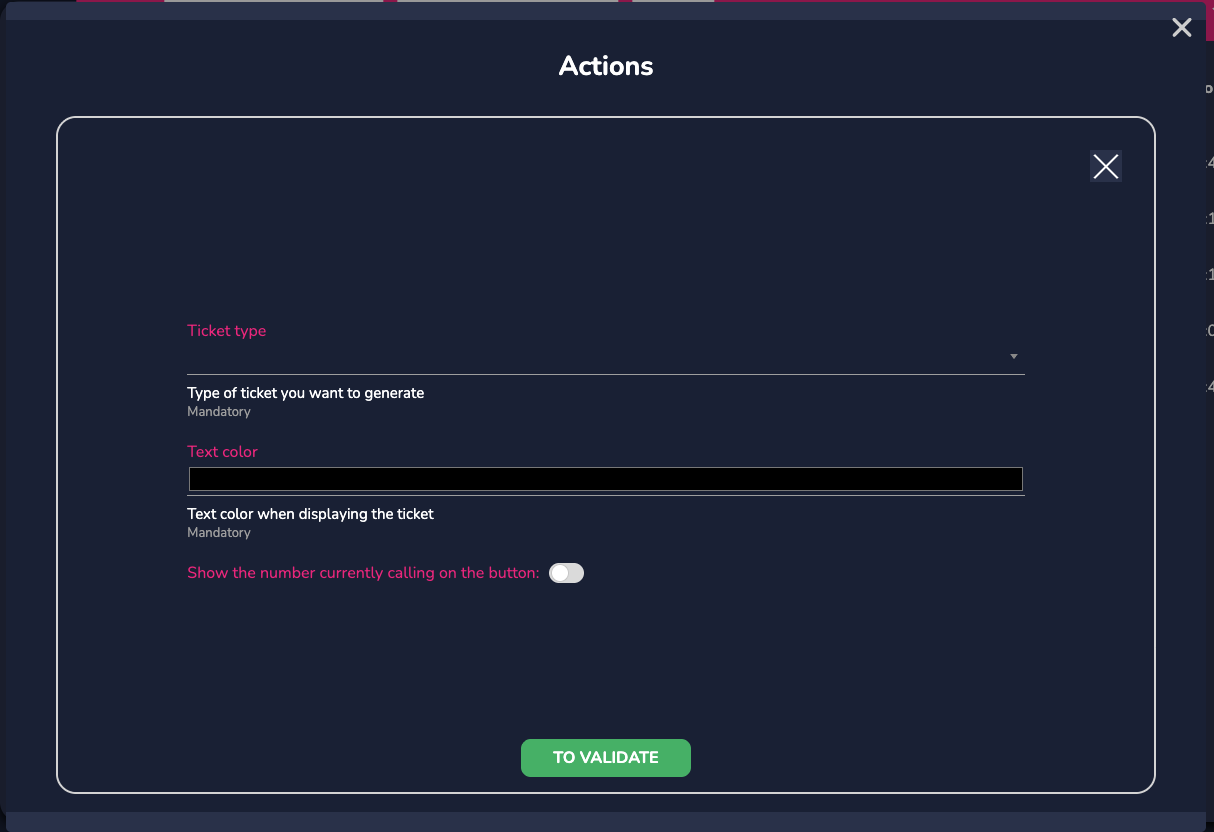
This function allows you to add a queue. For more information, refer to the dedicated manual. -
FORM
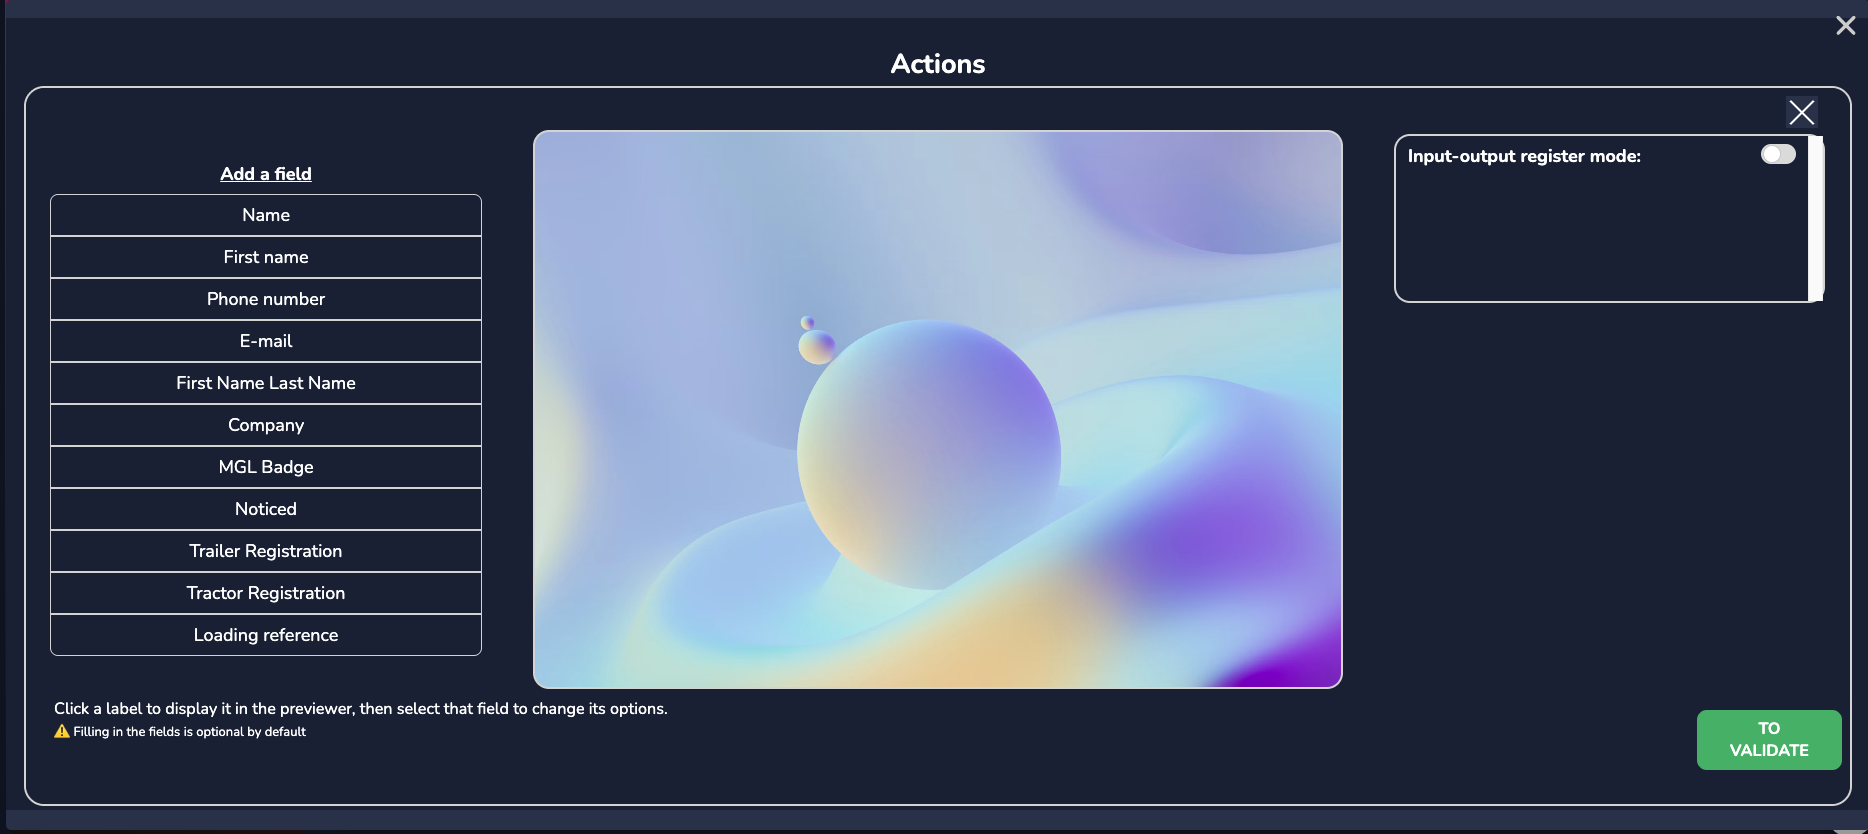
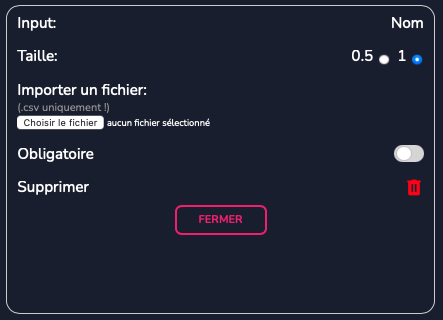
Add a form to your journey and ask the user to fill in the selected fields. Each field has its own specific settings.
The input-output mode will be explained in more detail later..
¶ STATISTICS
In this tab, you have access to statistics for your menus and buttons.
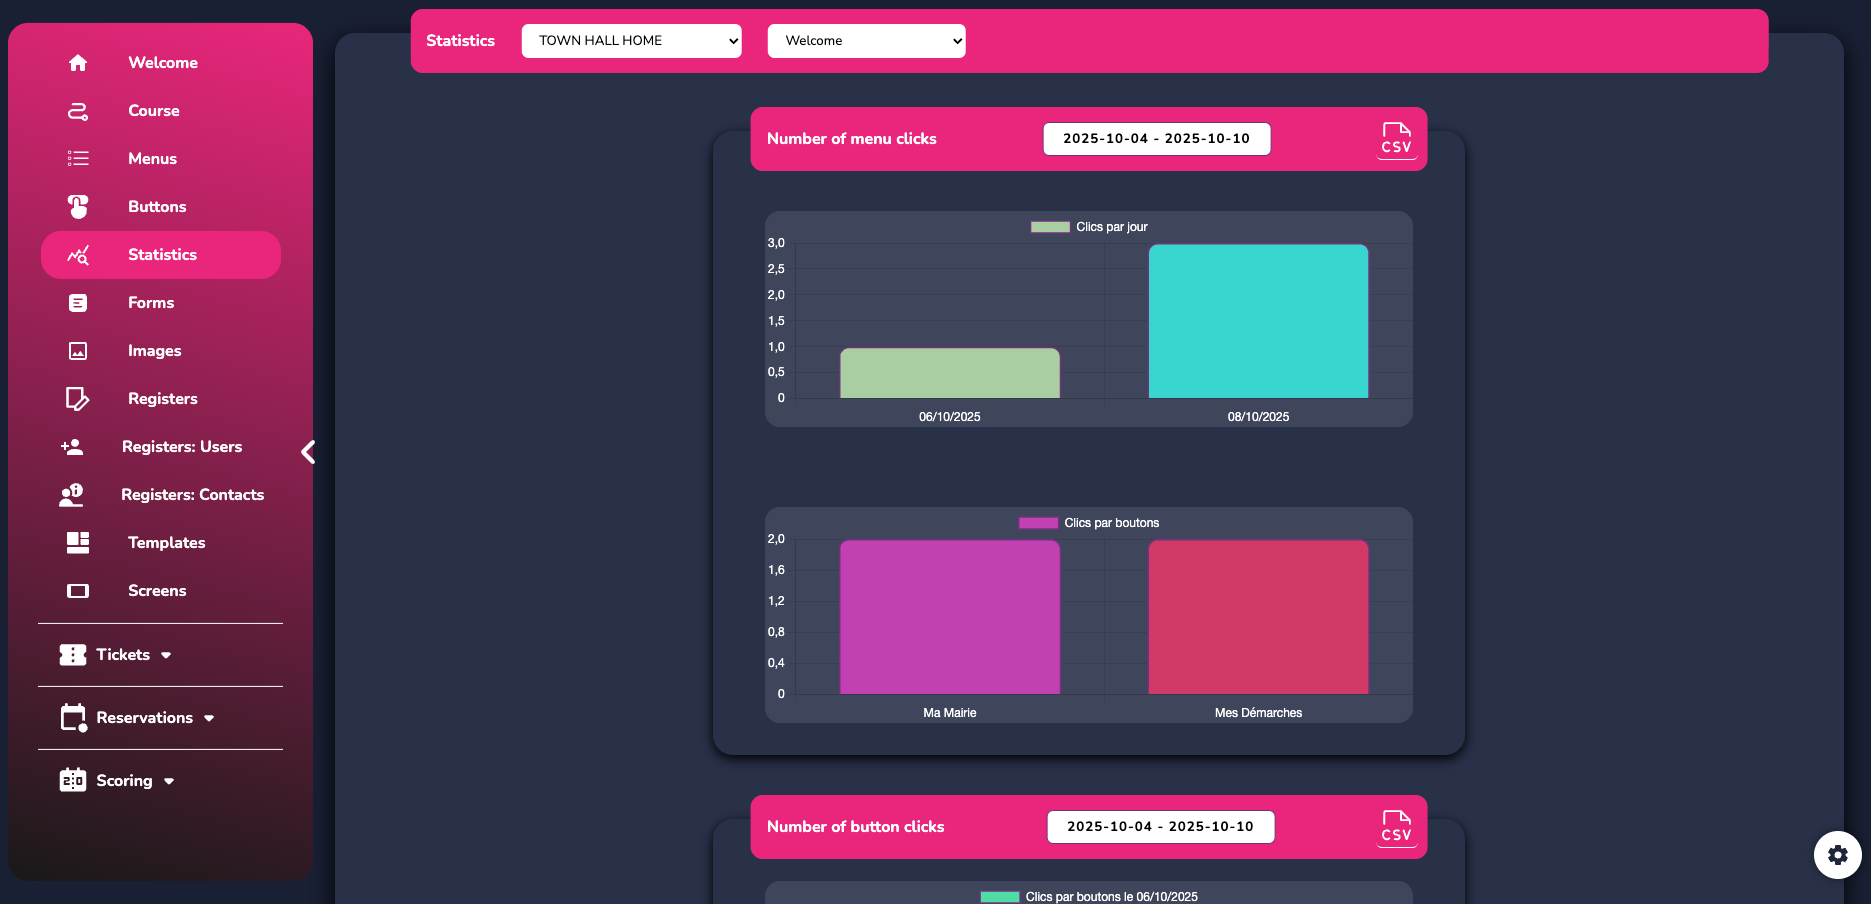
At the top of the page, you can choose the course and menu you want to study.

You also have the option to change the dates of your statistics in order to focus on a specific period.

¶ FORMS
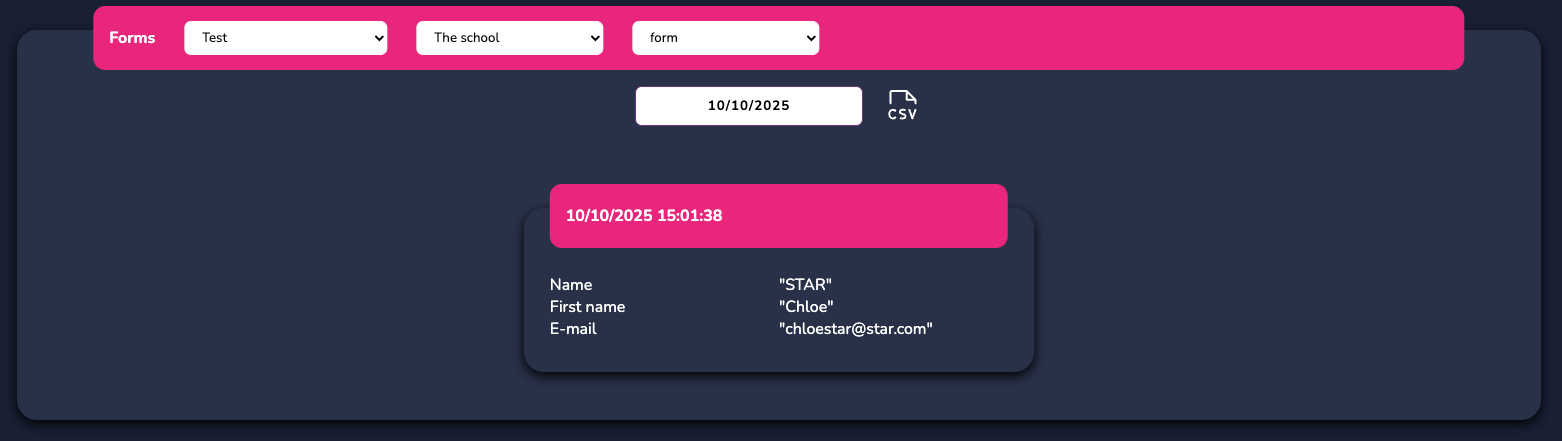
In this tab, which you can only access if a form has already been set up in one of your courses, you can view data related to your forms. Find the one you want to export and click on “CSV” to download the file.
¶ IMAGES
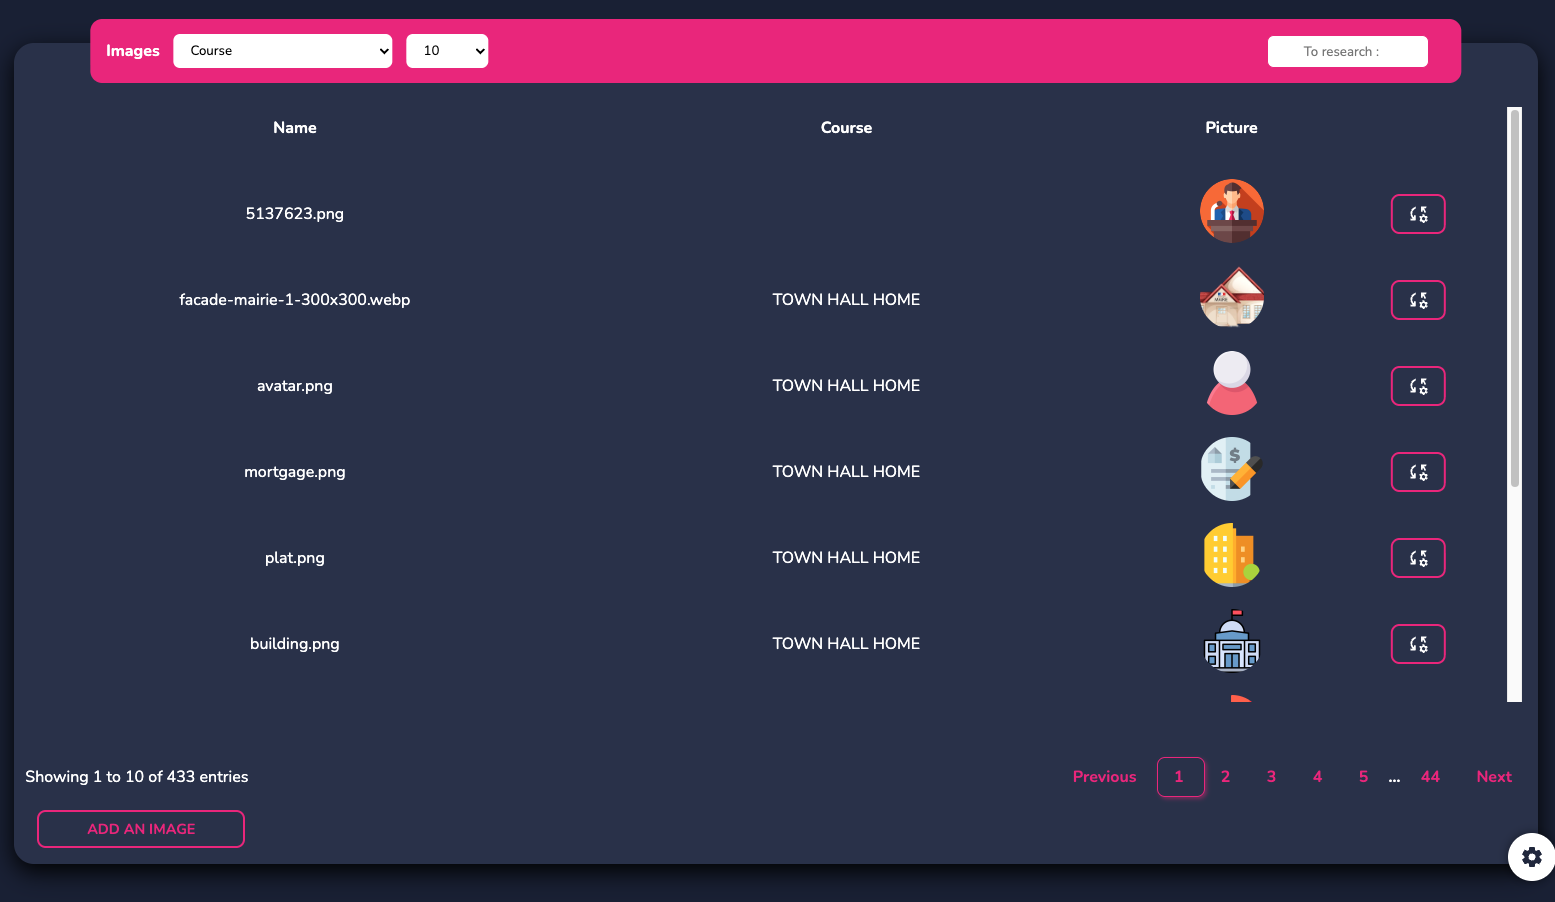
To add images and logos to your courses, menus, and buttons, you can go directly to this tab. Click on “Add an image” and import the desired media. They will then automatically be added to your image library.
¶ TEMPLATES
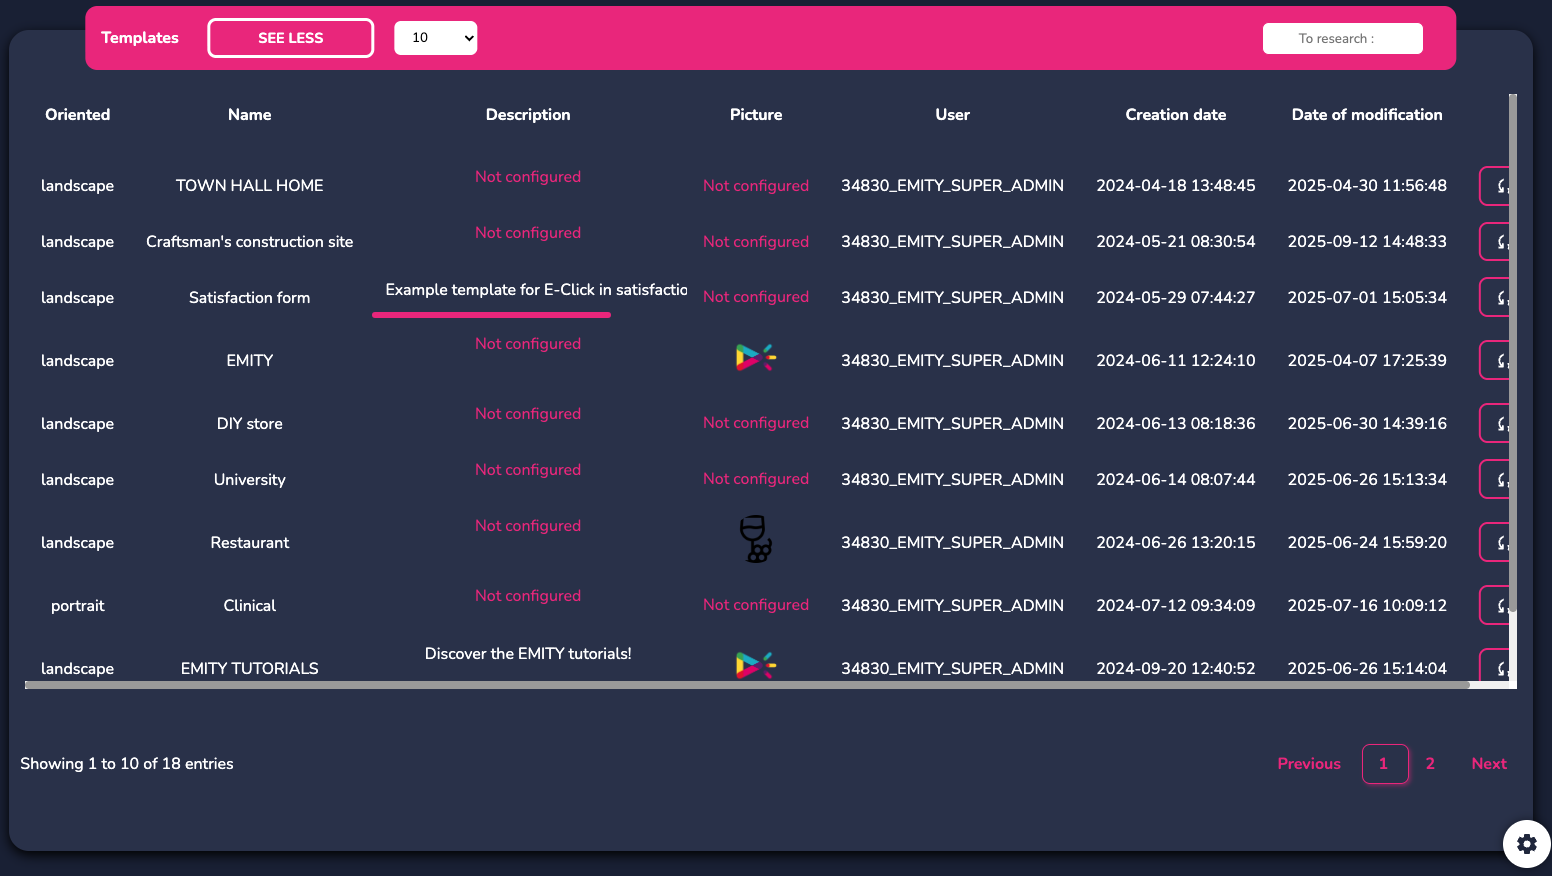
Here you will find the templates that EMITY provides to support and assist you in creating, modifying, and distributing your interactive courses.
Click this button to view the template:

Then click here to add the template to your own course:

This creates a copy that you can freely modify.
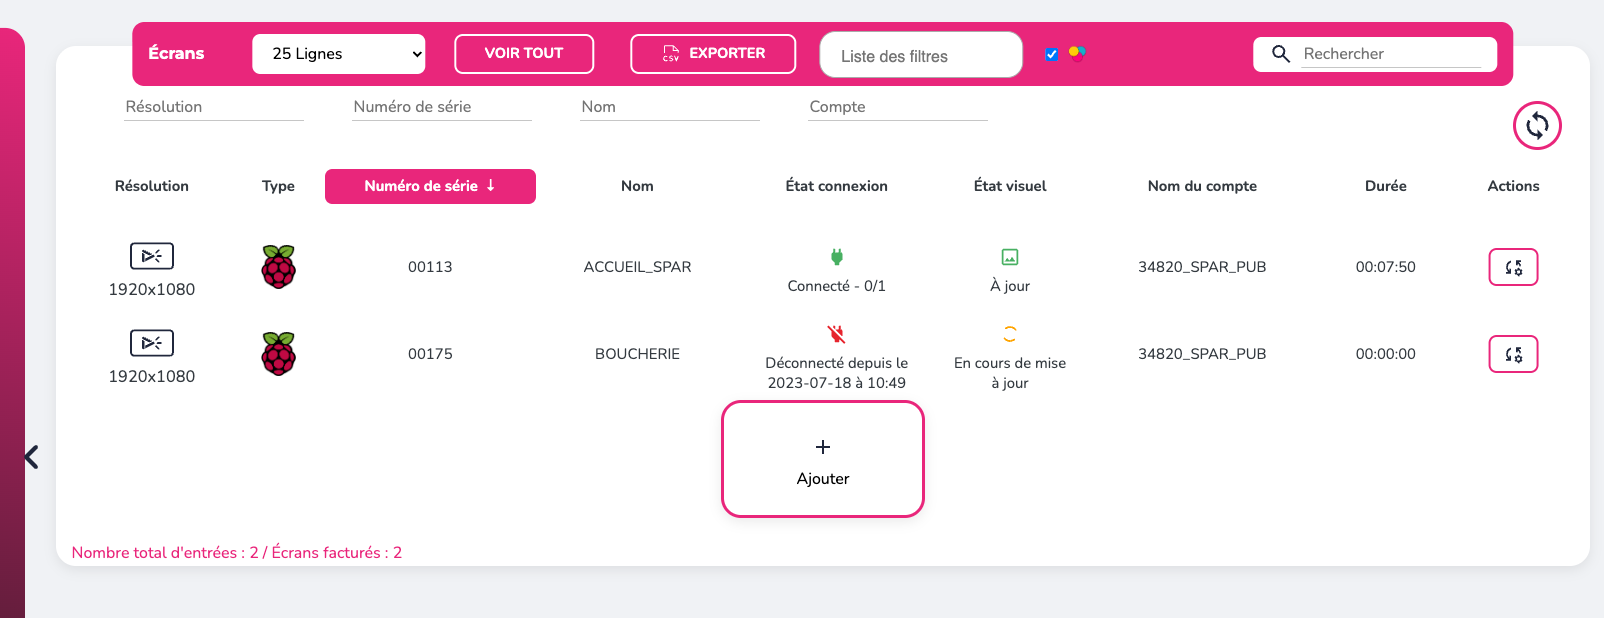
¶ SCREENS
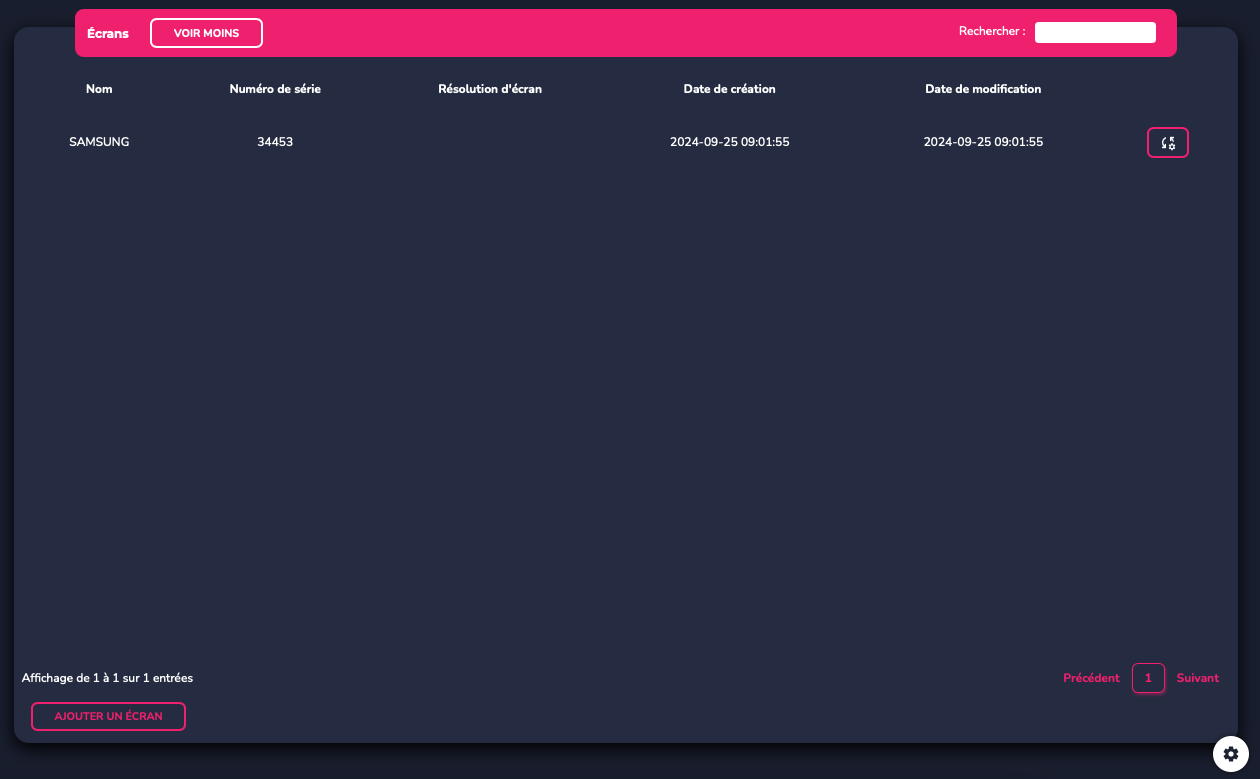
Find your touchscreens here.
Easily add a new screen:
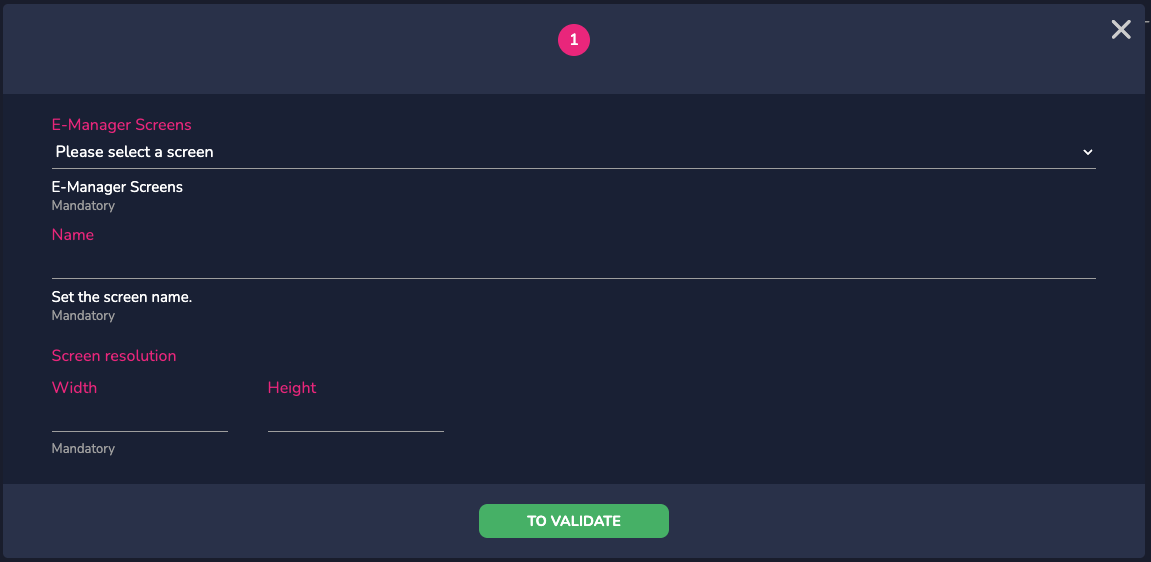
Select one of your screens from your E-MANAGER account, name it, and enter its resolution.
The actions available for your screens are modification or deletion.
¶ MODULES
¶ QUEUE
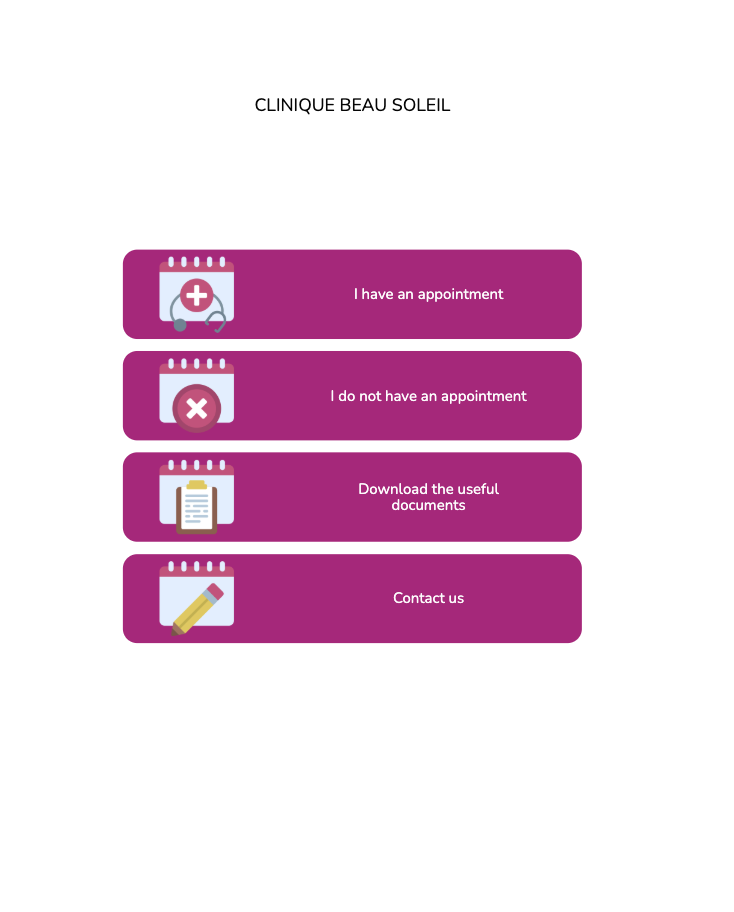
For the QUEUE, you will need to create ticket types and assign the ticket type to the queue action on a button. For example, you can create a ticket type called “without appointment” and then assign it to the ‘queue’ action on a button. When the customer clicks on the button, a ticket will be generated with a number for the “without appointment” ticket type.
For more information, refer to the dedicated notice.
¶ REGISTRATION DESK / ENTRANCE - EXIT
For the visitor log, you will create a “log” type form, then import the pre-filled list of contacts to facilitate the registration of your employees and/or visitors.
For more information, refer to the dedicated notice.
¶ SCORING
The scoring module will allow you to manage your teams, your games/sports events, and administer these events in real time.
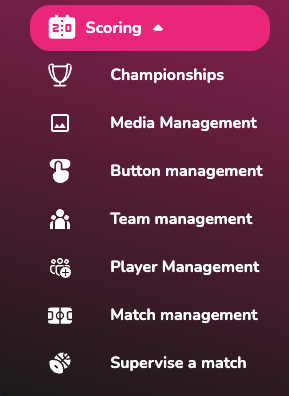
For more information, refer to the dedicated notice.
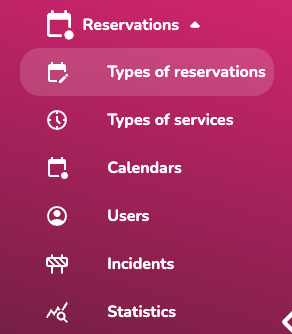
¶ ROOM BOOKING
The “reservation” module offers numerous features that allow you to synchronize your work calendars, manage multiple rooms, make reservations in real time in front of the room or from your workstation, and more.
For more information, refer to the dedicated notice.
¶ DEPLOYMENT
¶ PREVIEW
When your journey is complete, we recommend using the preview function to check your creation before officially deploying it.
Return to the “Journey” tab and click on the “Play” button.
This modal window will open:
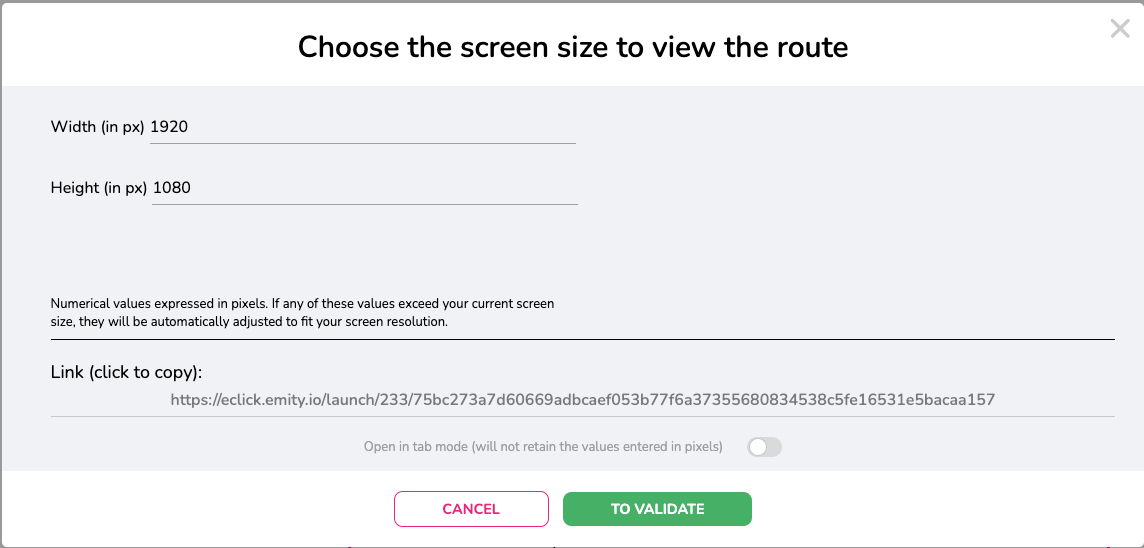
Select ... and confirm.
You can move between menus by clicking on the buttons or shortcuts created.
Copy the visible link and then go to E-MANAGER.
¶ LINK TO E-MANAGER
Once you are back in your E-MANAGER account, go to the “SCREEN” tab.
Go to the screen of your choice to access its internal playlist.
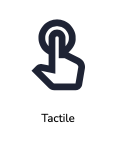
Then click on the “Applications” button on the left side menu, then select “Tactile.”

You will then be able to either:
- Copy the modal link seen previously in the web URL.
- Copy your API key (seen in the right side menu on E-CLICK - the cogwheel).
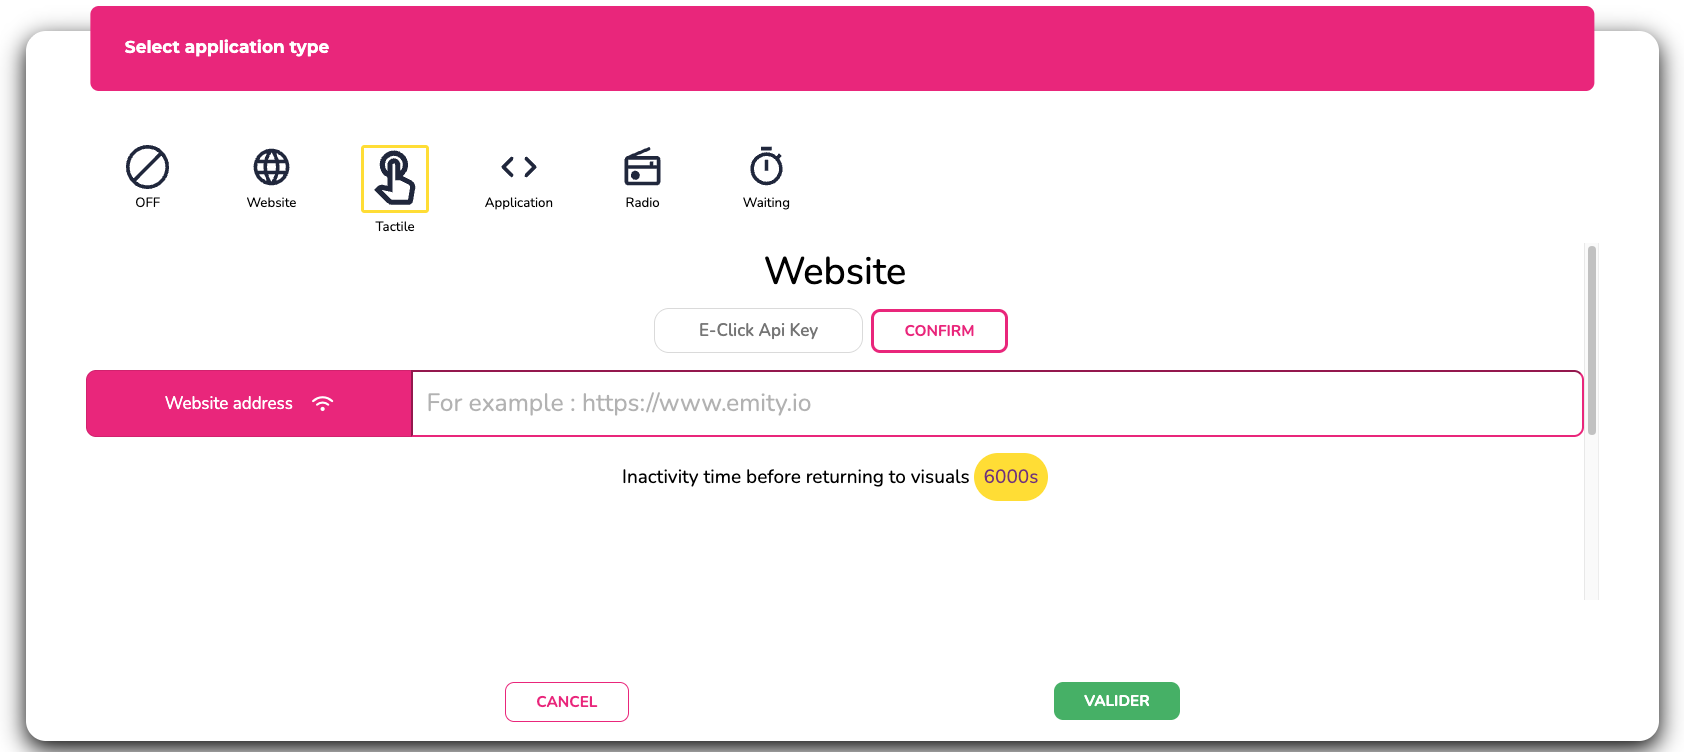
The API key will allow you to save your E-CLICK routes directly on E-MANAGER. You will then find a list of your routes so you can add them more quickly to your screen.
The duration mentioned under the URL link in “Application > Touchscreen” allows you to set up an inactivity time (no touchscreen activity on your screen) after which your dynamic display programmed on the same screen will automatically start playing.
¶ CUSTOMER SERVICE
Our customer service team is here to help you, support you, and answer all your questions as efficiently as possible.
We are available via online chat on our website. You can also contact customer service by email :support@emity.io
We have also posted a video guide online covering all the different steps involved in using our platform. You can find it here: https://www.emity.io/tutoriels/
or on our YouTube channel : https://www.youtube.com/channel/UCxjAkfG_v0QOr8YtFRCFA9w
A PHONE NUMBER is made available to our customers in order to take into account all the specificities of your requests. : 04 30 00 66 00
To contact customer service directly : 04 30 00 66 01
Customer service is open Monday to Friday from 9:00 a.m. to 12:30 p.m. and from 1:30 p.m. to 5:00 p.m.