Dernière mise à jour : août 2025
¶ INTRODUCTION
Welcome to the queue user manuel, a module of our interactive E-CLICK solution.
Queue allows you to manage your waiting lines from a single platform. This guide is designed to help you use this module effectively in order to maximize the efficiency of your visitor contact points and improve your queue management.
¶ PRESENTATION OF THE MODULE
Thanks to the E-CLICK digital dashboard, you can control your interactive terminal or touchscreen anywhere, without interruption and on any device. Designed and developed by EMITY, E-CLICK is a multifunctional solution that allows you to manage all your touchscreen projects easily and efficiently.
Queue is a feature of the E-CLICK solution. This simple application streamlines visitor traffic and facilitates appointment scheduling by generating digital tickets, ensuring a smooth and organized customer experience.
This allows you to create and distribute your interactive content:
• Anywhere:
E-CLICK can be used on all devices (PC, smartphone) and all operating systems (Mac, Windows, Linux, iOS, Android).
• Continuously:
E-CLICK allows you to schedule content distribution 24/7. What's more, when your screen receives no interaction (within a set period of time), it can automatically display the dynamic content you have programmed.
• On all types of touch screens, of all sizes:
E-CLICK can manage a single screen or an entire fleet! Regardless of their size and quantity.
• Intuitive, our software is quick to learn and incredibly easy to use.
• Unique, E-CLICK allows you to broadcast your communication to your entire fleet of screens with a single click. This digital platform encompasses many different features and can therefore be adapted to all professional sectors.
¶ ACCESS & CONNEXION
Use E-MANAGER without prior installation.
From a browser, go to:
• emity.io, under the “Login” section,
• or directly to https://link.emity.io/WebManager.
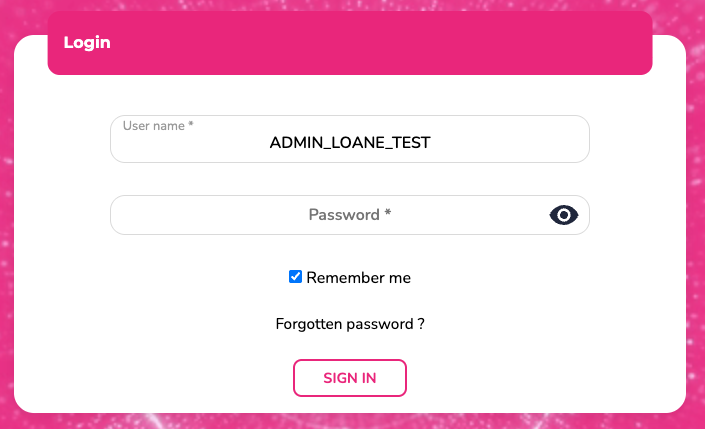
Enter your login details, which you received when your account was created by a third party.
At the bottom right, you will find this button:

Click on it and set your preferences: Light/dark mode and platform language.
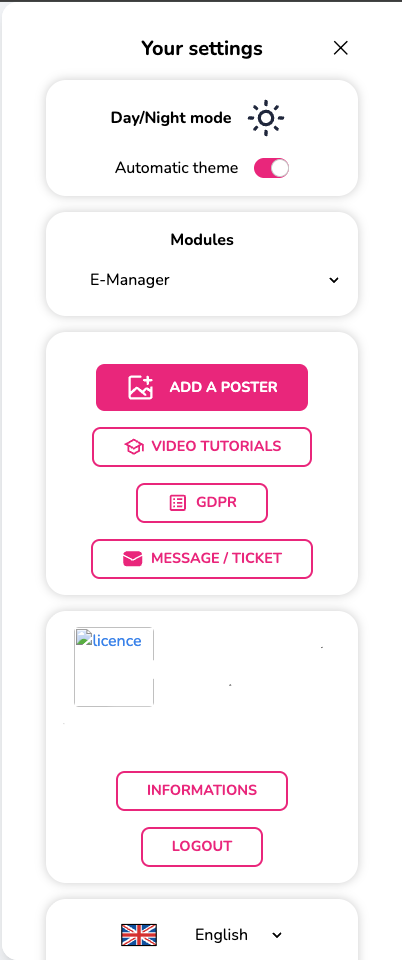
Our platform is available in various languages as : French, English, Spanish, Italian, Deutsch and German.
You can no longer create an account yourself. Please contact us or one of our distributors to access a free 3-month trial period.
An account will then be created in your name and you will receive a confirmation email to validate your registration and activate your E-Manager account. You will then be able to start using the platform.
Select the desired module—in this case, E-CLICK—on the home page that appears when you log in.
The modules are not available by default; you must have access to them. Access is granted only by the sales department, following an order or trial account request.
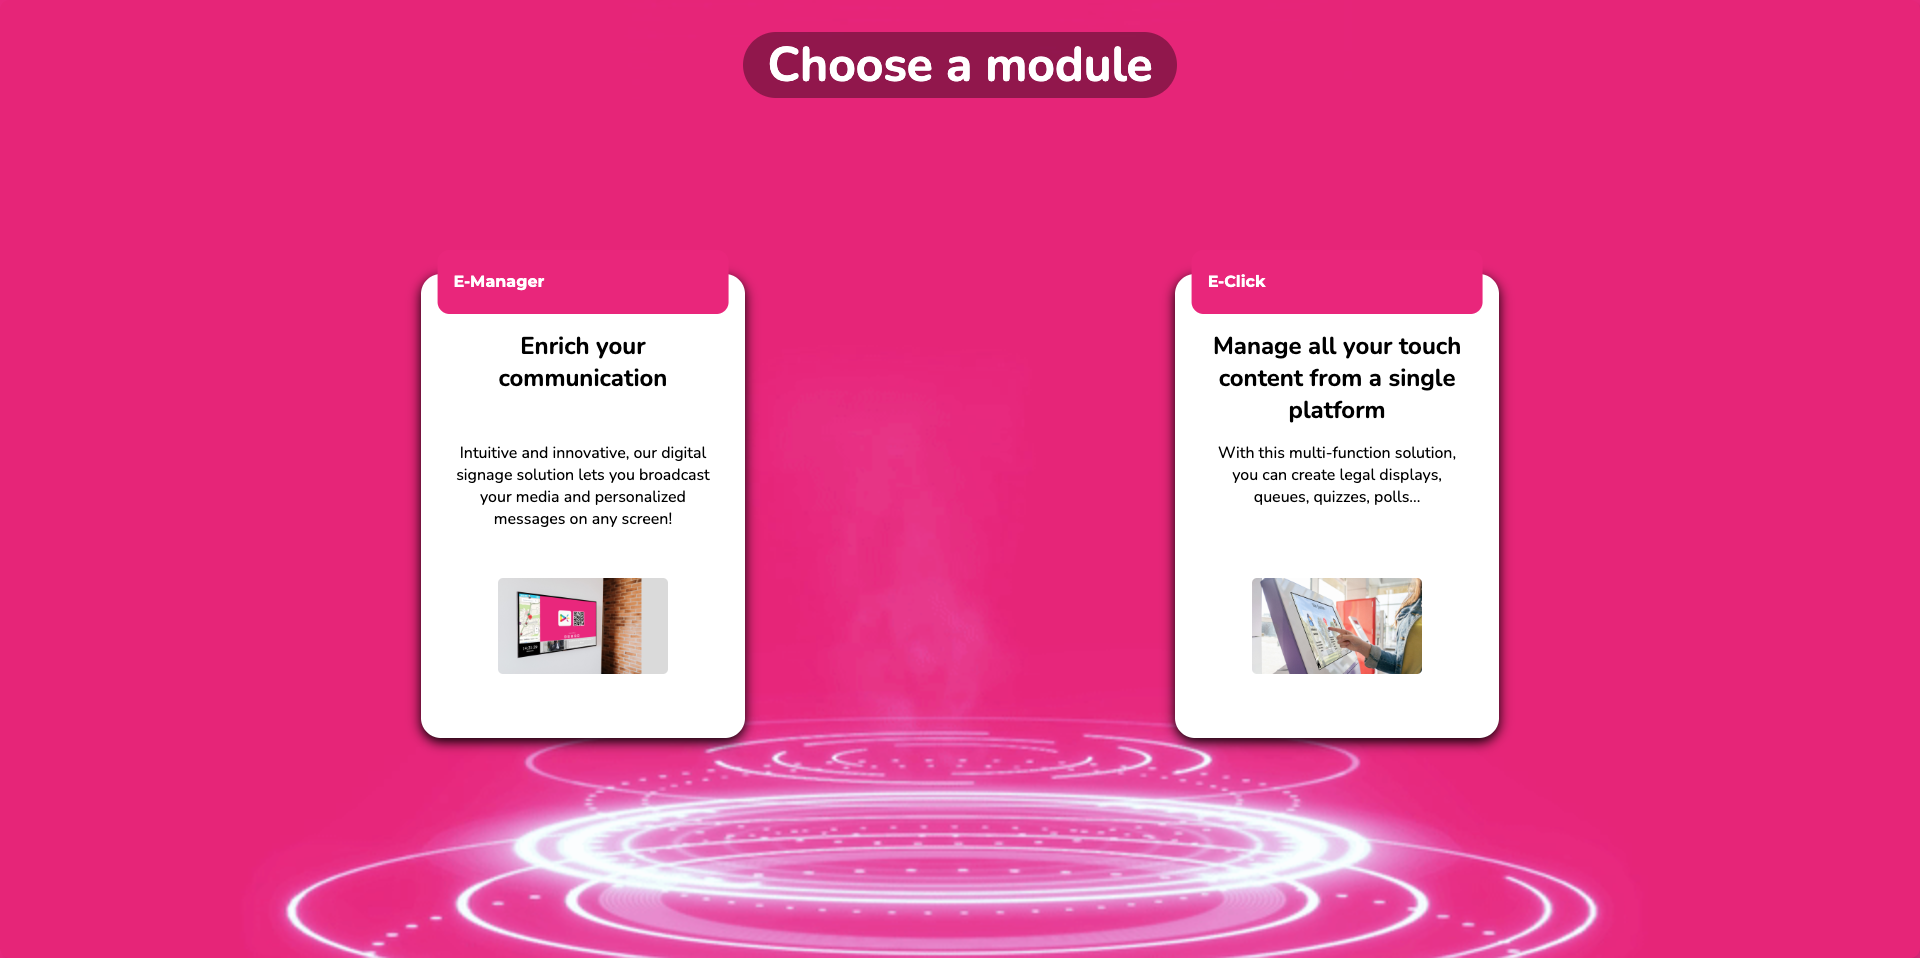
If you are already logged in to E-MANAGER, click on “Settings” on your home page to choose your E-CLICK module.
¶ TUTORIALS
This queue user guide is a written training resource. For a more interactive version, you can find all our video tutorials on the E-CLICK software and the QUEUE module:
• On the EMITY website, on the “Training” page
• On our YouTube channel.
New tutorials are regularly posted online and updates are also made on a regular basis.
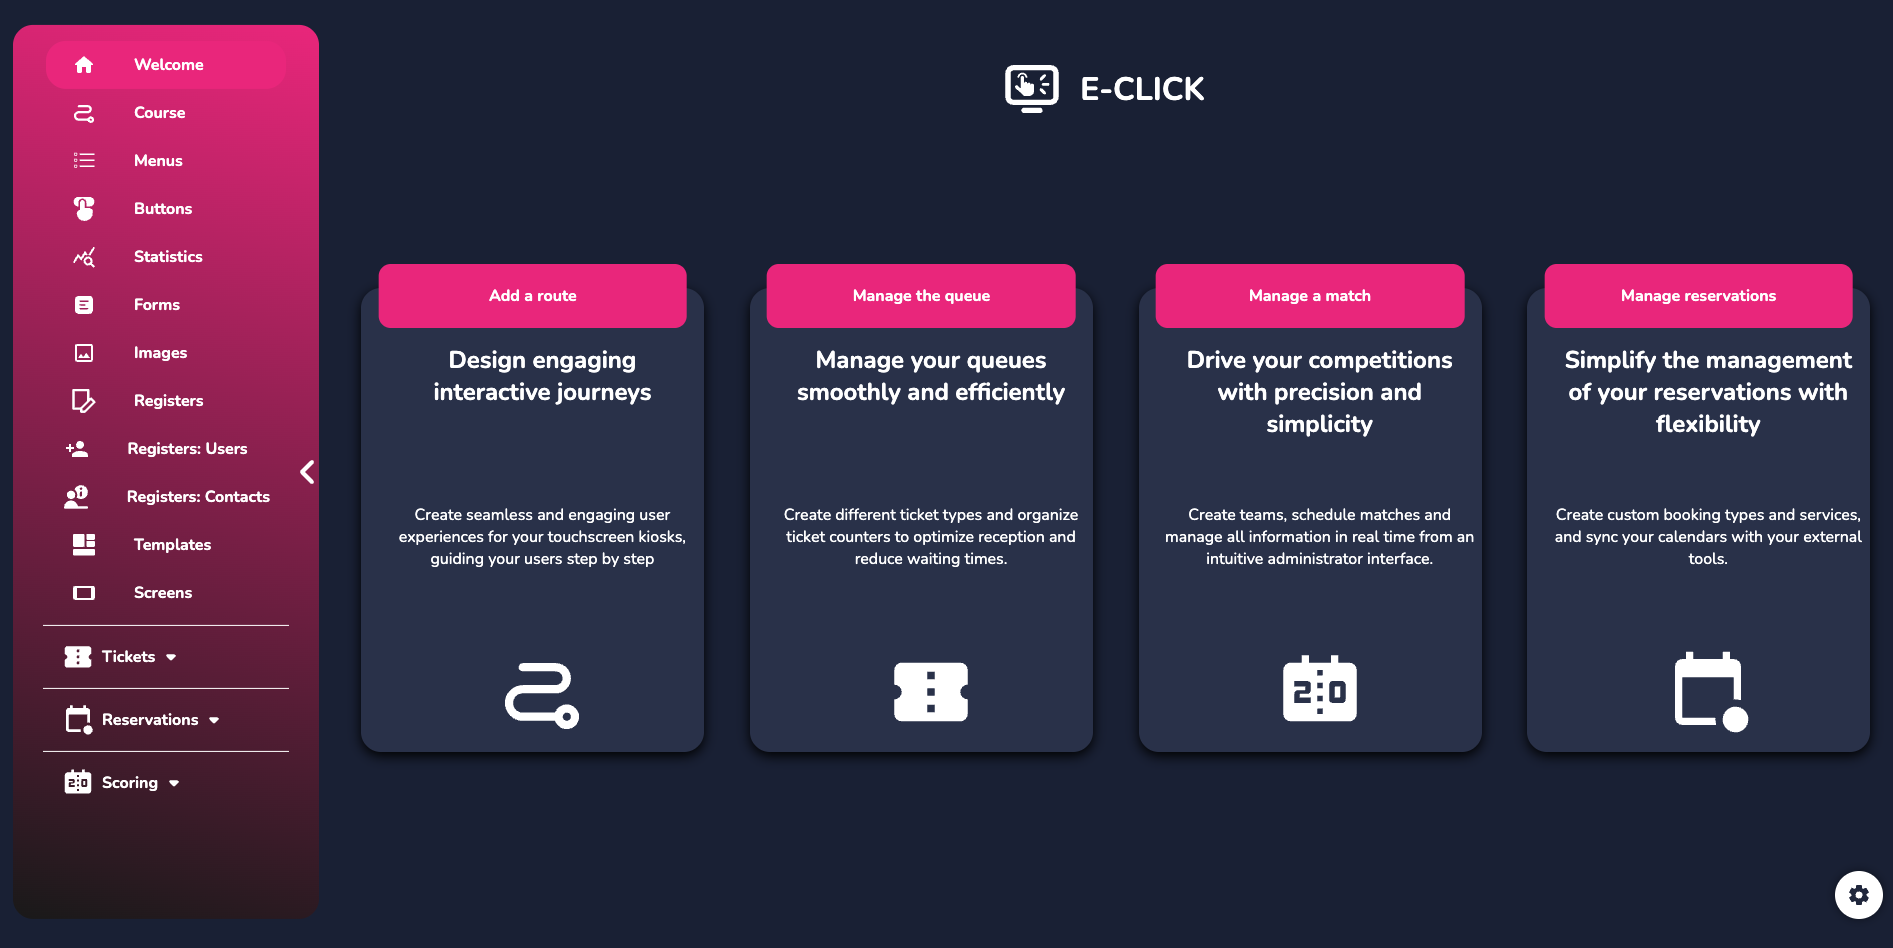
¶ HOME PAGE
¶ LEFT SIDE MENU
-
On the main page, there is a menu on the left divided into two parts, with the following main access points:
• Home, with four shortcut buttons.
• Courses, to directly access the management and creation of your interactive courses.
• Menus, to manage the content and description of your interactive terminal.
• Buttons, where you can modify their appearance (color, title size, border type, background opacity, etc.).
• Statistics (number of clicks per menu, per button, button click trends over a day).
• Forms: standardize requests to obtain the information you need (last name, first name, email, phone number).
• Images: customize your menu buttons.
• Registers: quickly access your data concerning a visitor register (already filled in).
• User register, for quick access to your user data concerning a visitor register (already filled in).
• Contact register, for quick access to your contacts concerning a visitor register (already filled in).
• Templates, access pre-designed paths to facilitate their creation and implementation.
• Screens, find and add your screens to your touchscreen and interactive displays. -
The second part of this menu concerns modules:
• Tickets: Clicking here takes you to the submenu for the QUEUE feature.
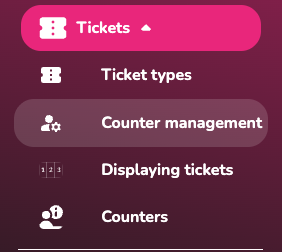
• Ticket types: To create and sort the different tickets you need.
• Ticket window management: To configure the different ticket windows required for your organization.
• Ticket display: Access the different monitoring pages to view tickets that have been taken, called, or are in progress.
• Ticket counters: To manage your visitors' tickets in real time, including calling, recalling, deleting, or validating them.
¶ RIGHT SIDE MENU
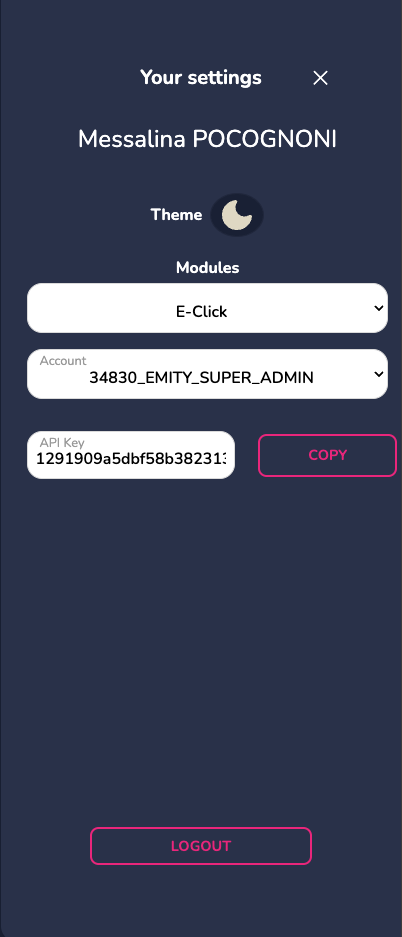
At the bottom right of this home page, as well as on the other pages, you will find a “settings” button:

It will enable several actions.
• Modules, to easily navigate between our different software programs while remaining
connected to your account.
• Theme, allows you to choose the platform's display mode, light or dark.
• Account, you can view the name of the account you are logged into.
• API key, if necessary for your activity.
The ‘Logout’ button can also be found in this right-hand side menu.
¶ CREATION OF A QUEUE
E-CLICK works through paths, menus, and buttons. A path contains menus, and these menus contain buttons. The buttons can contain actions (PDF document, image, video, form, message, etc.).
¶ ROUTES, MENUS, AND BUTTONS
To access this feature, click on “route.” You can either choose an existing route or create a new one (see E-CLICK instructions).
¶ TYPES OF TICKETS

Click on “Ticket Types” to configure the different tickets that your visitors will have access to.
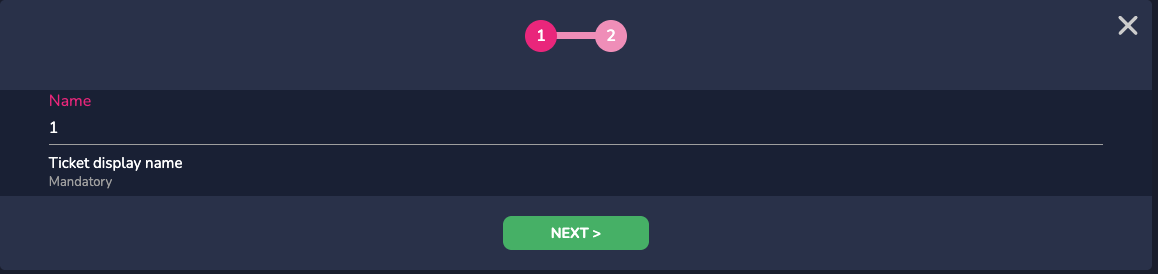
Add a new ticket and define its main settings:
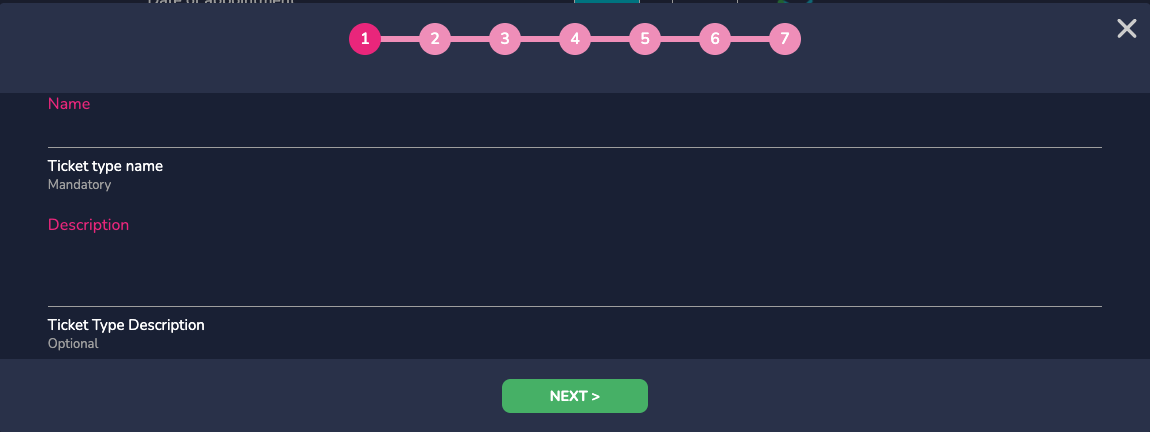
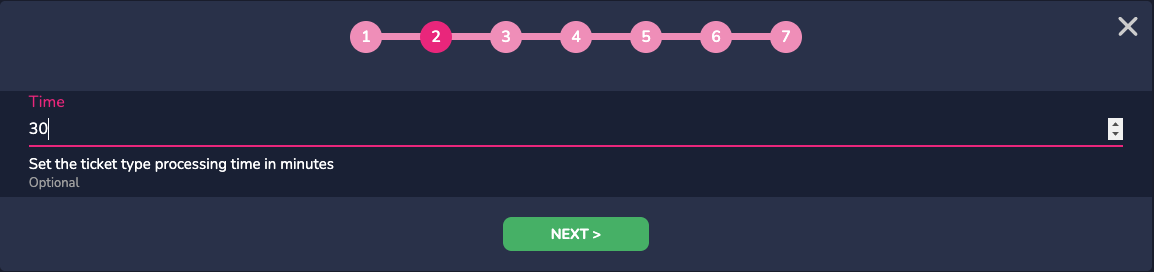
Define the name, then the time. This time is the time you estimate is necessary to process a ticket.
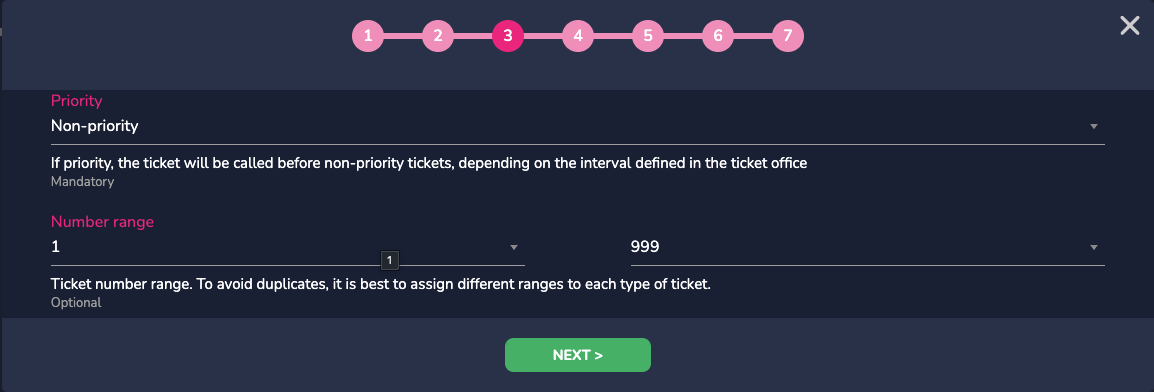
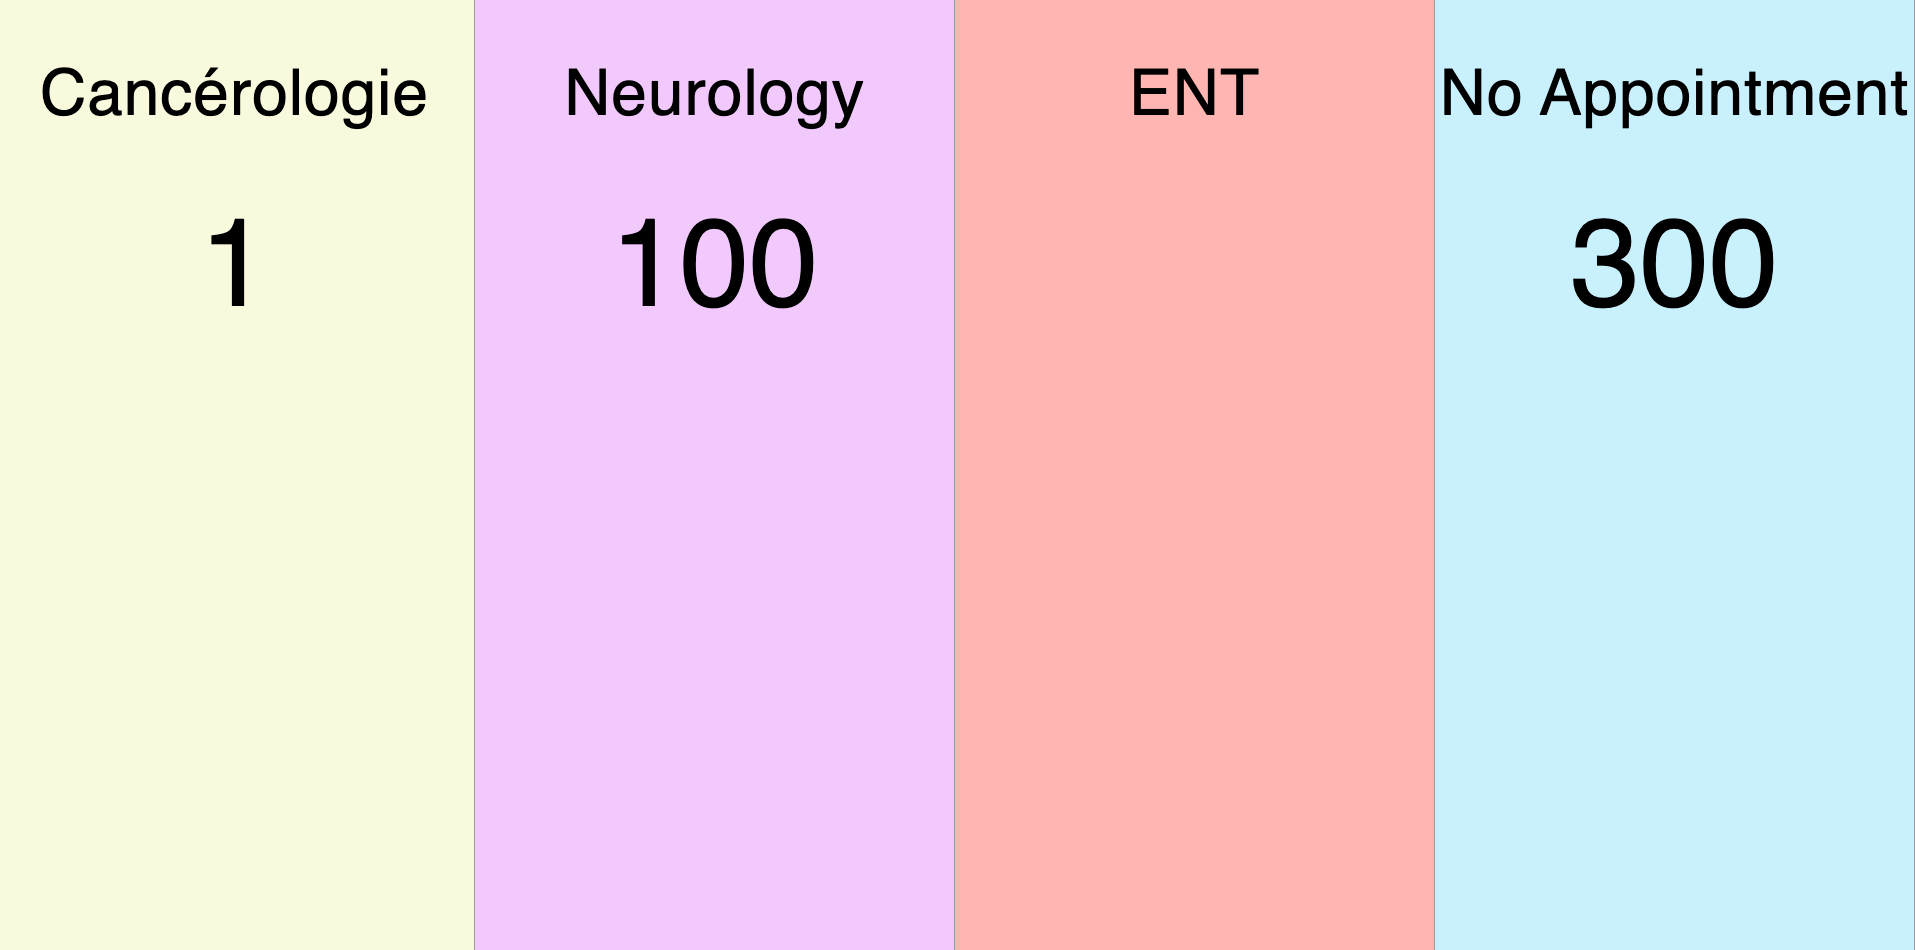
Define whether it is a priority ticket or not. Then define its range; you must assign different ranges to each type of ticket to avoid having tickets with the same number. This feature is essential if you have many different types of tickets and counters.
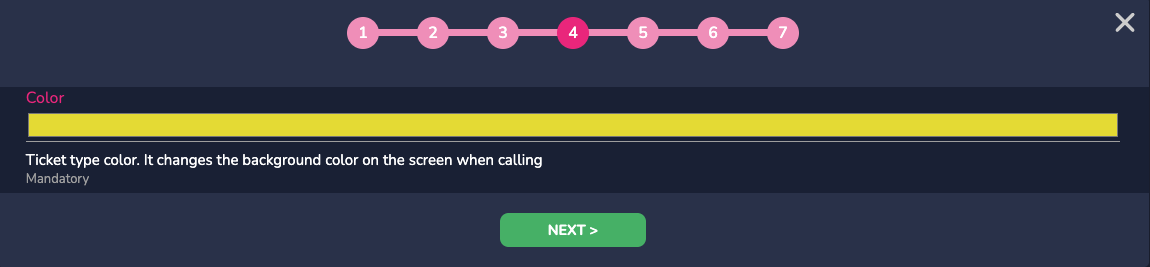
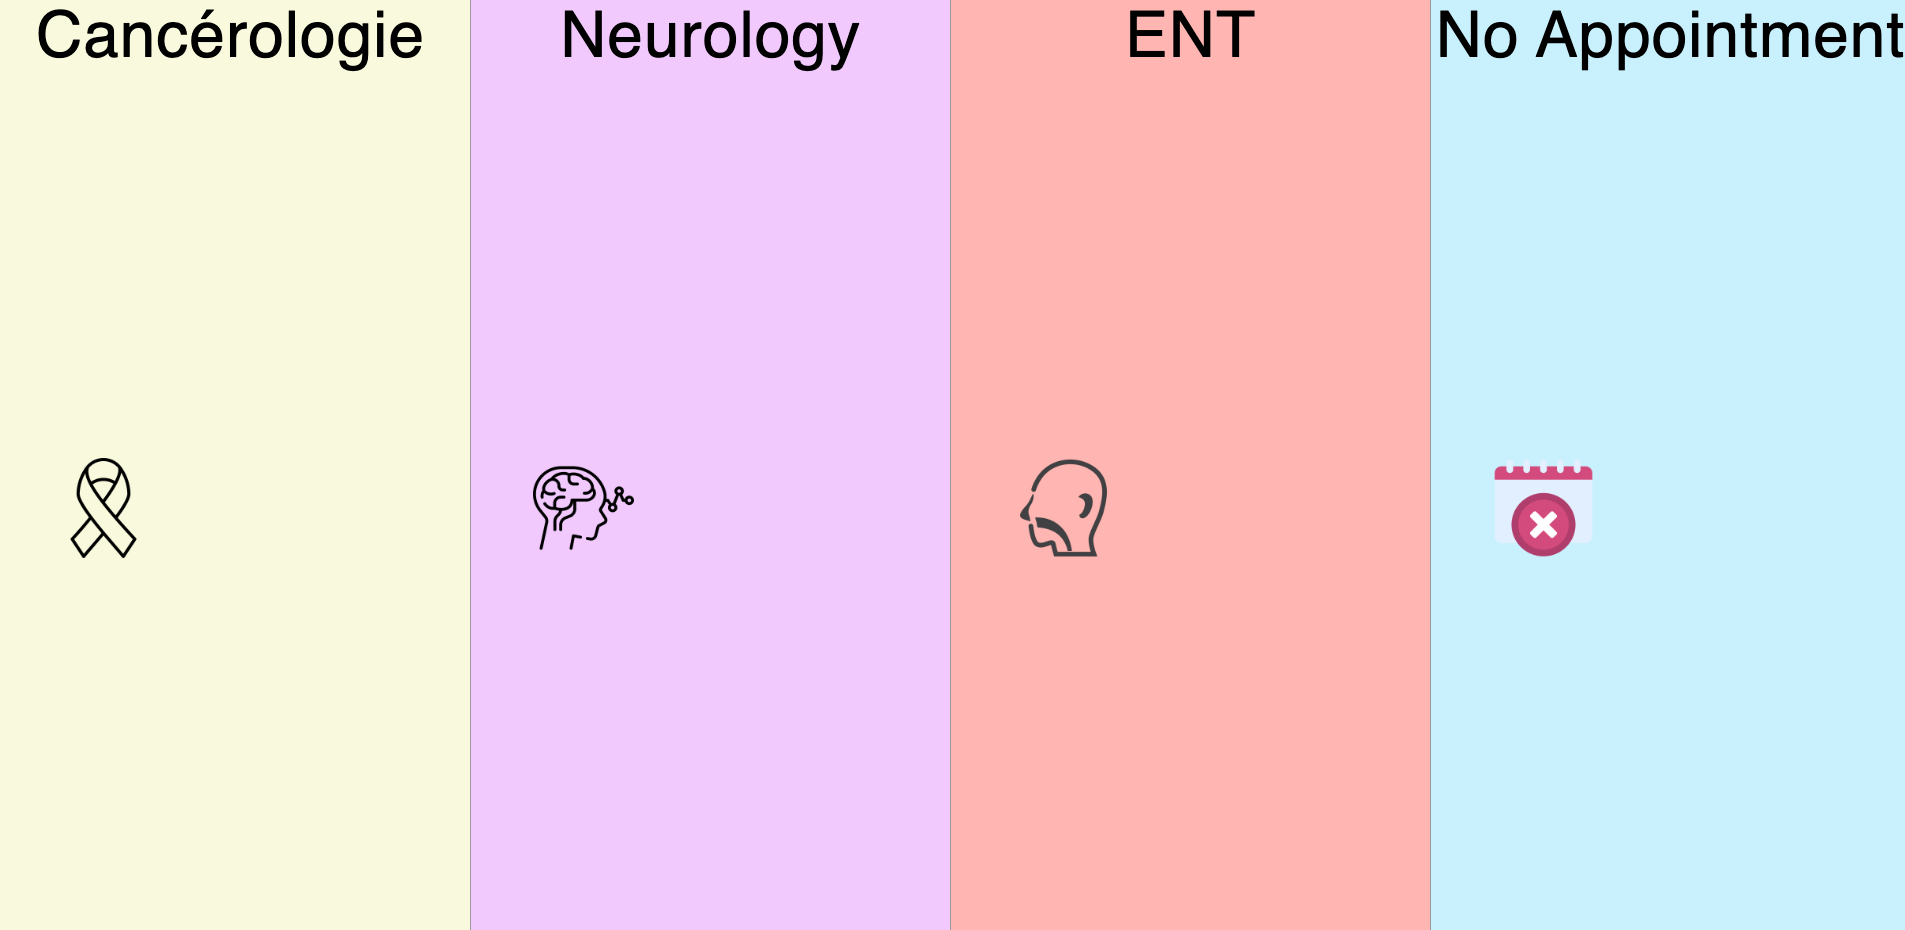
Then choose the color of your ticket; it will be displayed at the bottom of the screen on which the ticket will be called.
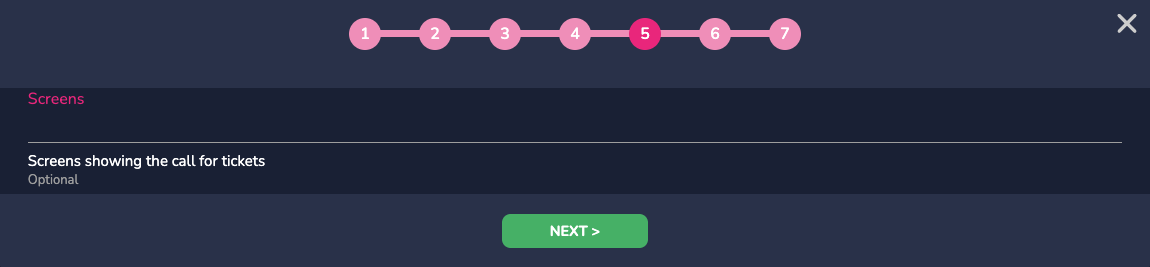
The next step allows you to select the screen in question. If your screen is not already specified, you can do so in the “Screens” tab.
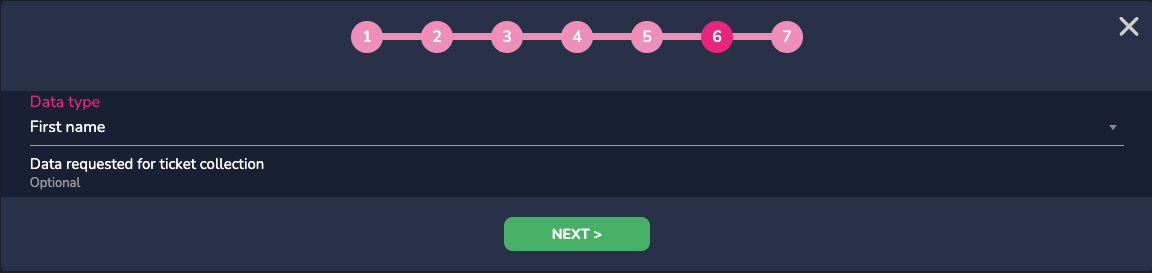
Next, if you wish, you can select the types of information to request before issuing the ticket. Visitors will then be required to provide their name, phone number, etc.
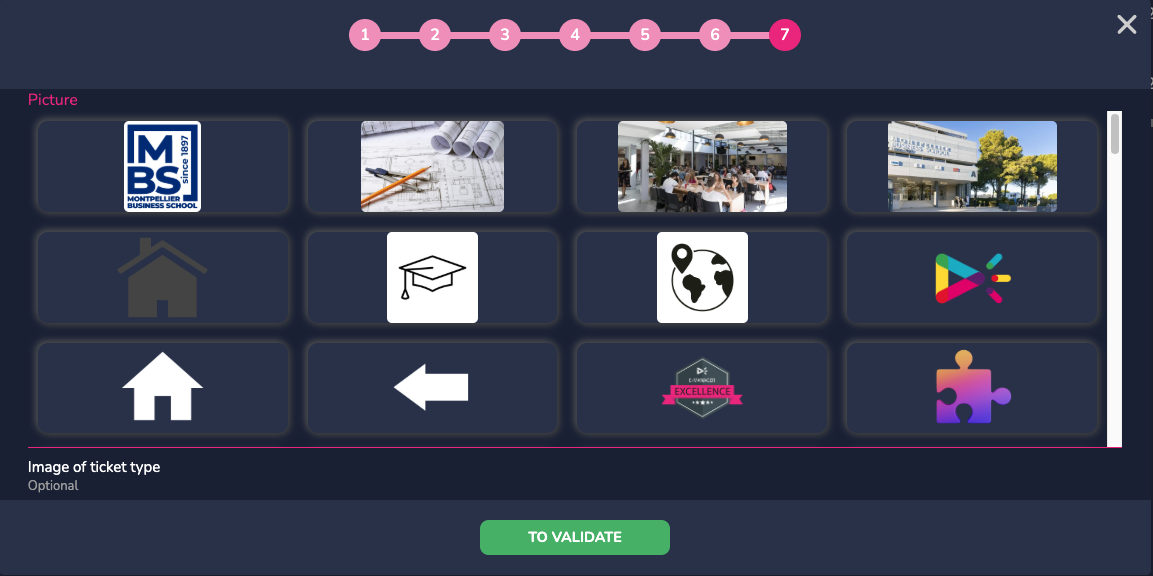
The last step allows you to choose an image that corresponds to your ticket. This is an optional choice. However, if you wish to import images, you will need to do so beforehand by going to the “Images” tab. They will then be automatically available for your buttons and tickets.
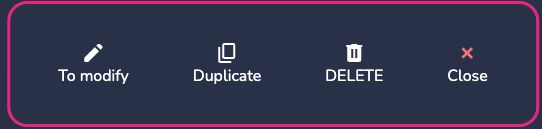
Once your tickets have been created, you can perform the following actions: modify, which gives you access to the settings shown above, duplicate, or delete.
¶ COUNTER MANAGEMENT
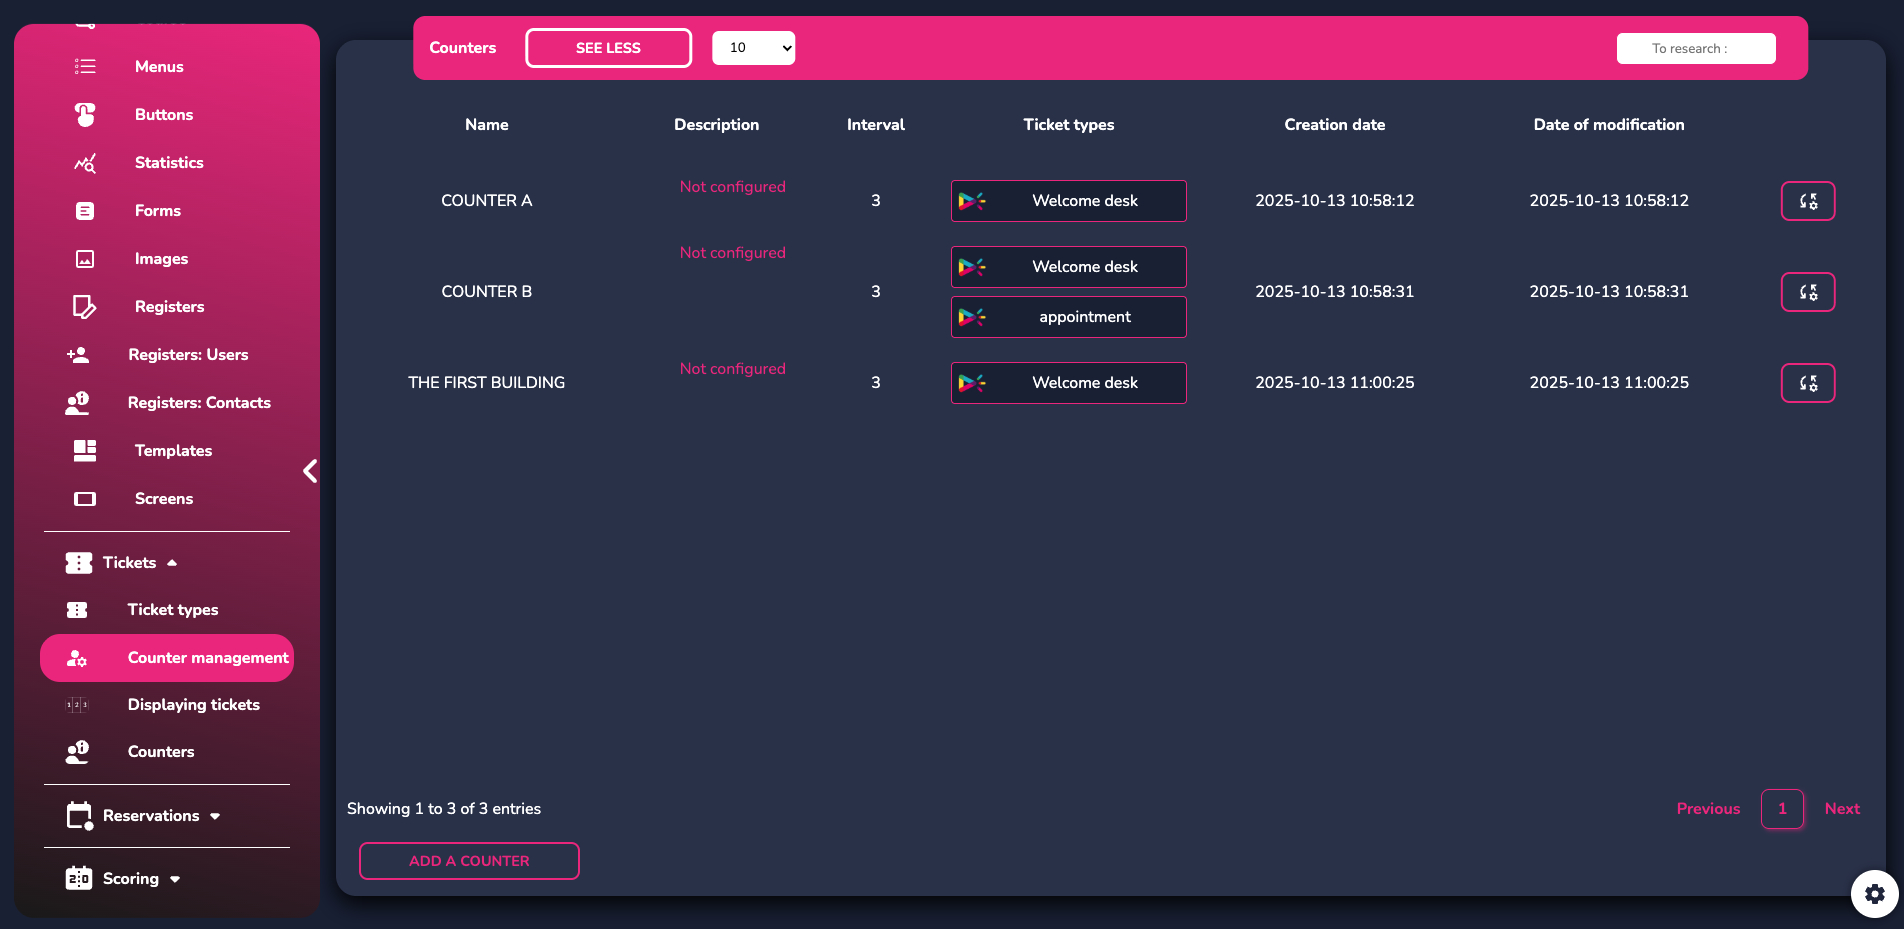
Click on this tab to configure the different ticket windows that your visitors will have access to once they have their tickets in hand.
Add a new ticket window and define its main settings:
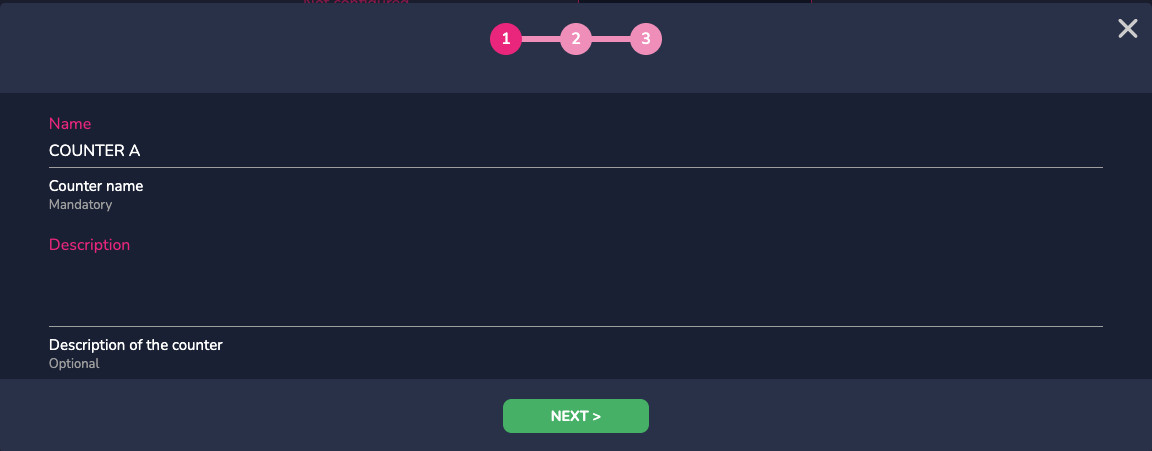

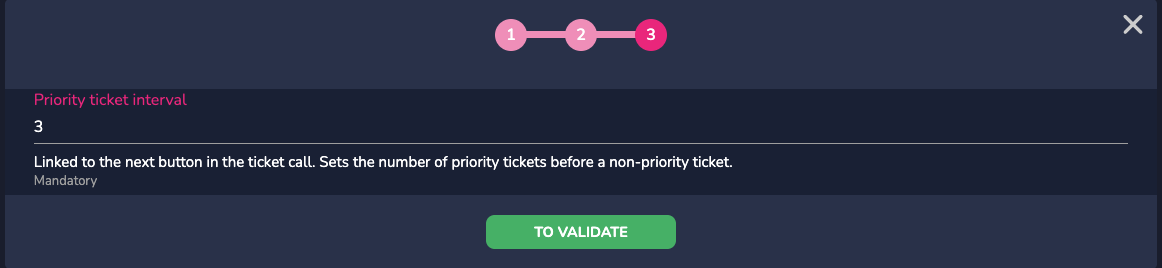
Its name and description, then the different ticket(s) associated with this ticket window. You can set them all as defining a ticket type per ticket window. In the last step, define the display interval for priority tickets in relation to non-priority tickets.
In the ticket window management tab, you can either modify or delete a ticket window that has already been created.
¶ TICKETS DISPLAY
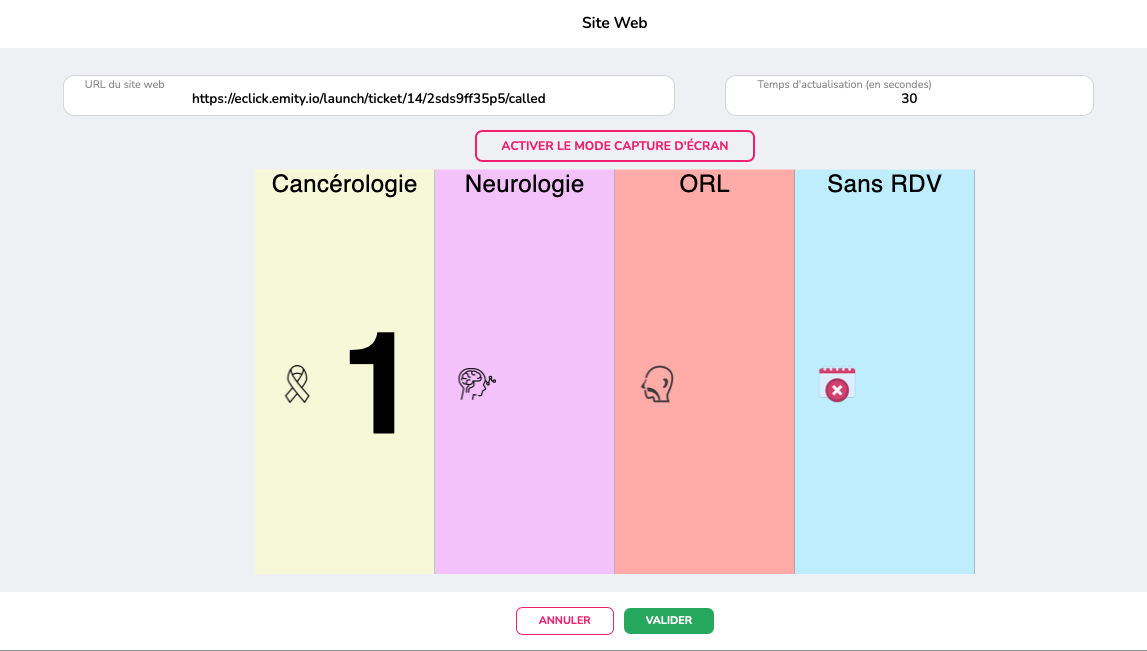
This tab allows you to add your screen and the ticket types that will be associated with it.
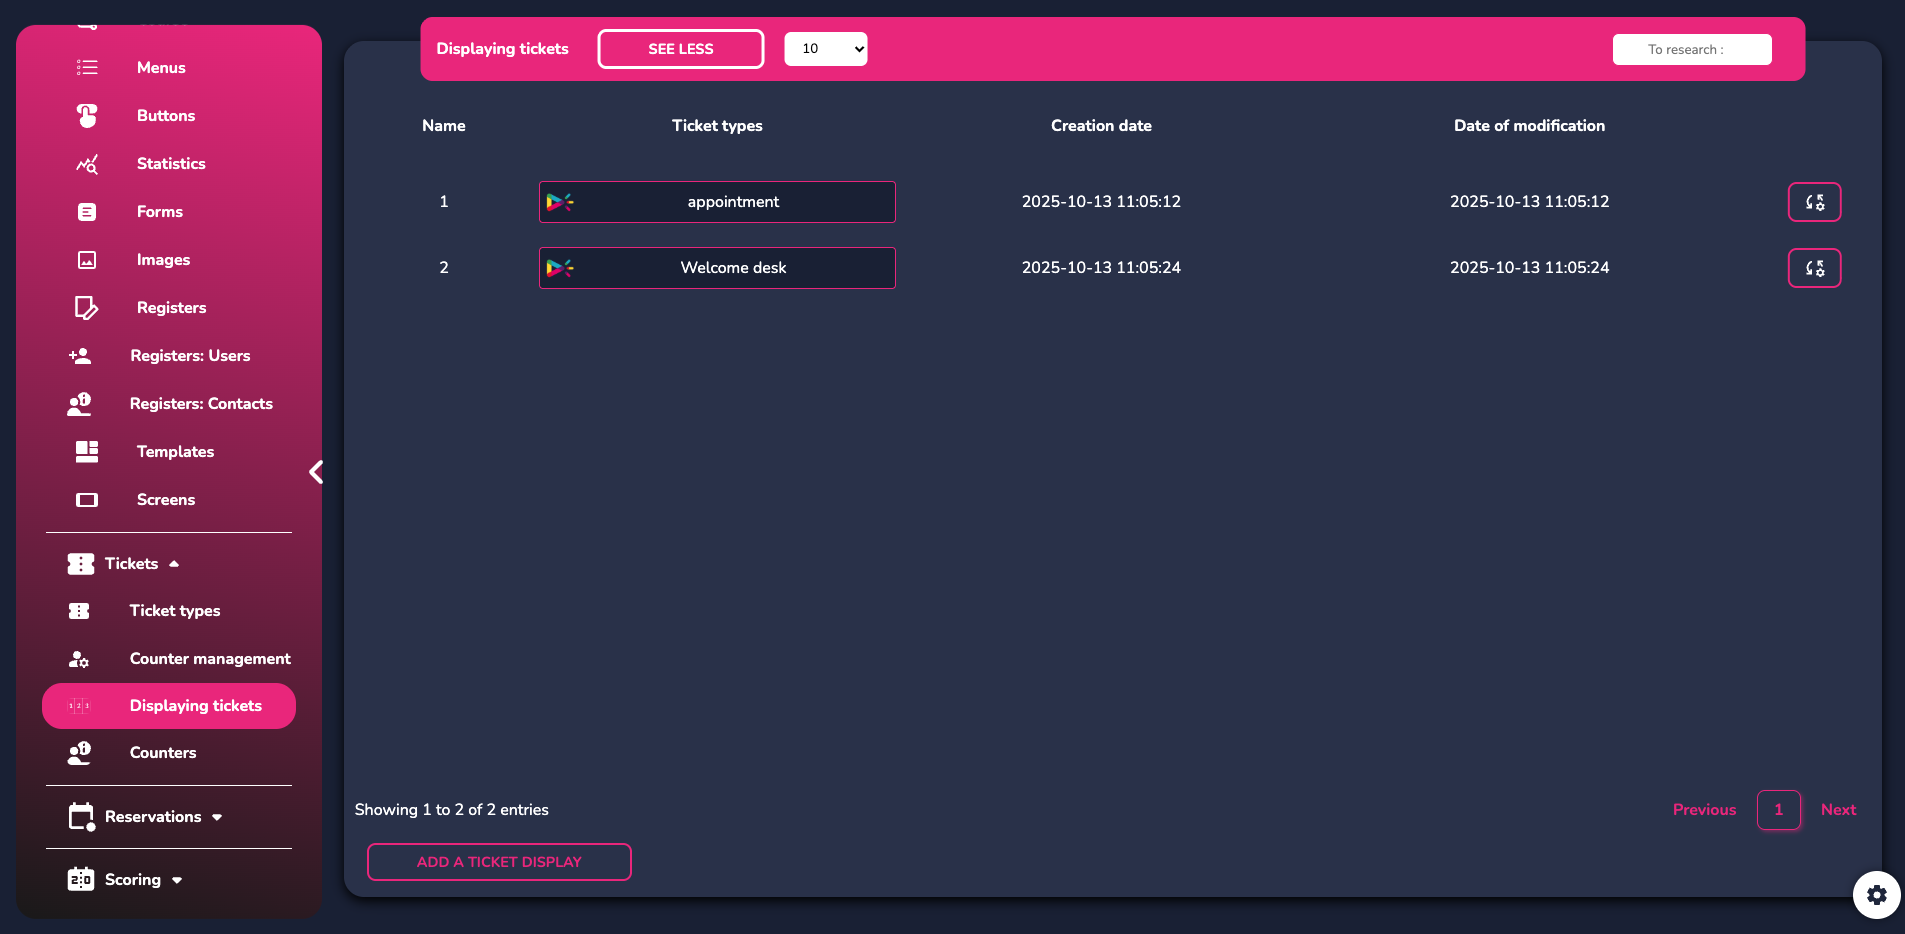
Click on “Add” to create a new display. You will be asked to name the display—for example, “Home screen,” “Room 3,” depending on your needs.
Then you can associate the tickets you want to see there.

Once a display has been created, you have access to these actions:
 |
Preview your pending tickets. |
 |
Preview your called tickets in banner format. |
 |
Preview your last called ticket. |
 |
Change your display. |
 |
Duplicate your display. |
 |
Remove your display. |
¶ COUNTERS
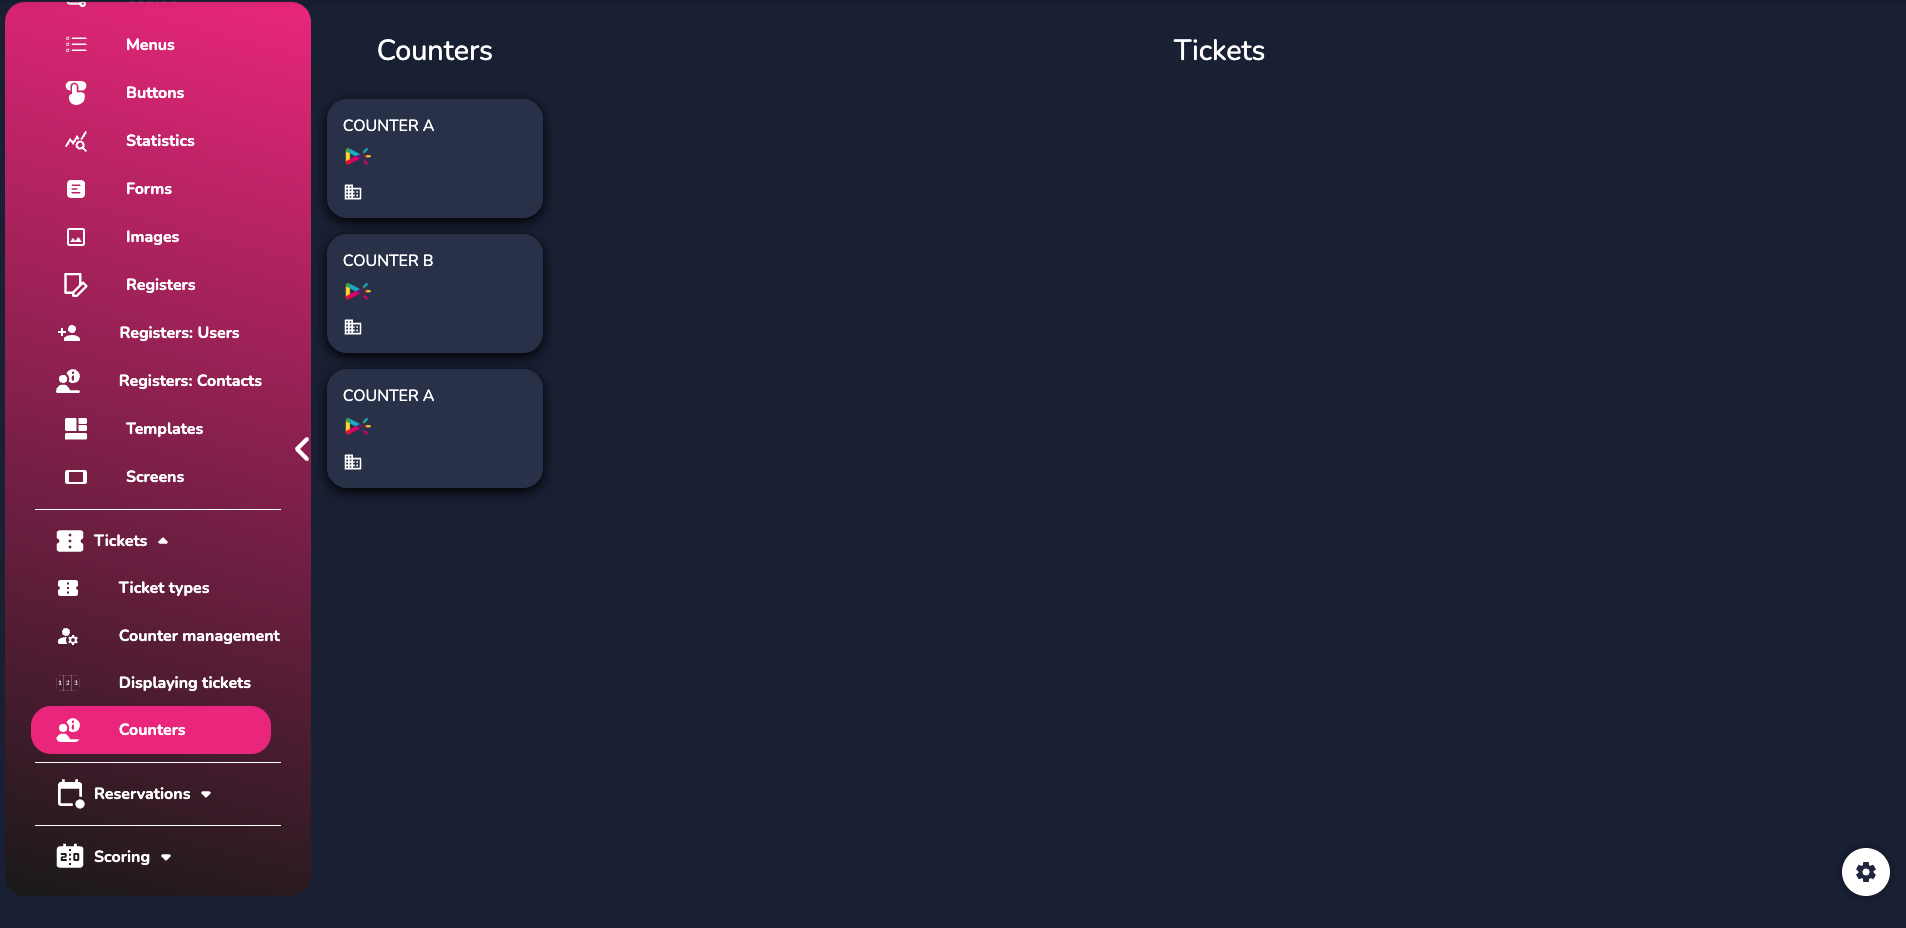
Then go to your ticket administration page, where you will find the number of tickets you have created previously.
Click on the ticket of your choice to view the tickets that are currently in progress or pending.
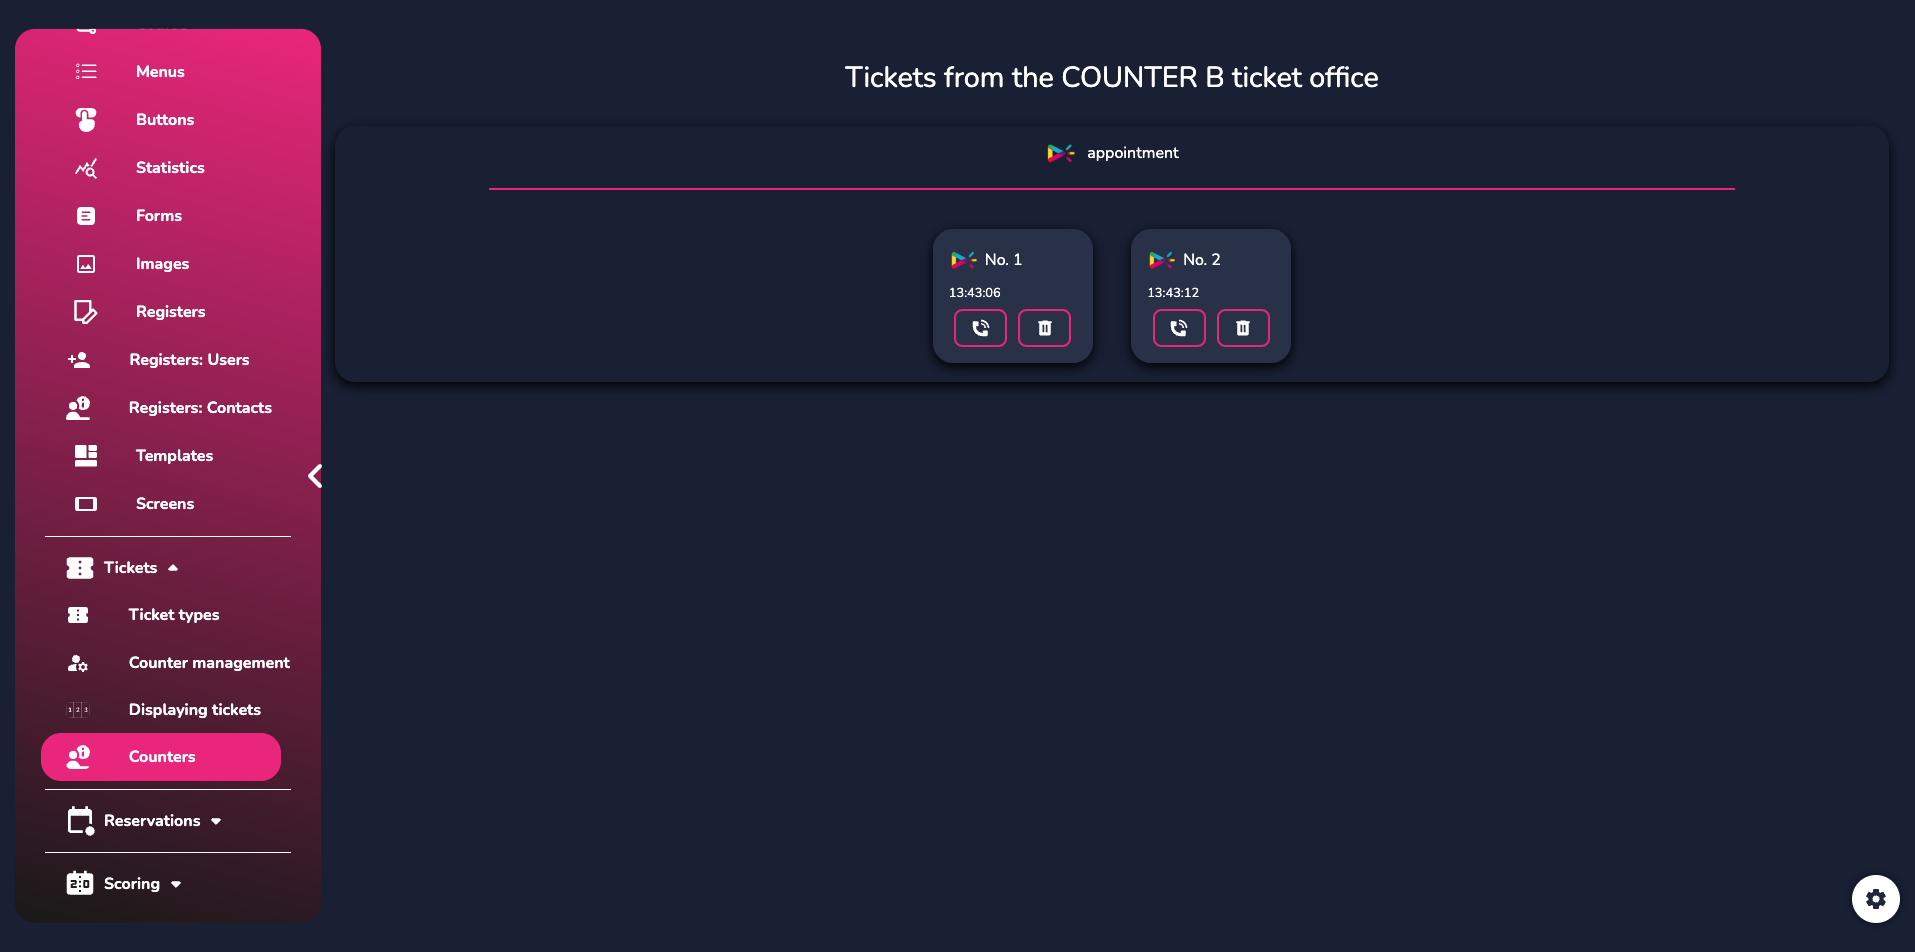
For tickets available at the ticket office, you have direct access to two actions :
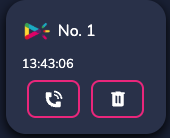
The first button is used to call up the ticket on the relevant screen, while the second button is used to delete the ticket.
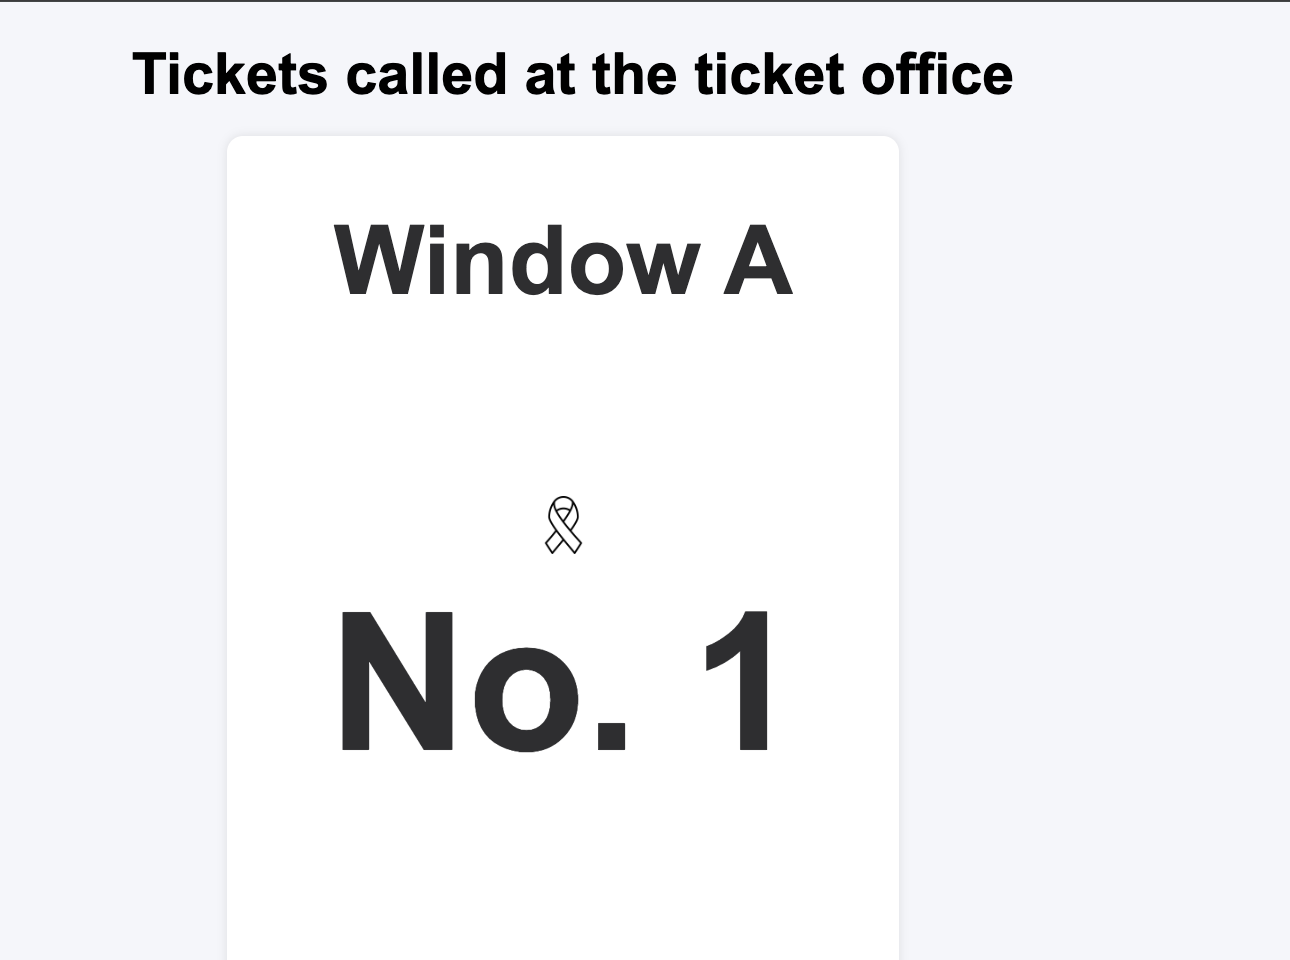
When you click on “Call,” the following is displayed:
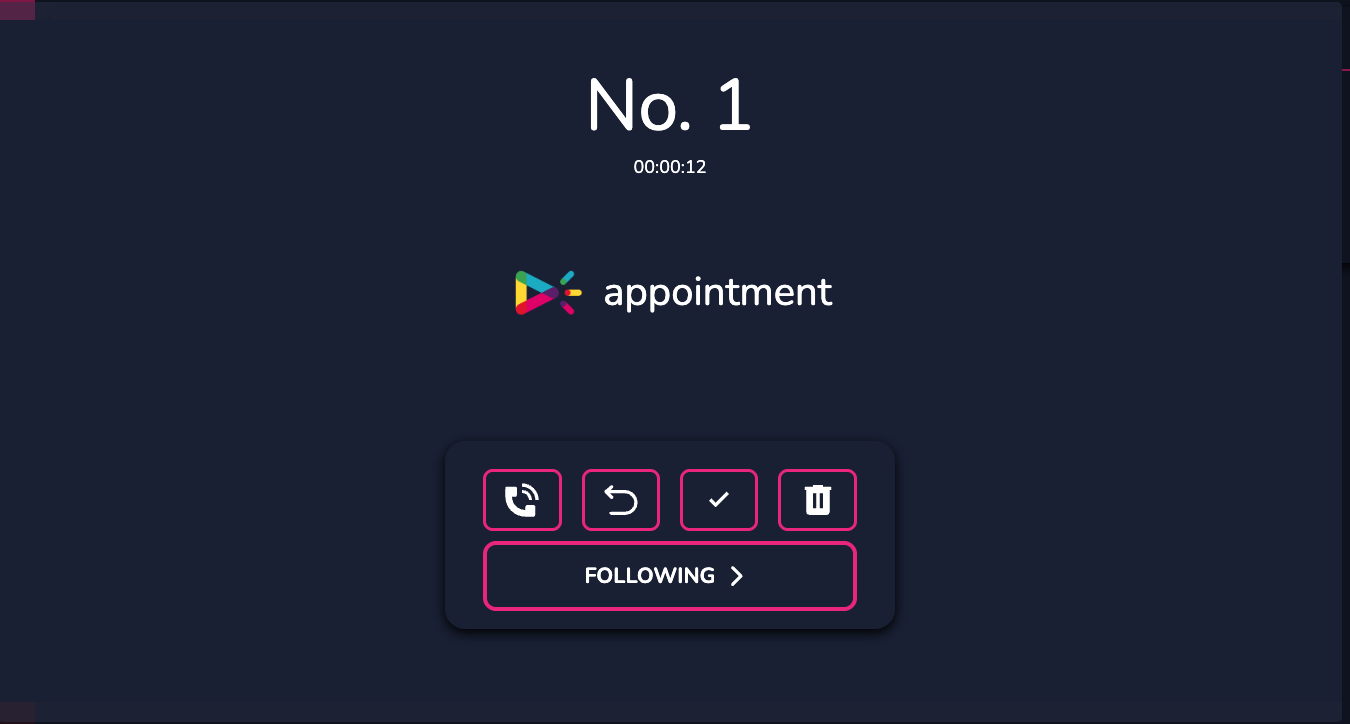
Here too, several actions are possible. You can (from left to right):
 |
Call the ticket again. |
 |
Return the ticket to the list of pending tickets. |
 |
Validate the ticket if it is complete (e.g., the person has entered the meeting room). |
 |
Permanently delete the ticket. |
 |
“Next” simply moves on to the next ticket, validates it, and deletes it. |
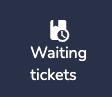
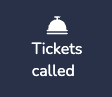
Here are the visuals for pending tickets and the two visuals for called tickets:
¶ PATH UPDATE
Once you have completed these steps, return to your route and select the buttons you want to associate with your different ticket types.

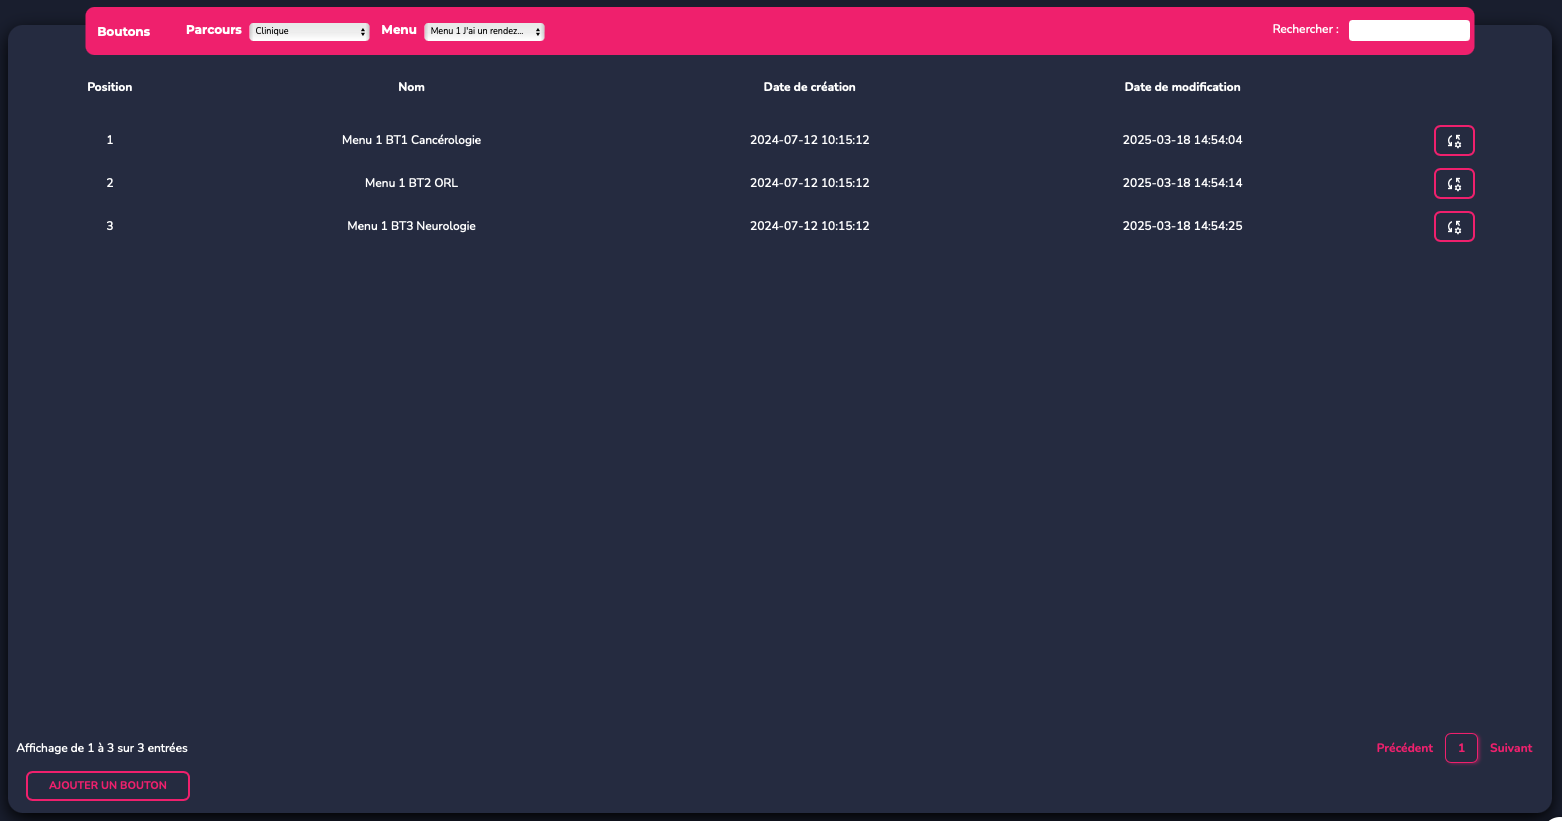
Here, click on the “action” button in question..


Then select “additional pop-up actions” to include your ticket.

Select ‘Tail’.
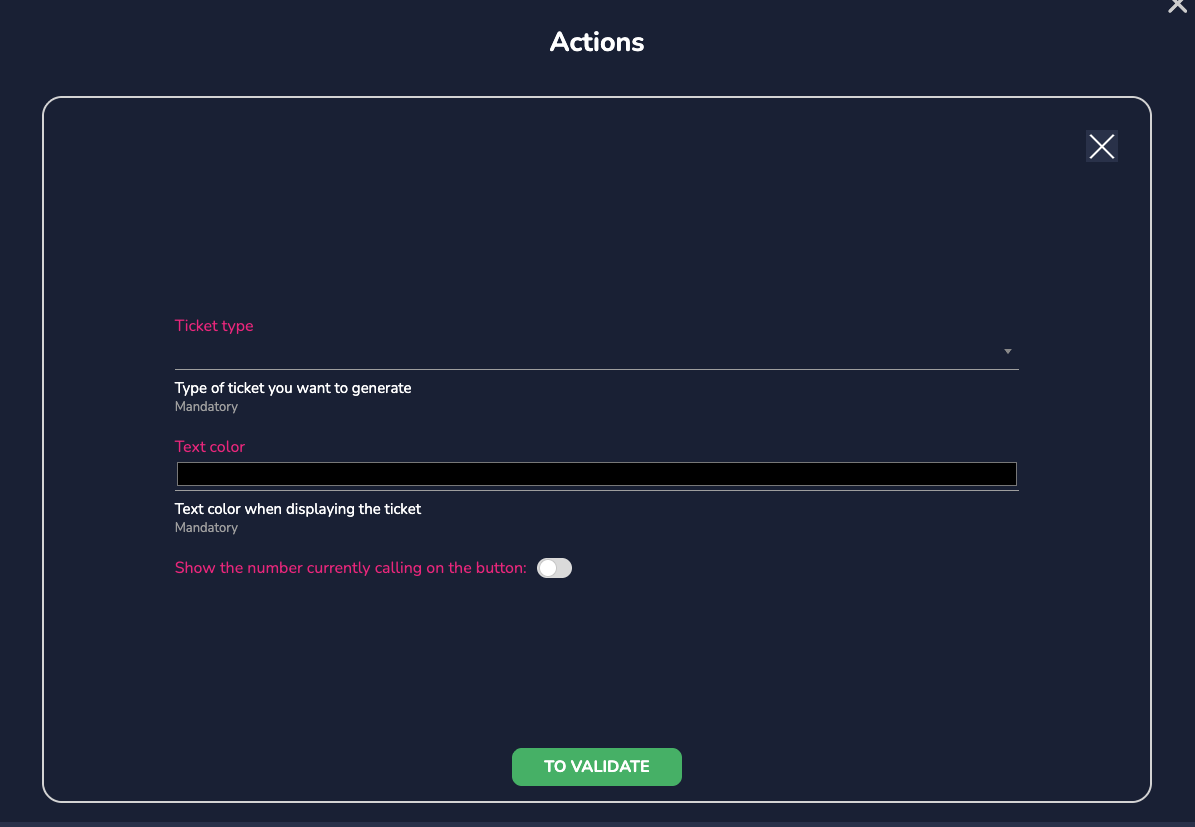
Enter the ticket corresponding to your button, its color, and confirm. If you wish, you can also display the current ticket number in real time directly on the button.
The action will then appear as “configured” and will be automatically updated on your route, even if it is already active.

¶ DEPLOYMENT
¶ PREVIEW
When your journey is complete, we recommend using the preview function to check your creation before officially deploying it.
Return to the “Journey” tab and click on the “Launch” button.

This modal opens:
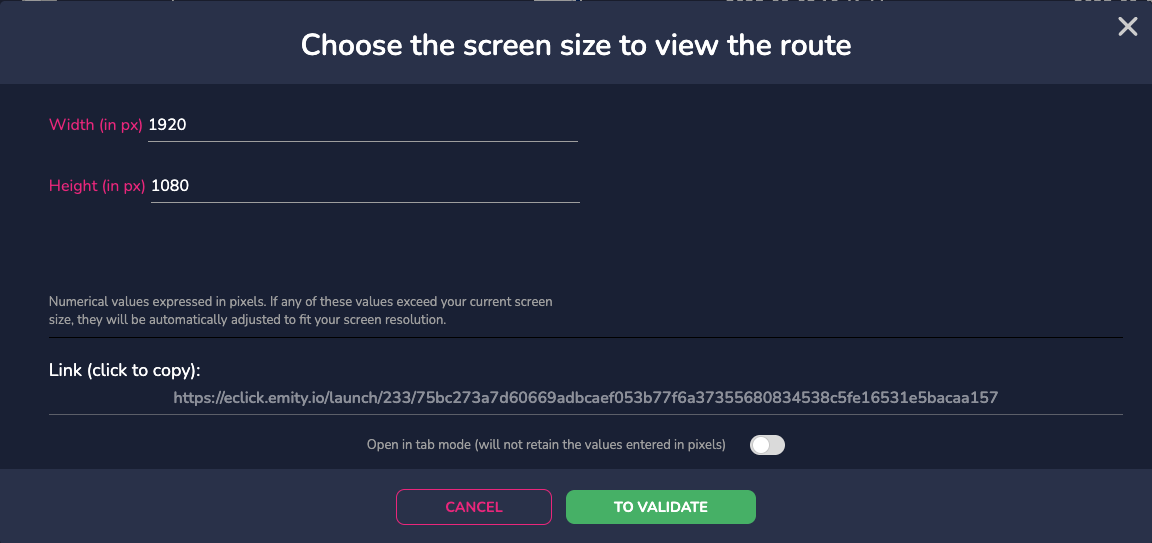
Select ... and confirm.
You can move between menus by clicking on the buttons or shortcuts created.
Copy the visible link and then go to E-MANAGER.
¶ LINK WITH E-MANAGER
Once you are back in your E-MANAGER account, go to the “SCREEN” tab.
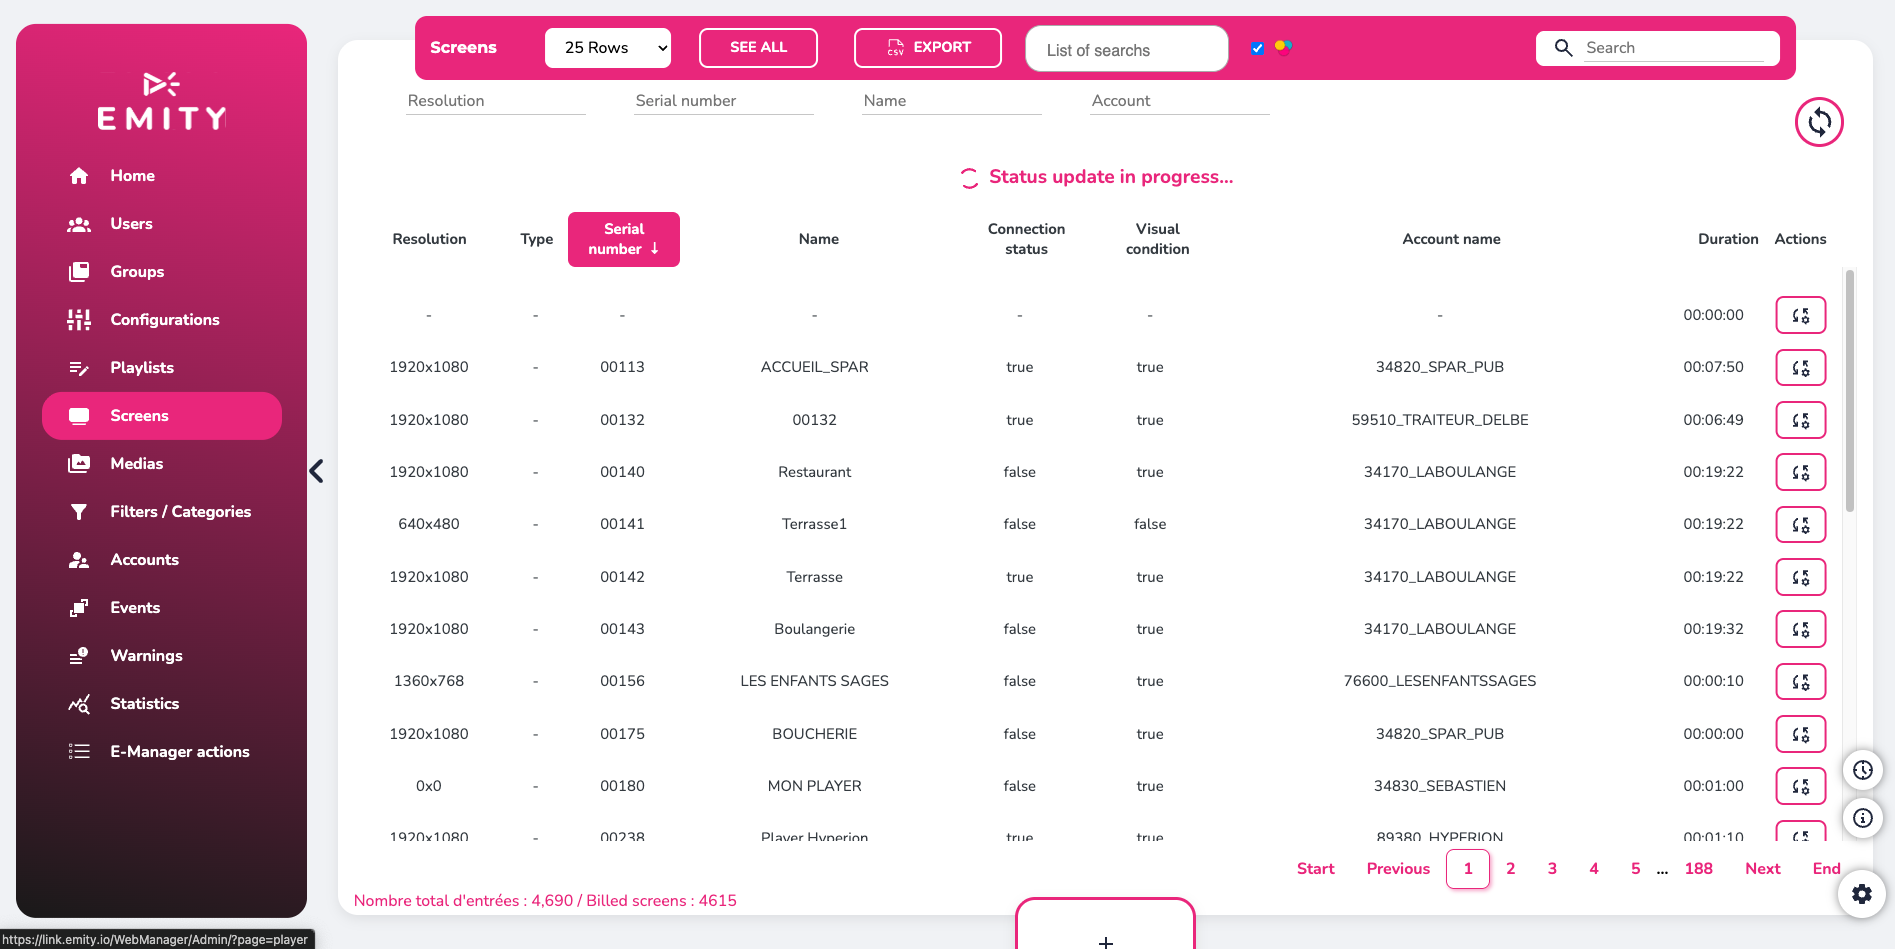
Go to the screen of your choice to access its internal playlist.
Then click on the “Applications” button on the left side menu, then select “Tactile.”

Use the touch option to add interactive content when someone is using the touchscreen, while displaying dynamic content with playlists when it is not in use, then click ‘Confirm’.
You will then be able to either:
- Copy the modal link seen previously in the web URL.
- Copy your API key (seen in the right side menu on E-CLICK - the cogwheel).
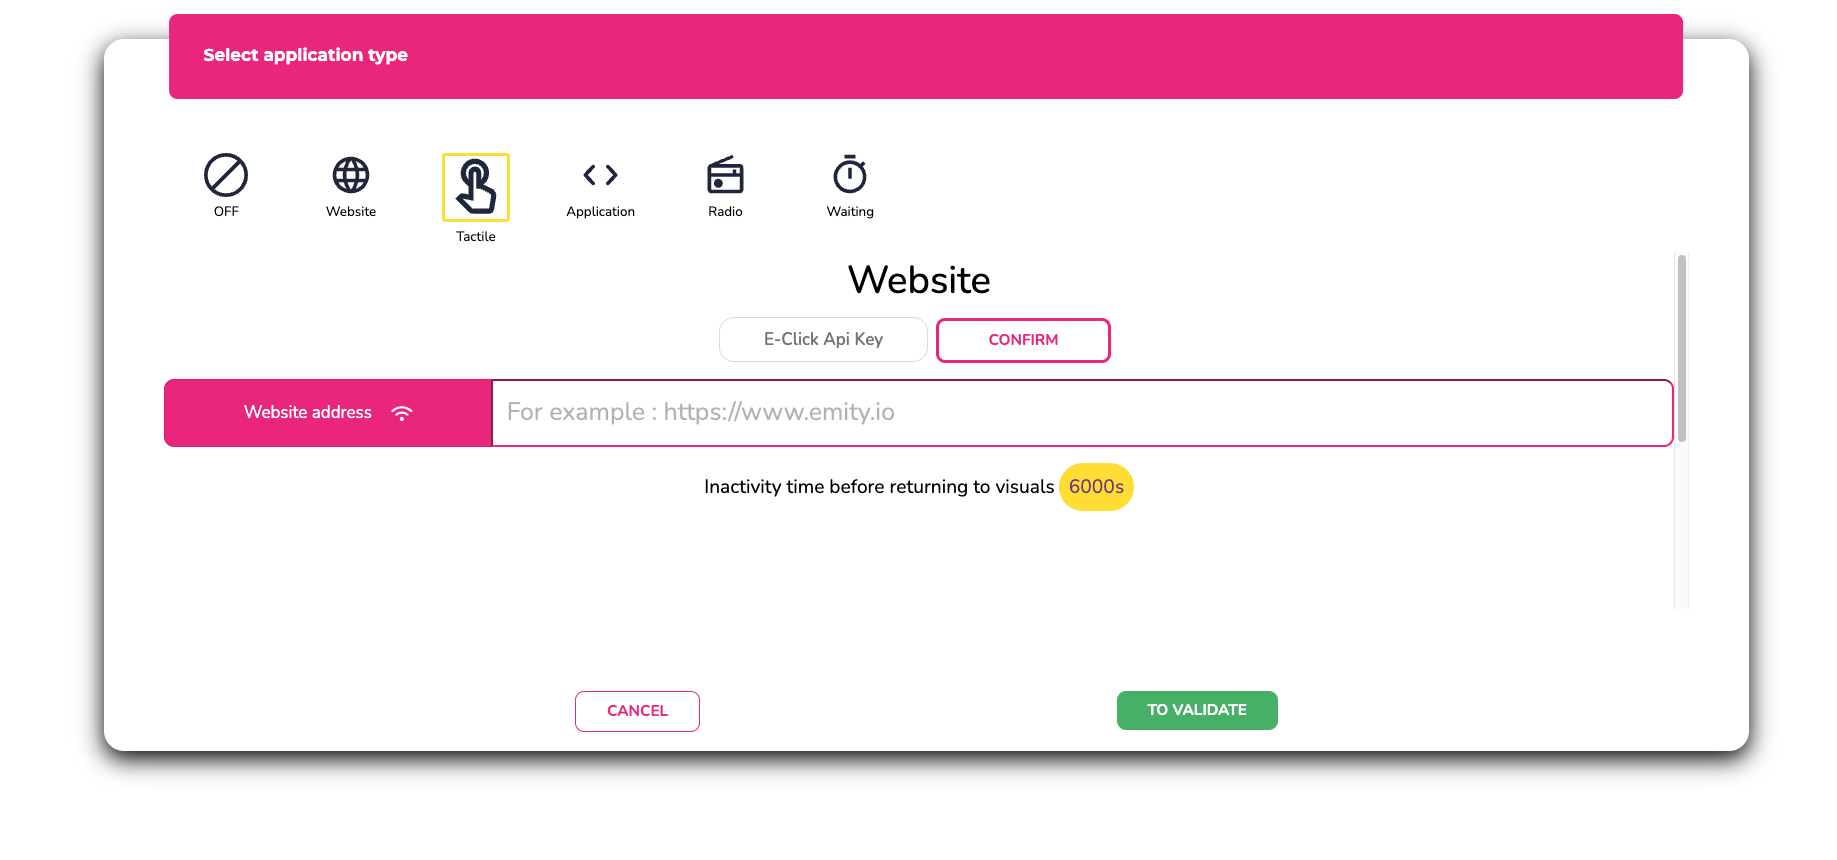
The API key will allow you to save your E-CLICK routes directly on E-MANAGER. You will then find a list of your routes so you can add them to your screen more quickly.
The duration mentioned under the URL link in “Application > Touchscreen” allows you to set up an inactivity time (no touchscreen activity on your screen) after which your dynamic display programmed on the same screen will automatically start playing.
To save the contents of the playlist, press the “Deploy/Save” icon in the side menu.

This step concerns the screen that will display your E-CLICK route. To display your pending tickets and called tickets, you must also go to your E-MANAGER account.
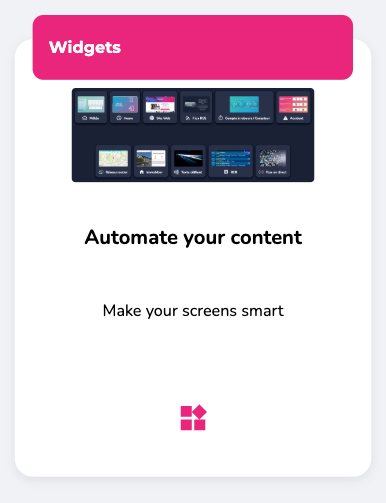
Go to your playlists and click on “add a poster”:

Next, select “Widgets” then “Website.” Enter the URL for your previews (as seen in the ticket display) and confirm.

The final step is to deploy your playlist.
¶ CUSTOMER SERVICE
Our customer service team is here to help you, support you, and answer all your questions as efficiently as possible.
We are available via online chat on our website. You can also contact customer service by email :support@emity.io
We have also posted a video guide online covering all the different steps involved in using our platform. You can find it here: https://www.emity.io/tutoriels/
or on our YouTube channel : https://www.youtube.com/channel/UCxjAkfG_v0QOr8YtFRCFA9w
A PHONE NUMBER is made available to our customers in order to take into account all the specificities of your requests. : 04 30 00 66 00
To contact customer service directly : 04 30 00 66 01
Customer service is open Monday to Friday from 9:00 a.m. to 12:30 p.m. and from 1:30 p.m. to 5:00 p.m.