Last update: september 2025
¶ INTRODUCTION
Welcome to the RESERVATION user guide, a module of our interactive solution E-CLICK.
RESERVATION allows you to optimize the use of all your workspaces. This guide is designed to help you use the module efficiently, making it easier to manage, schedule, and book your meeting rooms, offices, parking spaces, and more.
¶ PRESENTATION OF THE MODULE
Thanks to the E-CLICK digital dashboard, you can manage your interactive kiosk, tablet, or touchscreen remotely — anytime, anywhere, and on any device. Designed and developed by EMITY, E-CLICK is a multifunctional solution that allows you to manage all your touchscreen projects easily and efficiently.

RESERVATION is a feature of the E-CLICK solution. This simple application allows you to manage your workspaces using a tablet dedicated to bookings. Create and track your reservations, either from your computer or directly in front of the corresponding room. View the schedule of each room and connect your professional calendars to ensure you never miss a meeting.
This way, you can create and publish your interactive content:
• Everywhere :
E-CLICK can be used on all devices (PC, smartphone) and across all operating systems (Mac, Windows, Linux, iOS, Android).
• Continuously :
E-CLICK allows you to schedule content playback 7 days a week. Additionally, when your screen does not receive any interaction within a set period, it can automatically display the digital signage content you have programmed.
• On All types of touchscreens, of all sizes:
E-CLICK allows you to manage a single screen or an entire network of screens, regardless of their size or number.
• Intuitive, Our software offers a quick onboarding and unmatched ease of use.
• Unique, E-CLICK allows you to broadcast your communication with a single click across your entire network of screens. This digital platform encompasses a wide range of features and can adapt to all professional sectors.
¶ ACCESS & CONNEXION
Use E-MANAGER without any prior installation.
From a web browser, go to:
• On emity.io, under the "Connexion" section,
• or directly at the address: https://link.emity.io/WebManager.
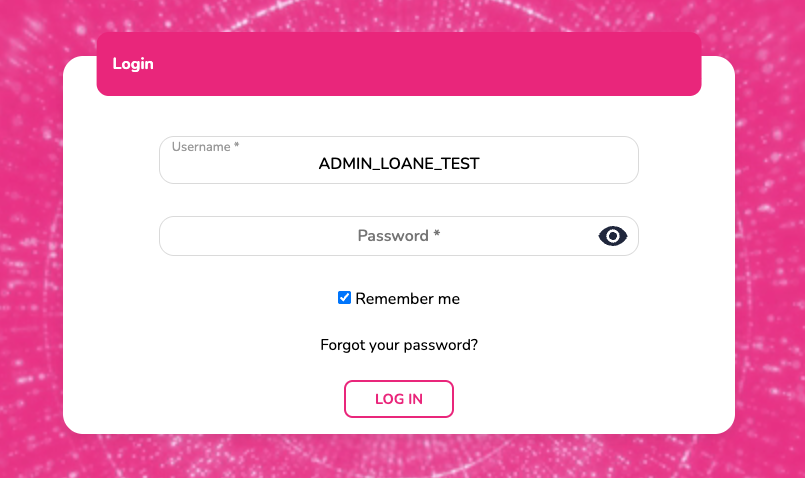
Enter your login information, provided to you when your account was created by a third party.
At the bottom right, you will find this button:

Click on it and set your preferences: Light/Dark mode and the platform language.
The platform is available in multiple languages: French, English, Spanish, Dutch, Italian, and German.
Creating an account can no longer be done independently. Please contact us or one of our distributors to access a free 3-month trial.
An account will then be created in your name, and you will receive a confirmation email to validate your registration and activate your E-MANAGER account. You can then start using the platform.
Select the desired module — in this case, E-CLICK — on the homepage that appears upon login.
Modules are not available by default; you must have access. Access is granted only by the sales department, following an order or a requested trial account.
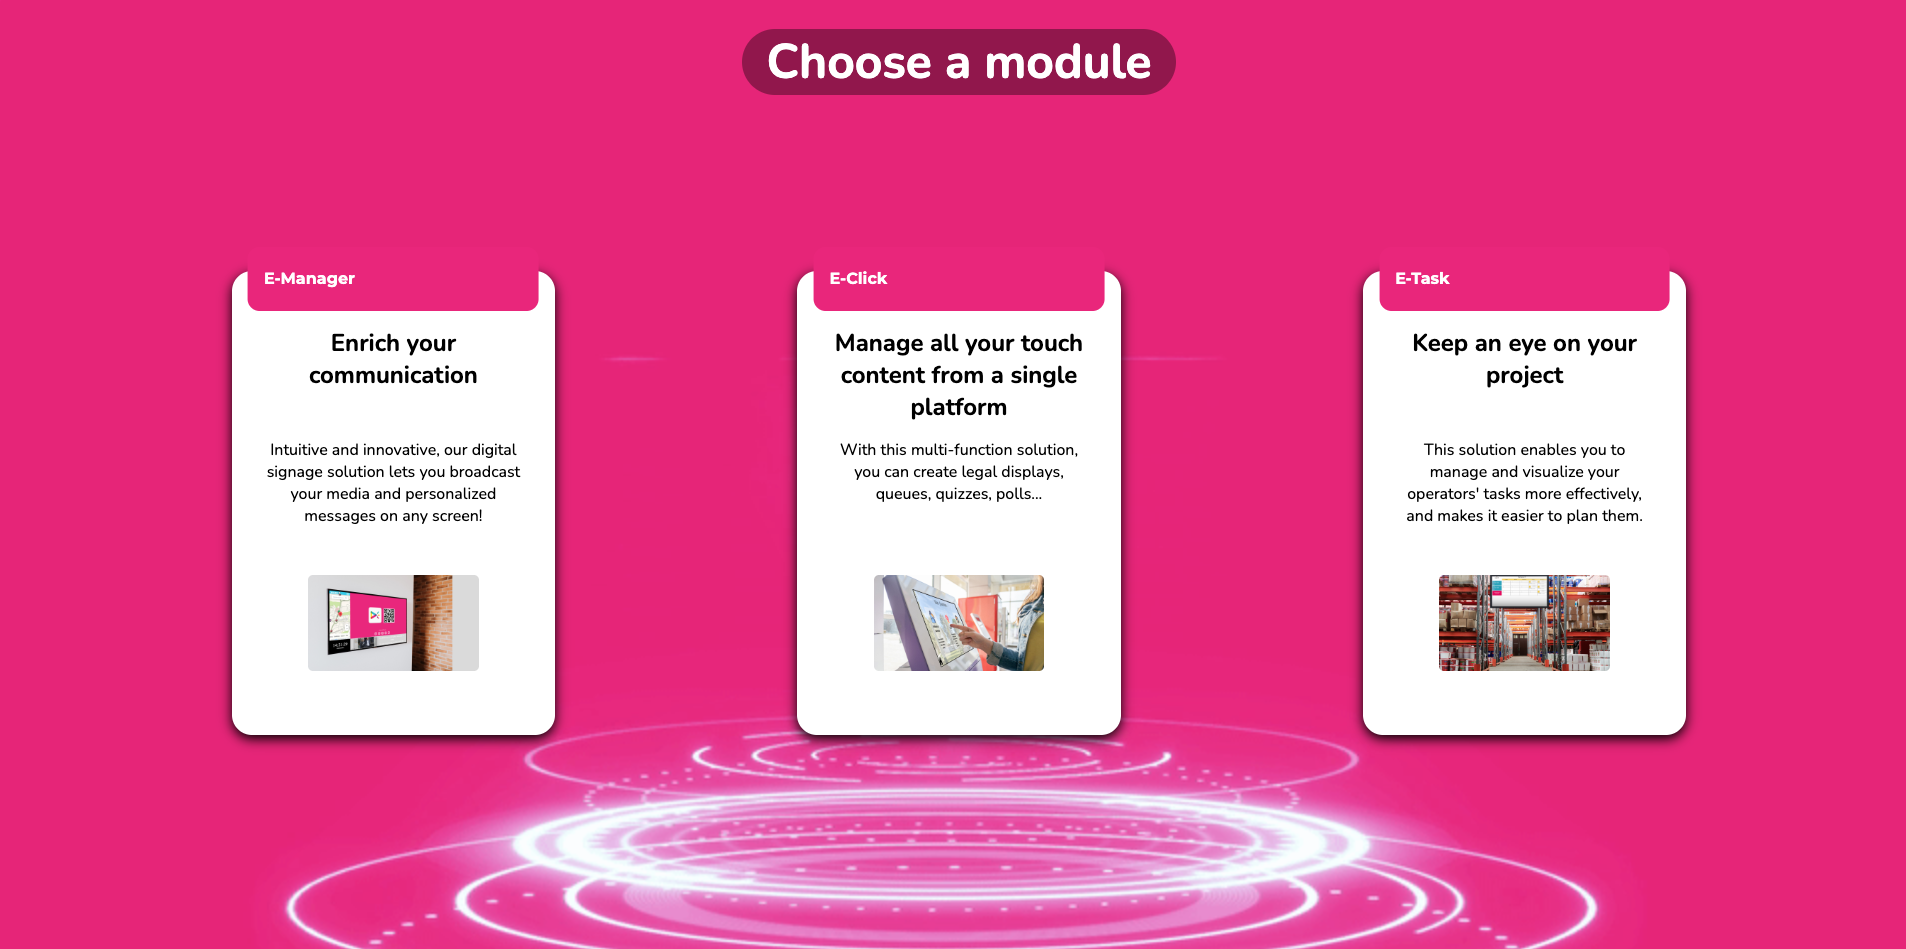
If you are already logged into E-MANAGER, click on "Settings" on your homepage to select your E-CLICK module.
¶ TUTORIALS
This RESERVATION user guide serves as a written training resource. For a more interactive experience, you can access all our video tutorials covering the E-CLICK software and the RESERVATION module:
- On the EMITY website, under the "Training" page
- On our YouTube channel
New tutorials are regularly uploaded, and updates are made on an ongoing basis.
¶ WELCOME PAGE
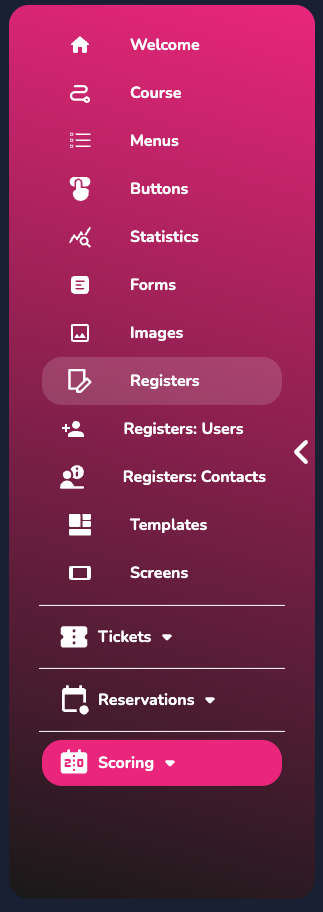
¶ LEFT SIDE MENU
-
On the main page, there is a menu on the left divided into two sections, with the following main accesses:
• Home, with the 4 shortcut buttons.
• Paths, to directly access the management and creation of your interactive paths.
• Menus, to manage the content and description of your interactive kiosk.
• Buttons, where you can modify their appearance (color, title size, border style, background opacity, etc.).
• Statistics, showing the number of clicks per menu and per button, as well as click trends for a button over a day.
• Forms, to standardize requests and collect the information you need (first name, last name, email, phone number).
• Images, to customize the buttons in your menus.
• Registers, to quickly access your data related to a visitor register (already filled in).
• User Register, to quickly access your user data related to a visitor register (already filled in).
• Contact Register, to quickly access your contacts related to a visitor register (already filled in).
• Templates, access pre-designed paths to simplify their creation and implementation.
• Screens, view and add your screens to your touchscreen and interactive displays. -
The second part of this menu relates to modules:
• Reservations: By clicking here, you access the submenu for the RESERVATION feature.
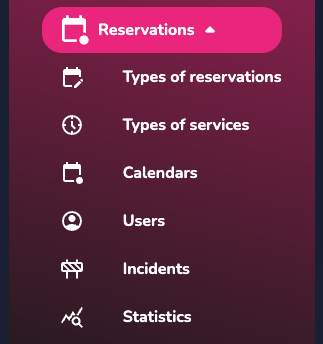
• Reservation Types: Create and add different types of reservations (e.g., meeting rooms).
• Service Types: Add services that may or may not be linked to a reservation type.
• Calendars: View the schedule of each of your rooms and synchronize your existing professional calendars.
• Users: Add your colleagues or clients to meetings so they receive an invitation notification.
• Incidents: Record any incidents (hardware or other) that may affect the proper functioning or use of a room.
• Statistics: Access all statistics related to room reservations to get an overall view and analyze your workspace usage and needs.
¶ RIGHT SIDE MENU
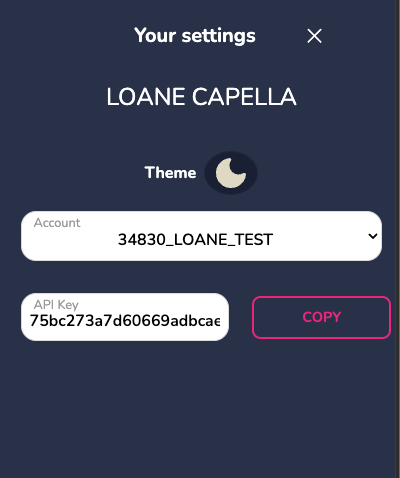
At the bottom right of this homepage, as well as on other pages, you will find a "Settings" button:

It allows you to perform several actions.

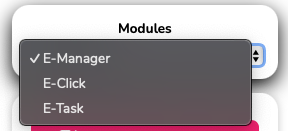
• Modules, to easily navigate between our different software while staying logged into your account.
• Theme, allows you to choose the platform’s display mode: light or dark.
• Account, displays the name of the account you are currently logged into.
• API Key, if required for your activities.
It is also on this right-side menu that you will find the "Logout" button.
¶ CREATING A RESERVATION
The "Reservations" module does not require the creation or association with a path. You can create a reservation directly by clicking on the module’s menu.
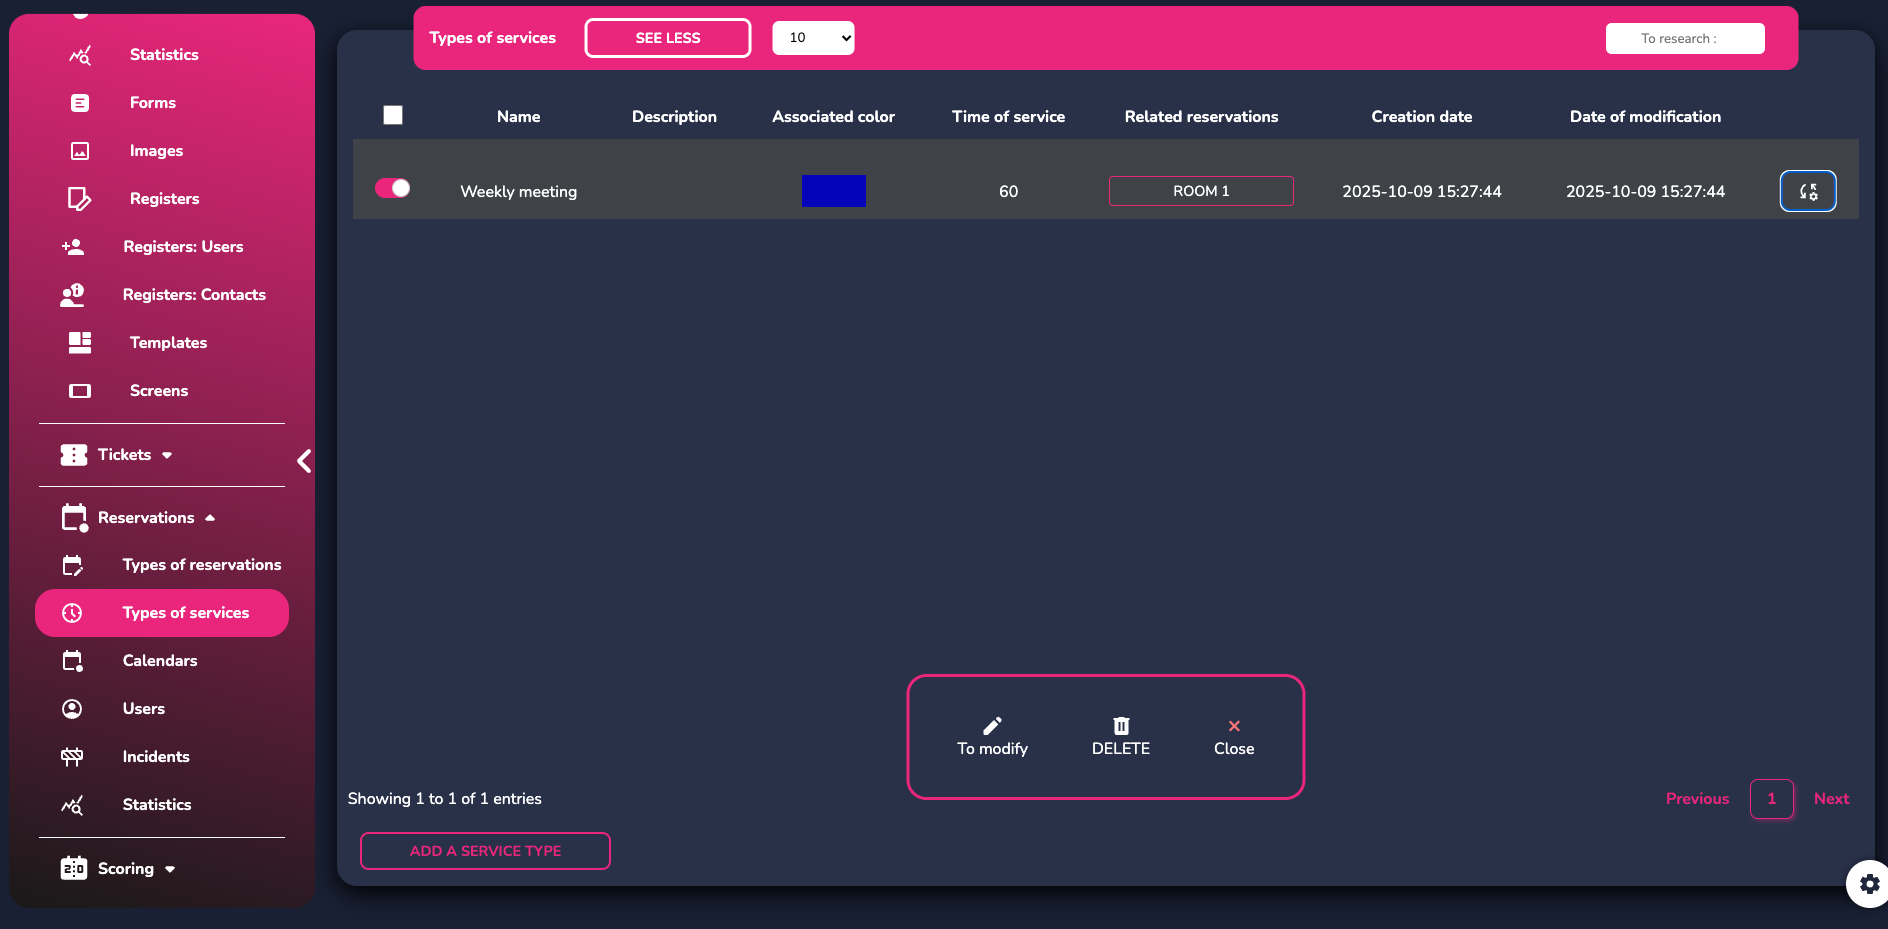
¶ SERVICES TYPES
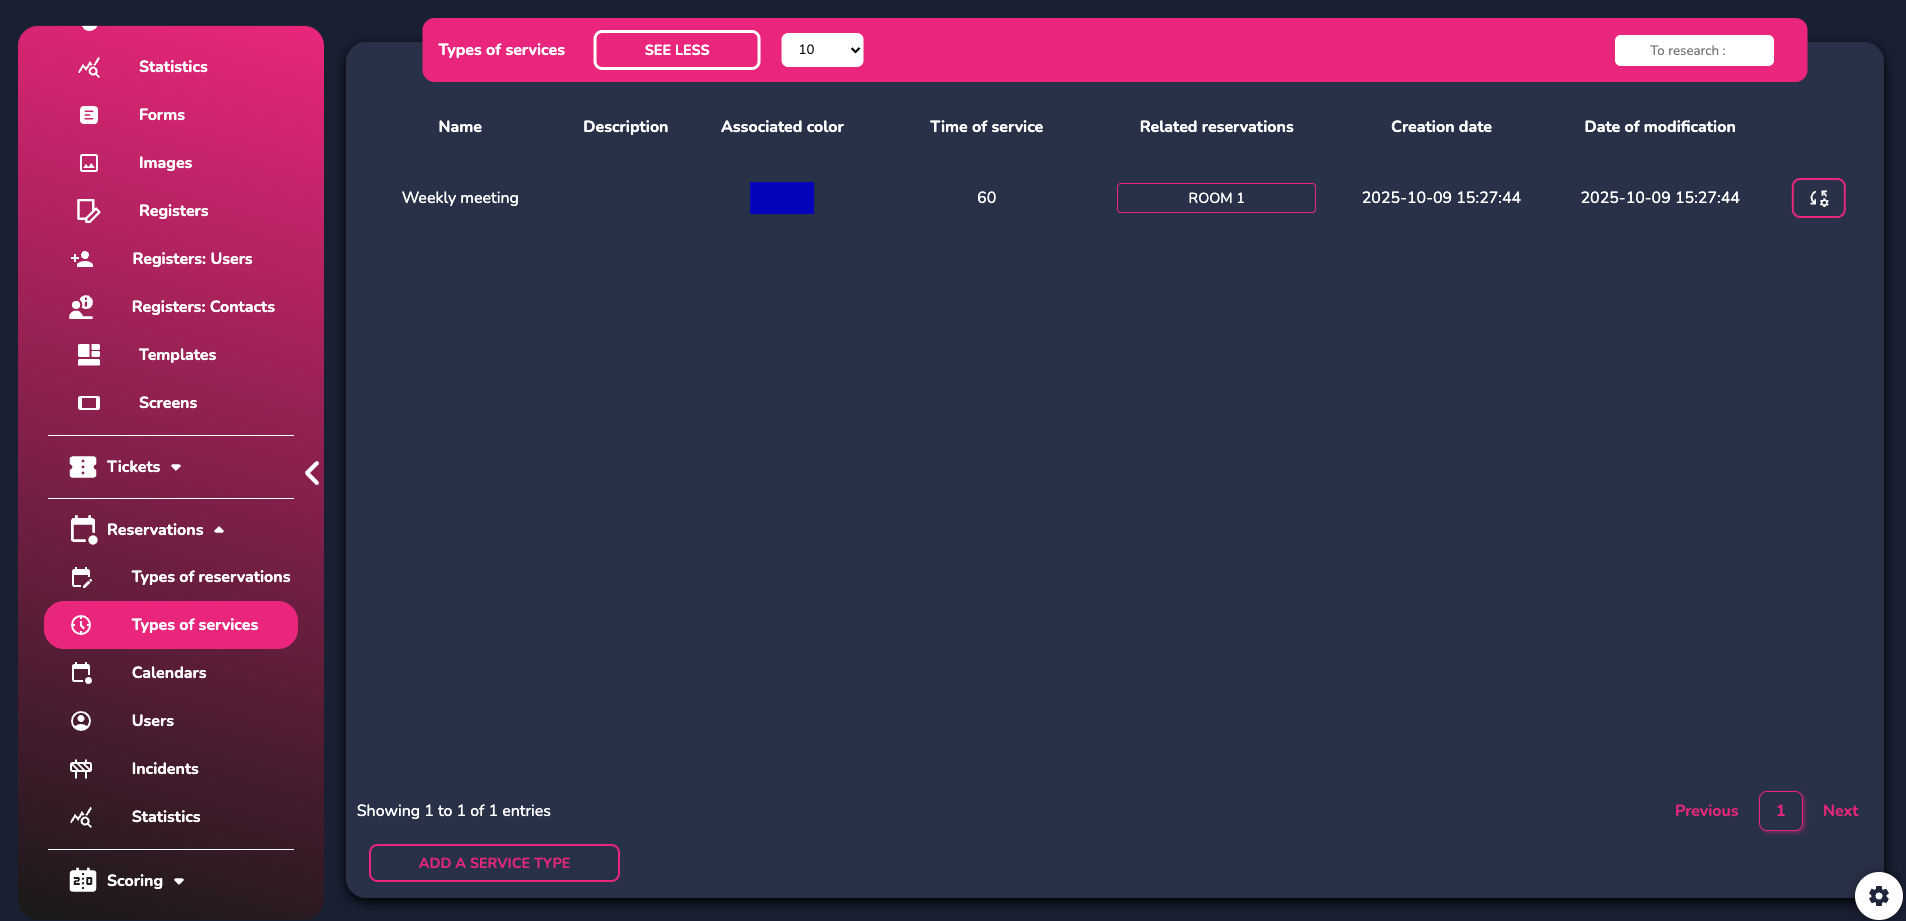
This tab allows you to create service types that you want to offer and make available for a reservation.
To create a new type, click "Add" and set the desired service parameters:
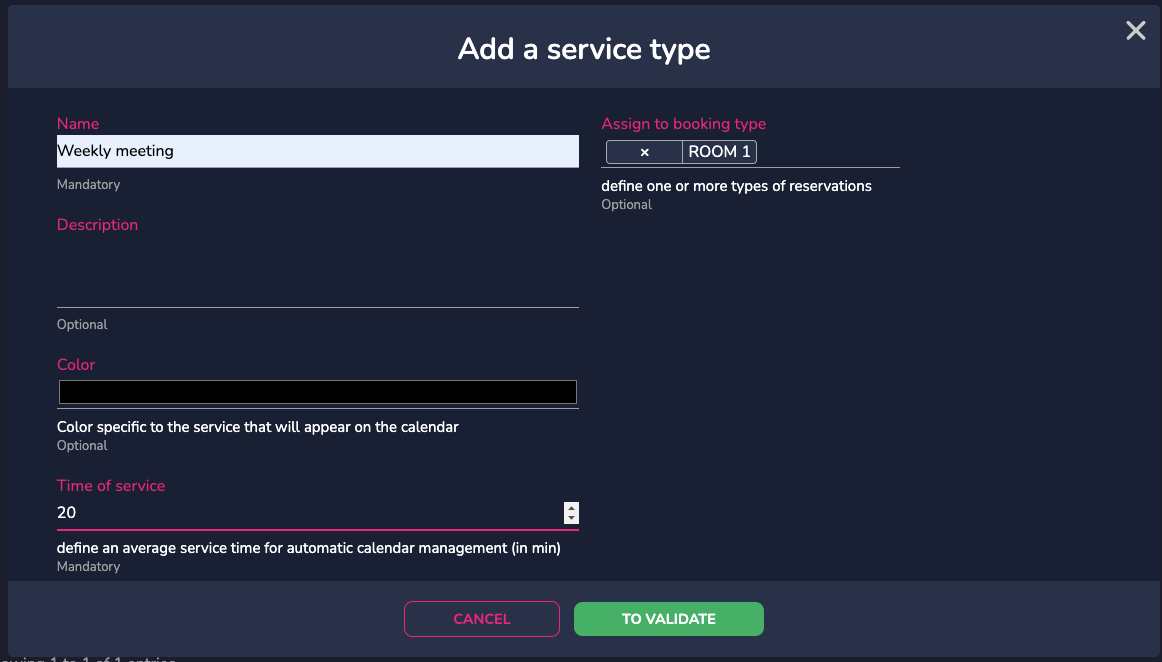
Give it a name, a description, and a color if needed, then set an average duration for this service. You can also link it to a reservation type (see the paragraph below).
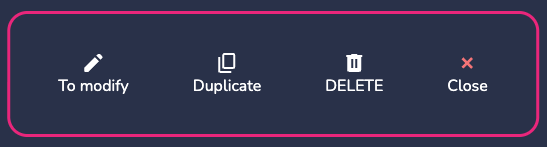
Once the service is created, you have access to the following actions:
¶ RESERVATION TYPES
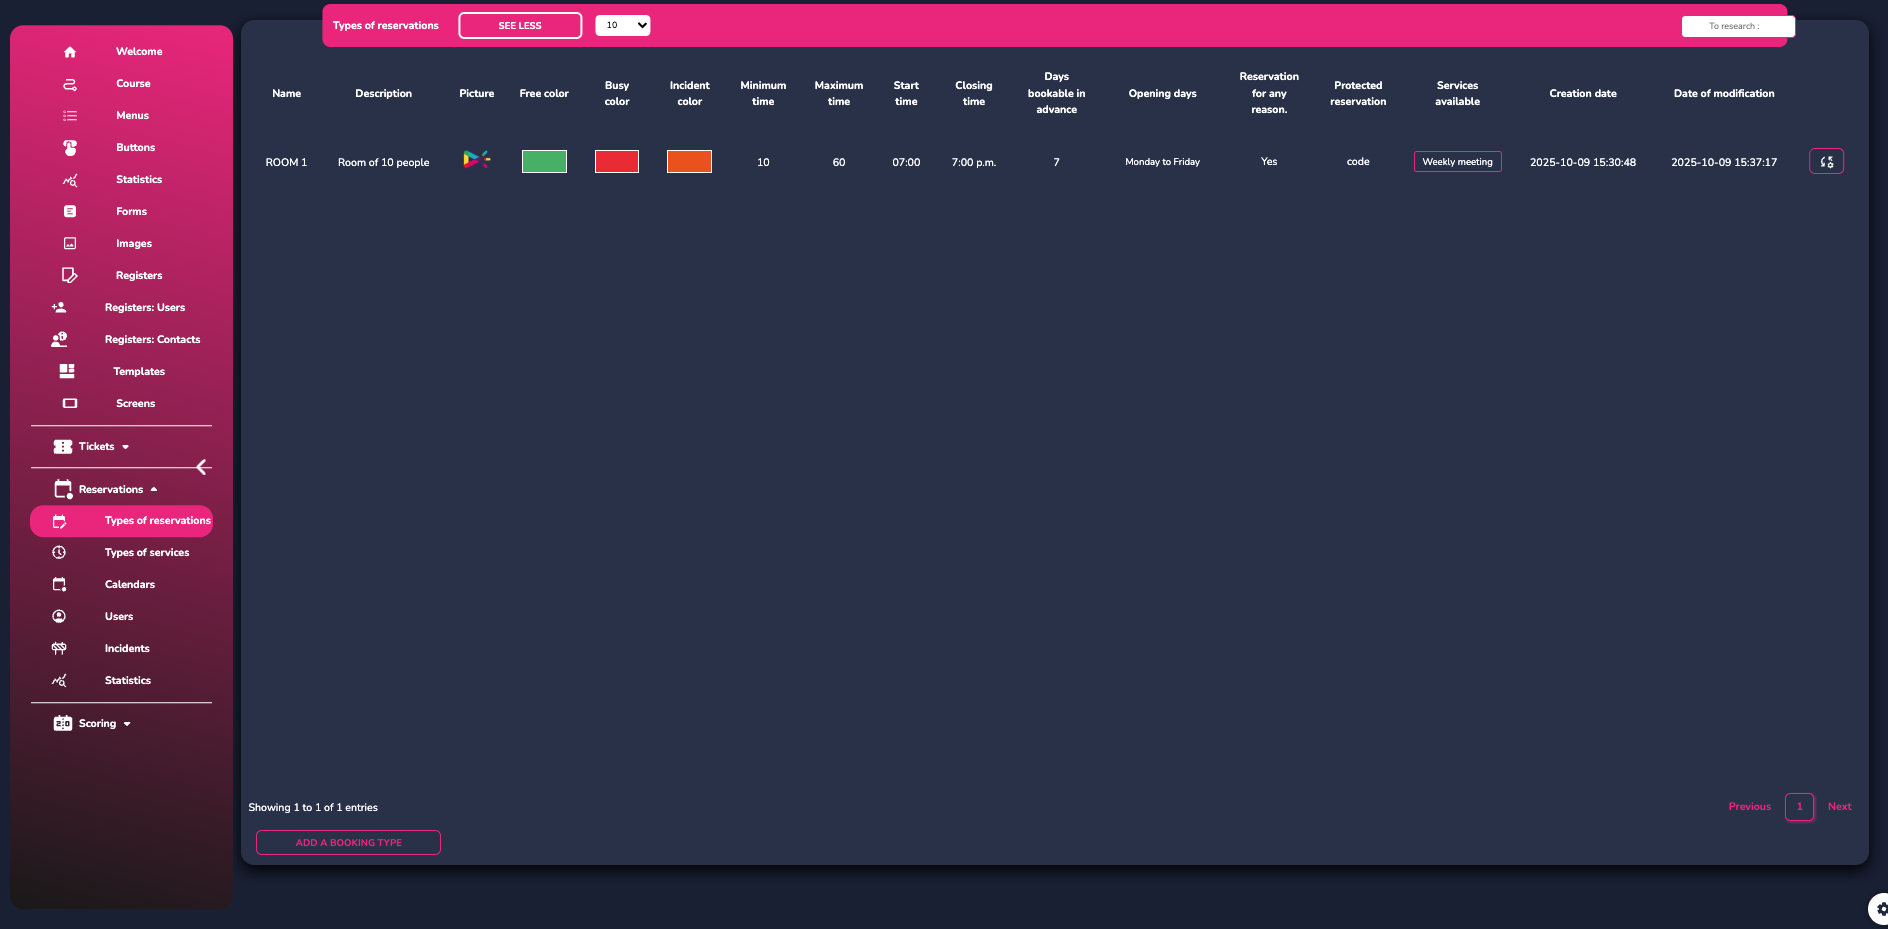
Click on "Reservation Types" to configure the different reservations available on your screen.
Add a new reservation and set its main parameters:
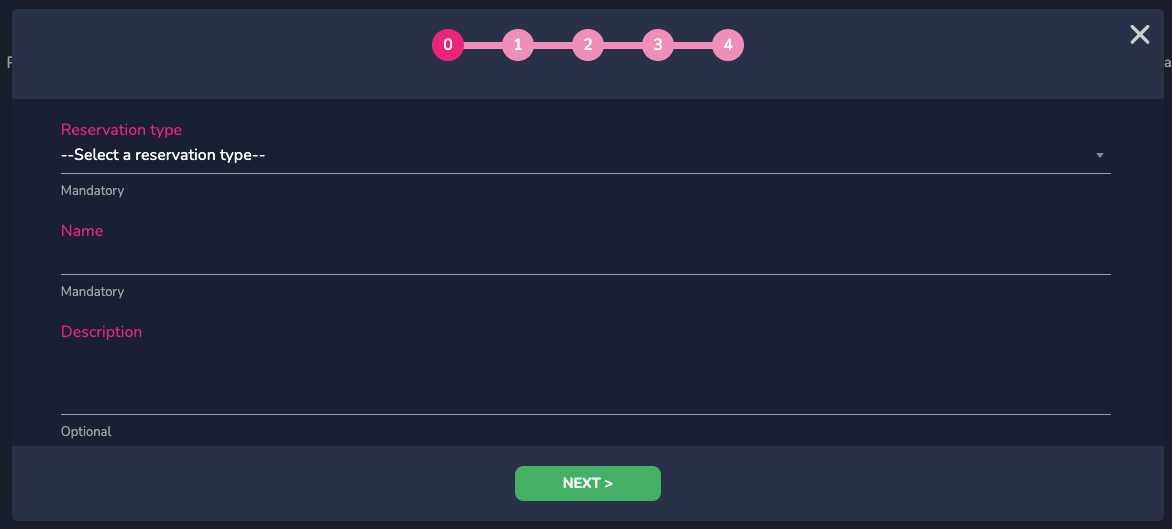
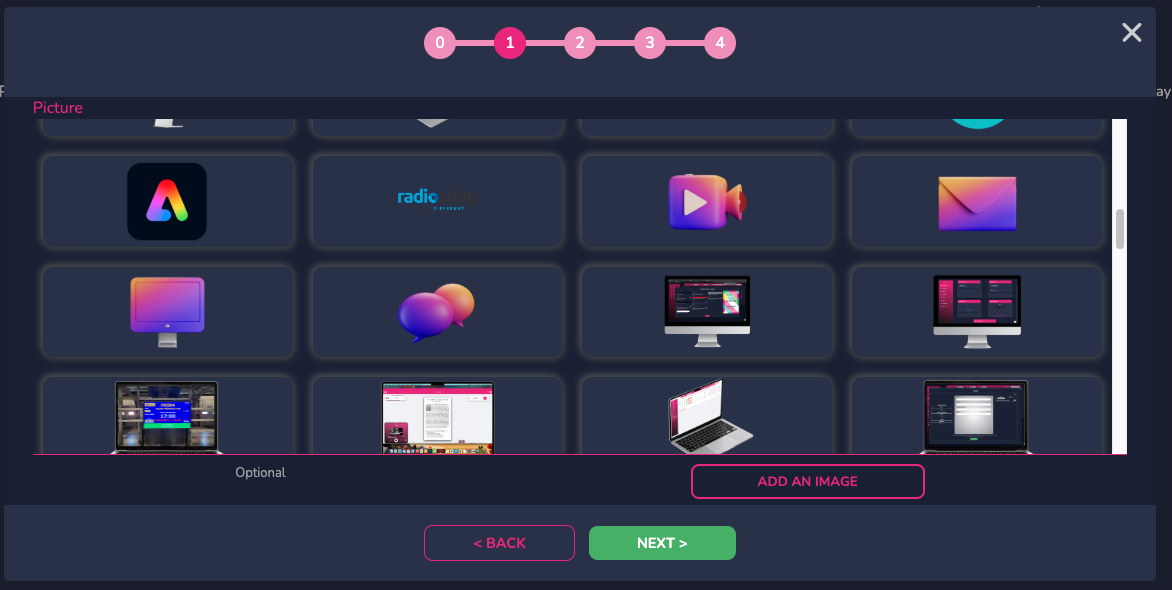
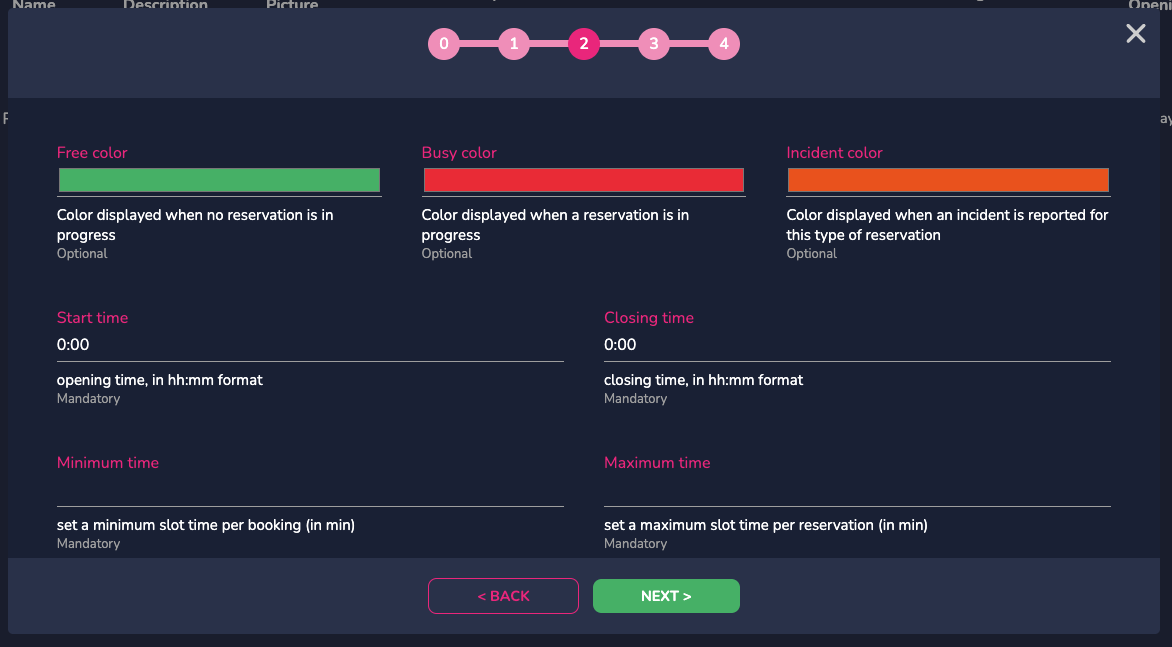
Set the name and the reservation type. Then, add an image if you wish to better identify the reserved room.
Next, set the colors that will appear when the room is available, occupied, or unavailable. Also, configure the room’s opening and closing hours for reservations, as well as the minimum and maximum duration for a reservation in that room.
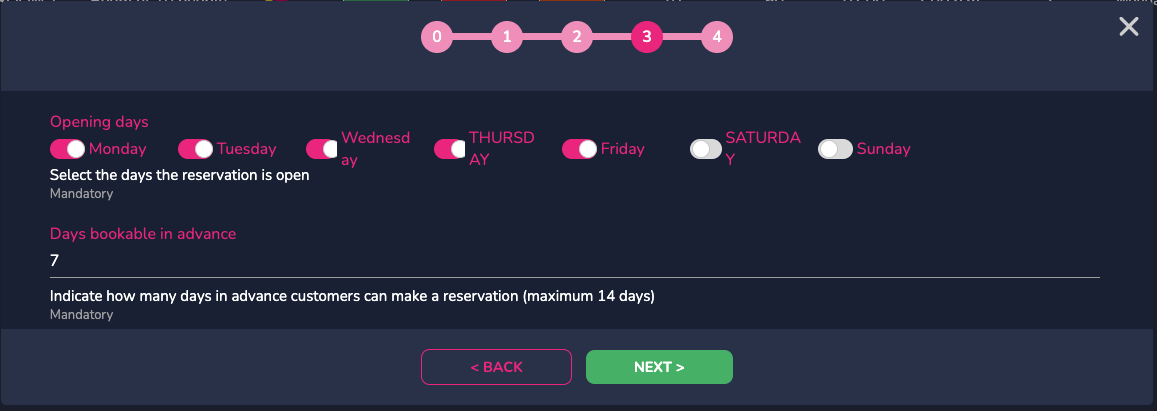
Set the opening days and how many days in advance reservations can be made:
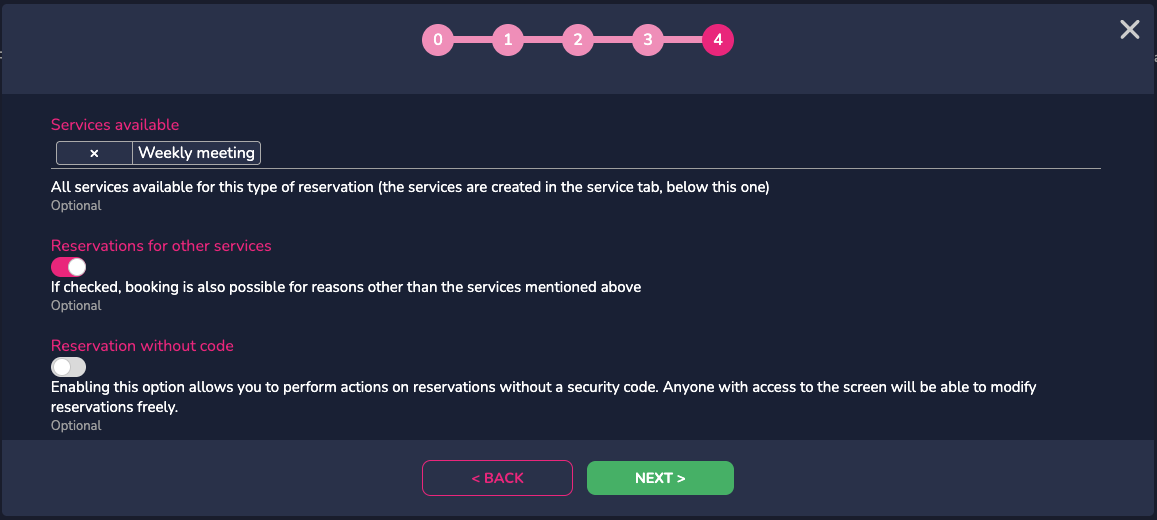
Specify the services (as described earlier) available in this room, whether new services can be added, and whether you want to enable a security code for these reservations.
Once your reservation is created, you have access to the following actions for each reservation type:
¶ CALENDERS
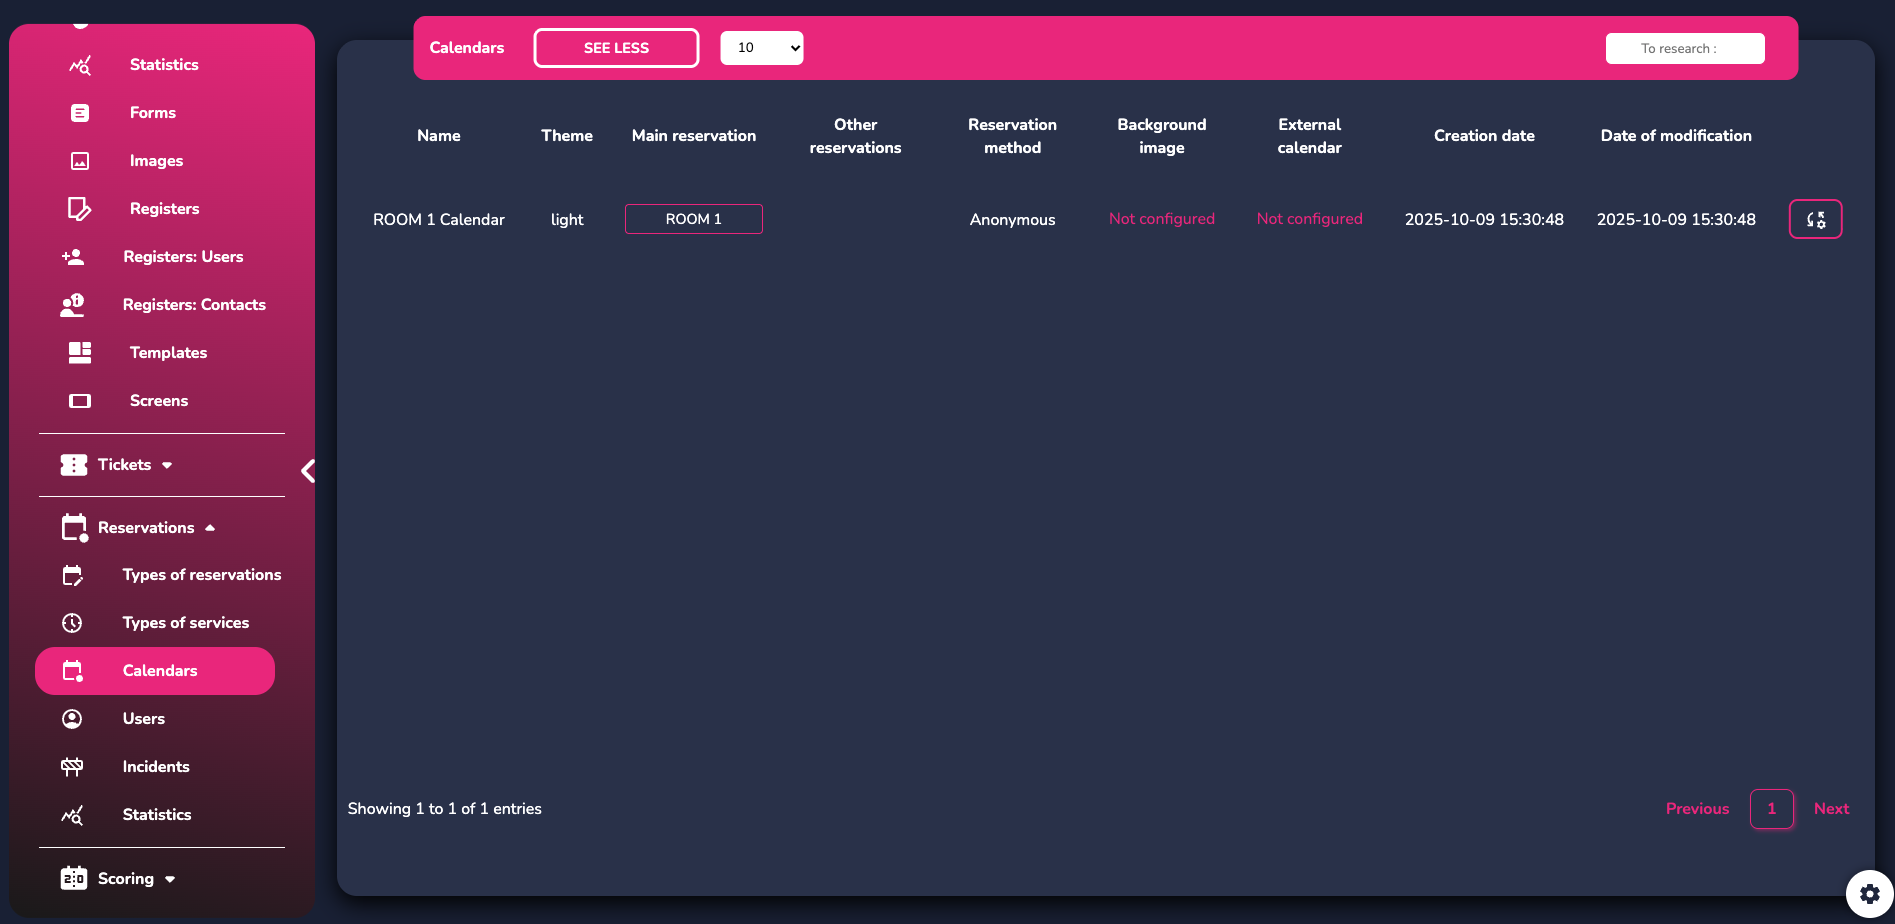
Creating a new room will automatically generate a calendar linked to that room.
In the "Calendars" tab, you can access all the settings and views for your room reservations.
By clicking the actions button to the right of your calendar, you can access the following options:

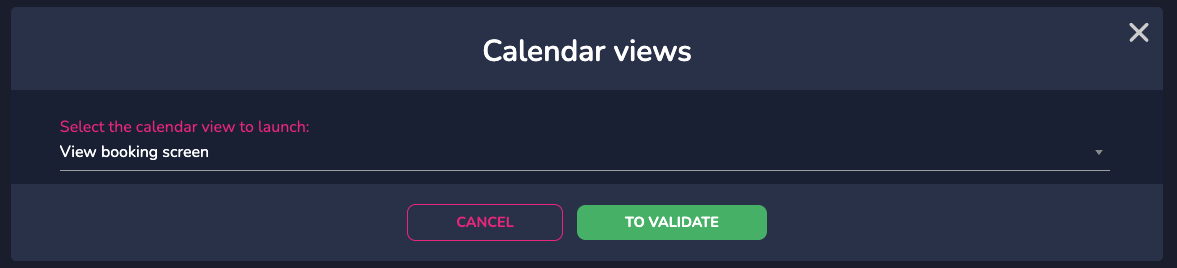
- Click "Throw" to visualize your calendar in multiple formats.
Here is an example of the reservation view:
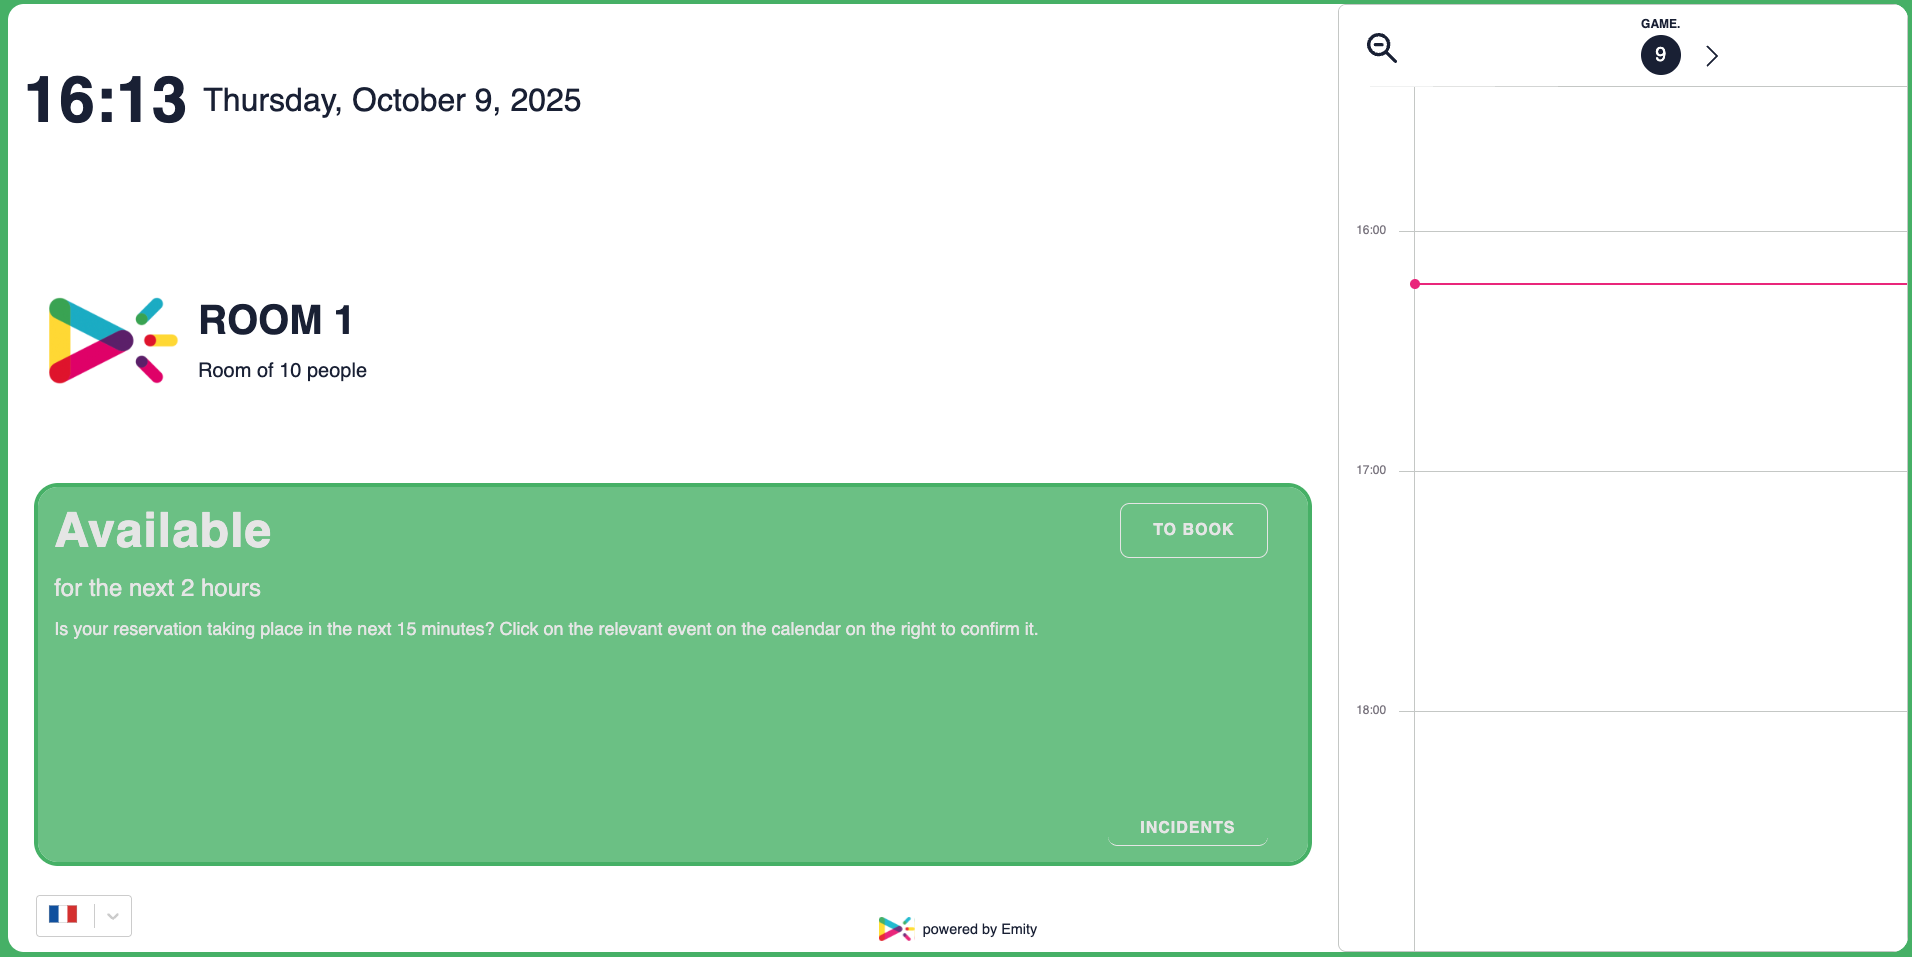
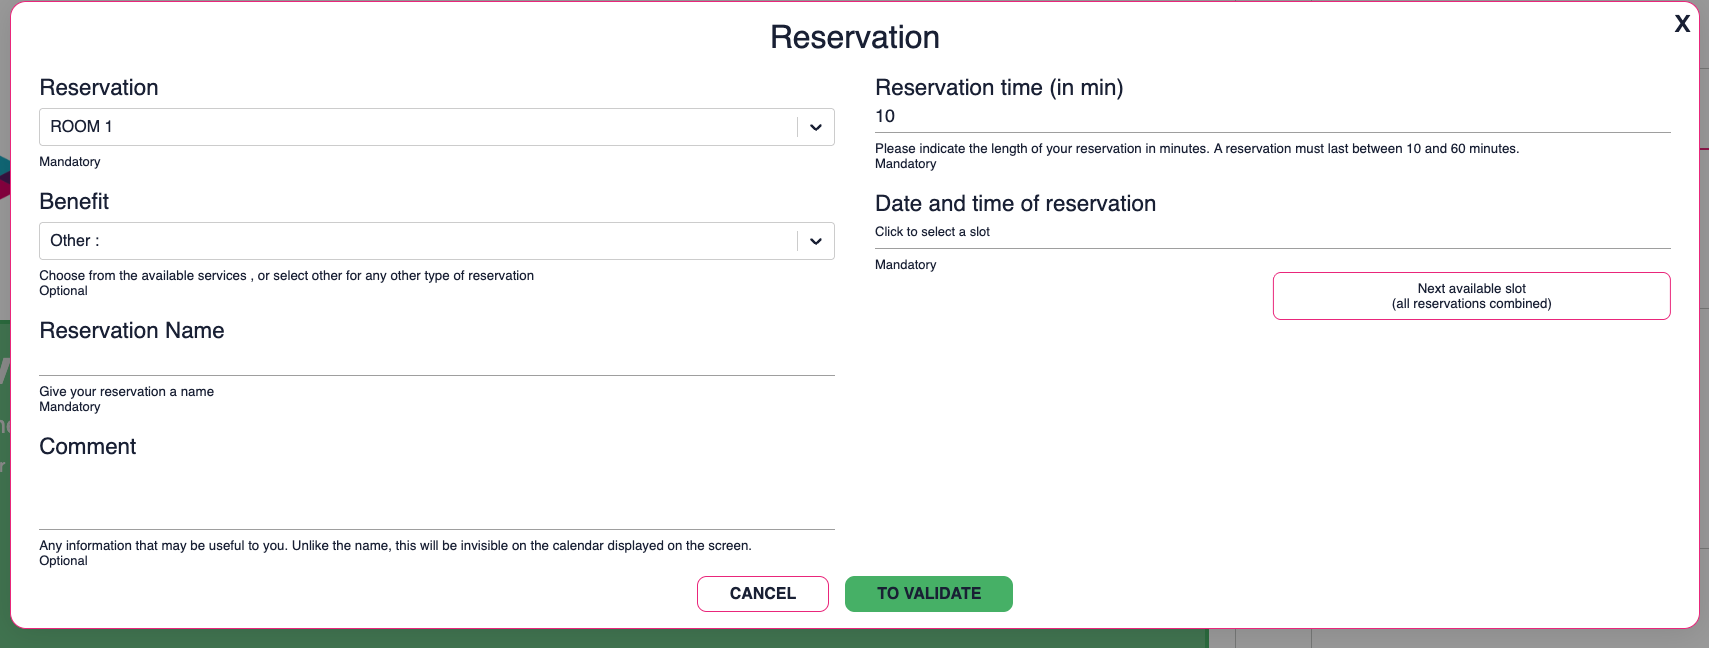
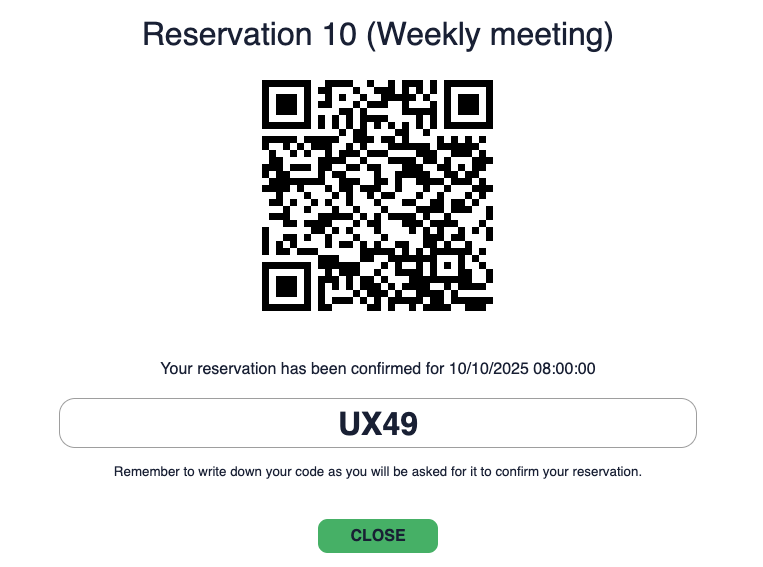
You can also make a reservation directly from this page. Click "Reserve" and enter all the necessary information to book your time slot.
Once confirmed, a QR code will appear, allowing you to add the reservation to your personal calendar if you wish.
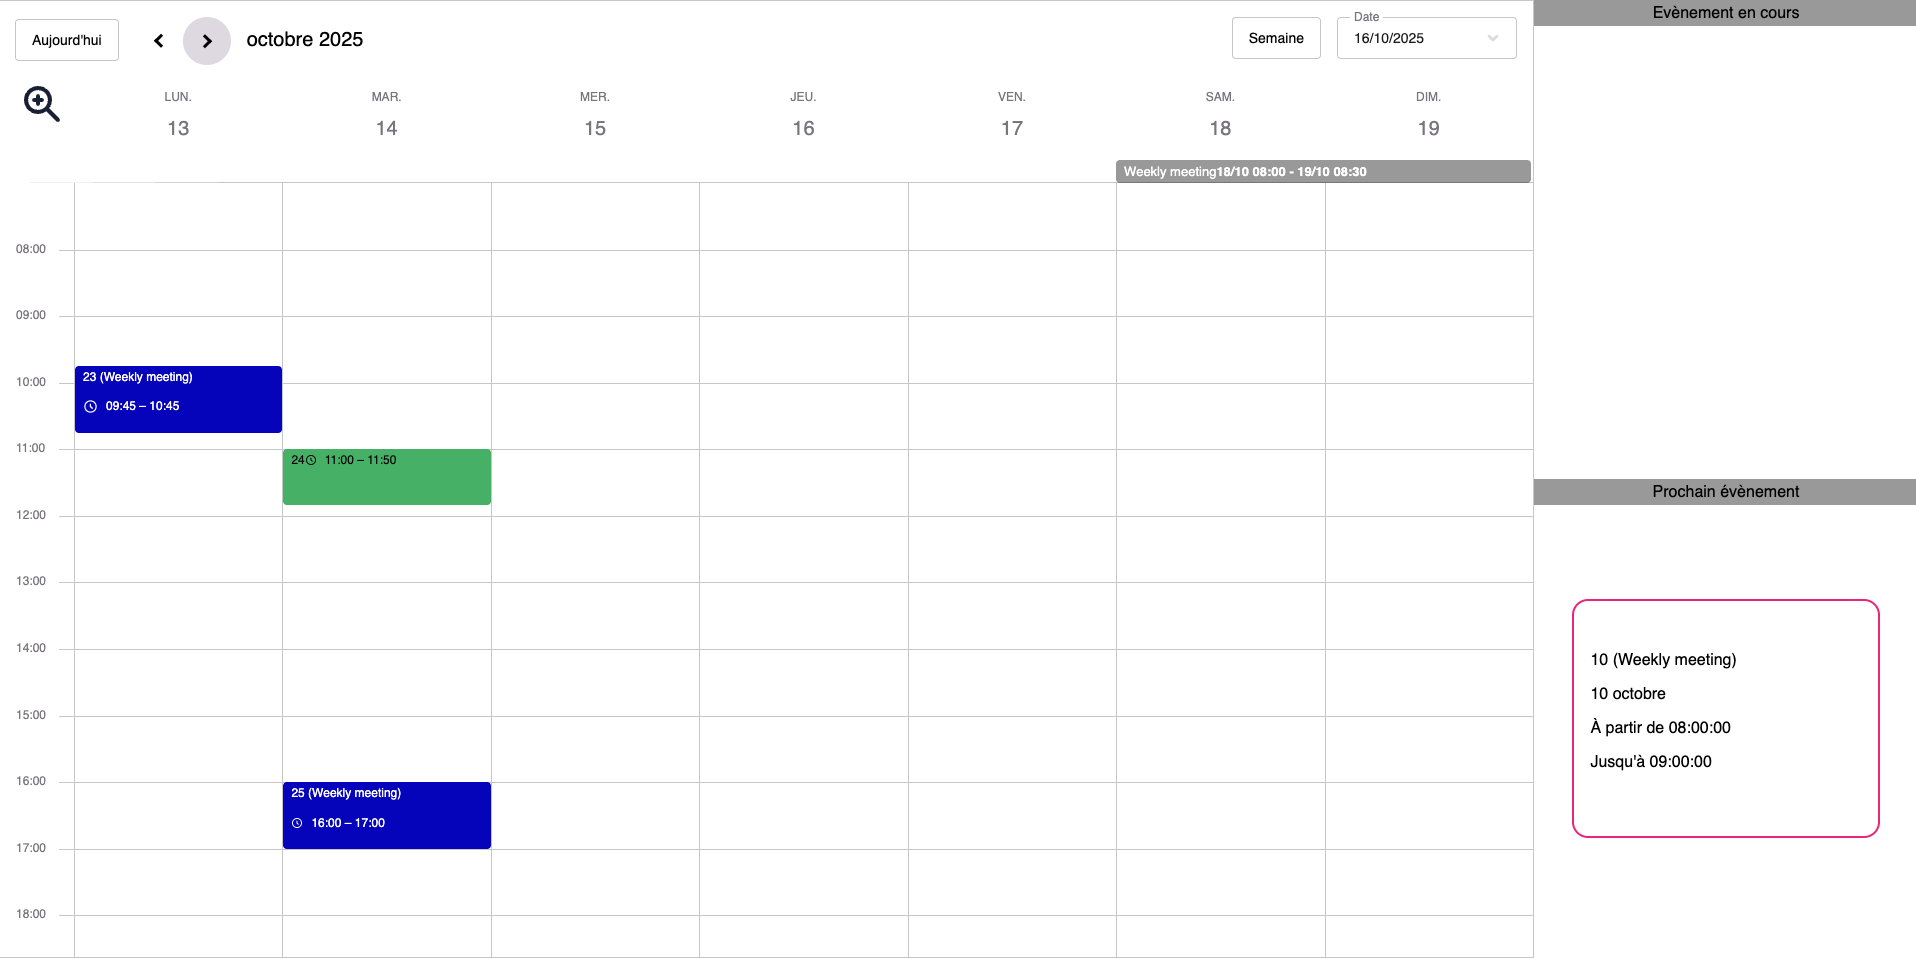
Here is an example of the overall calendar view:
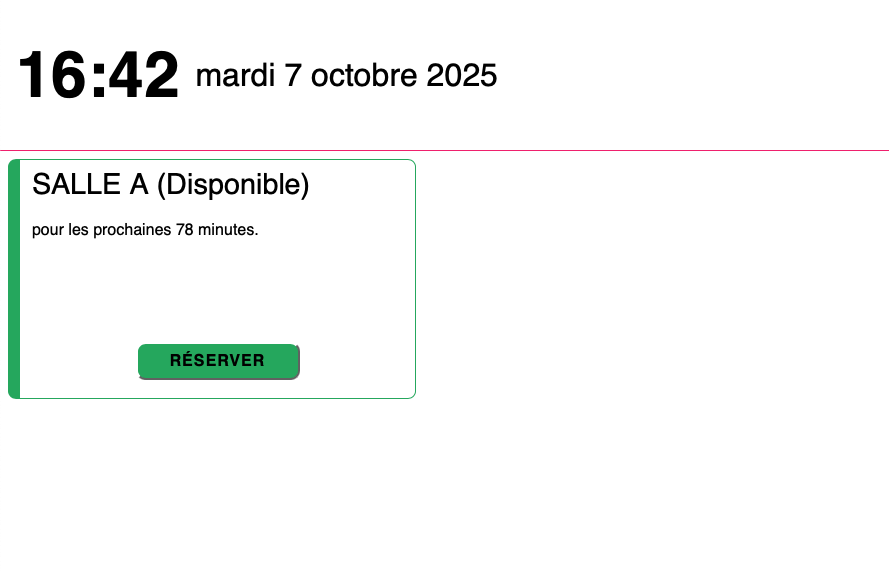
Here is an example of the view showing the list of available reservation types:
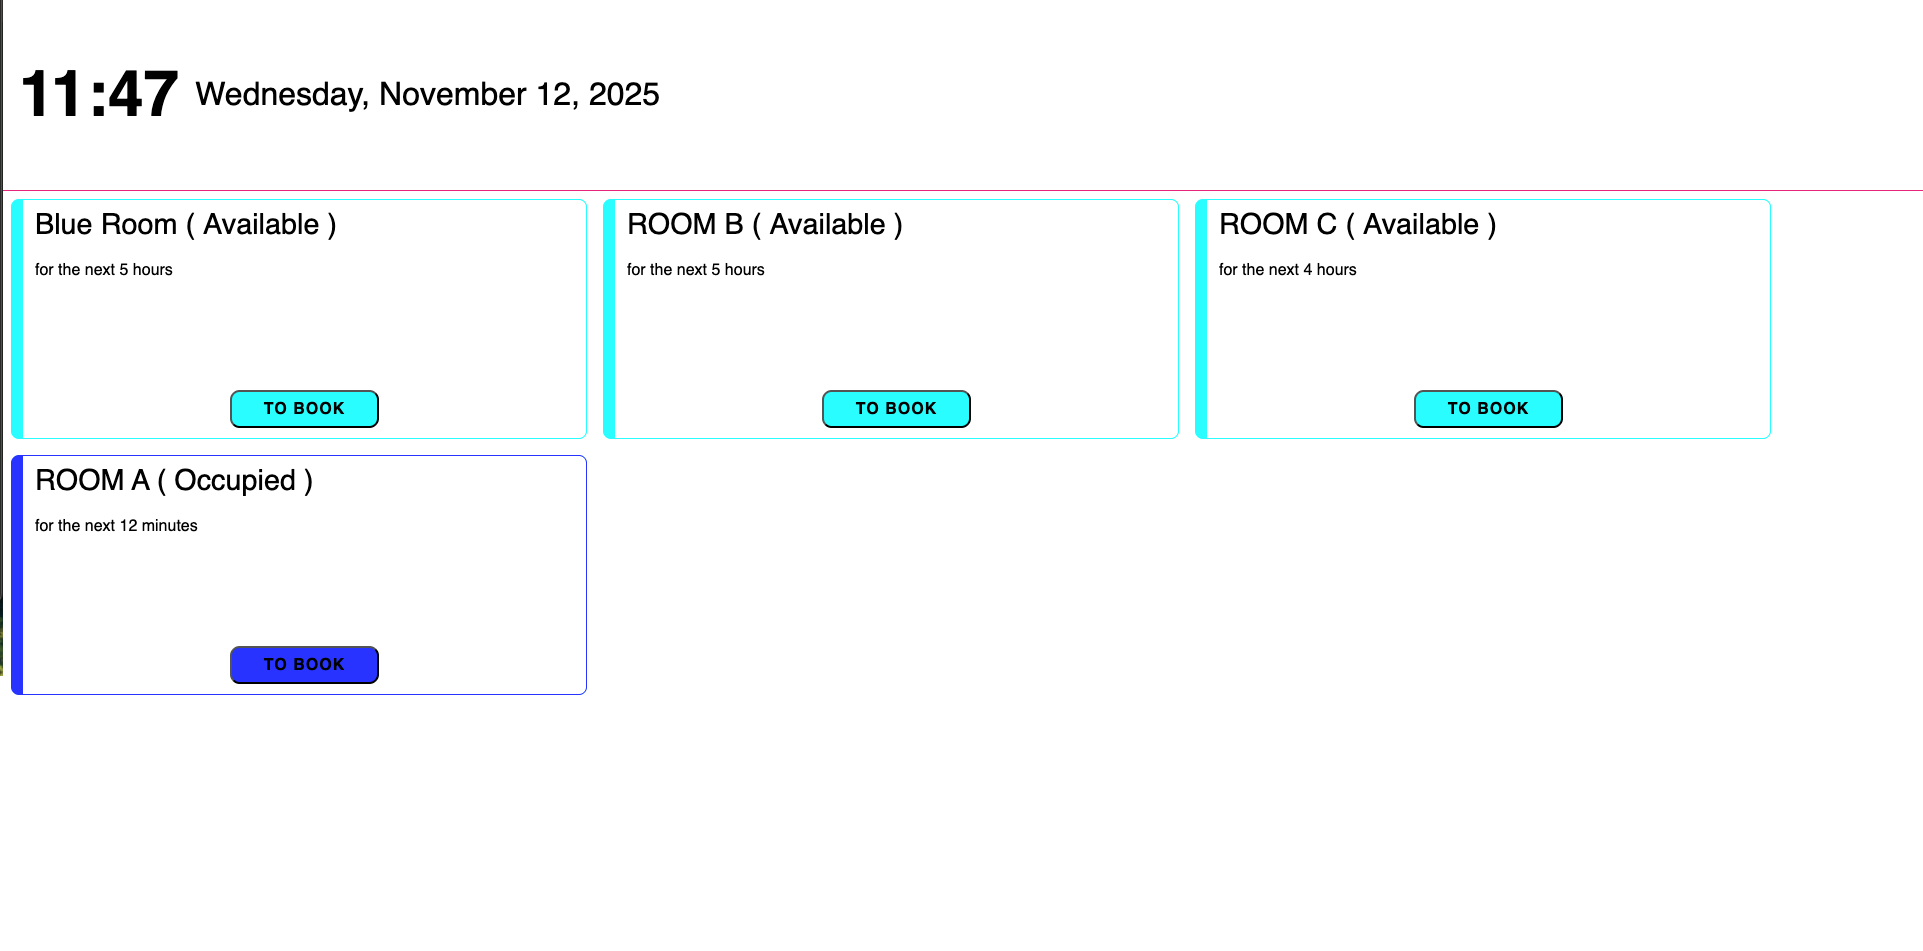
You can also enable the booking of all rooms through a single room, by selecting the same types of reservations available across all your rooms.
As shown below, you can then book any available room.
- Click "Edit" to review and adjust your calendar display settings.

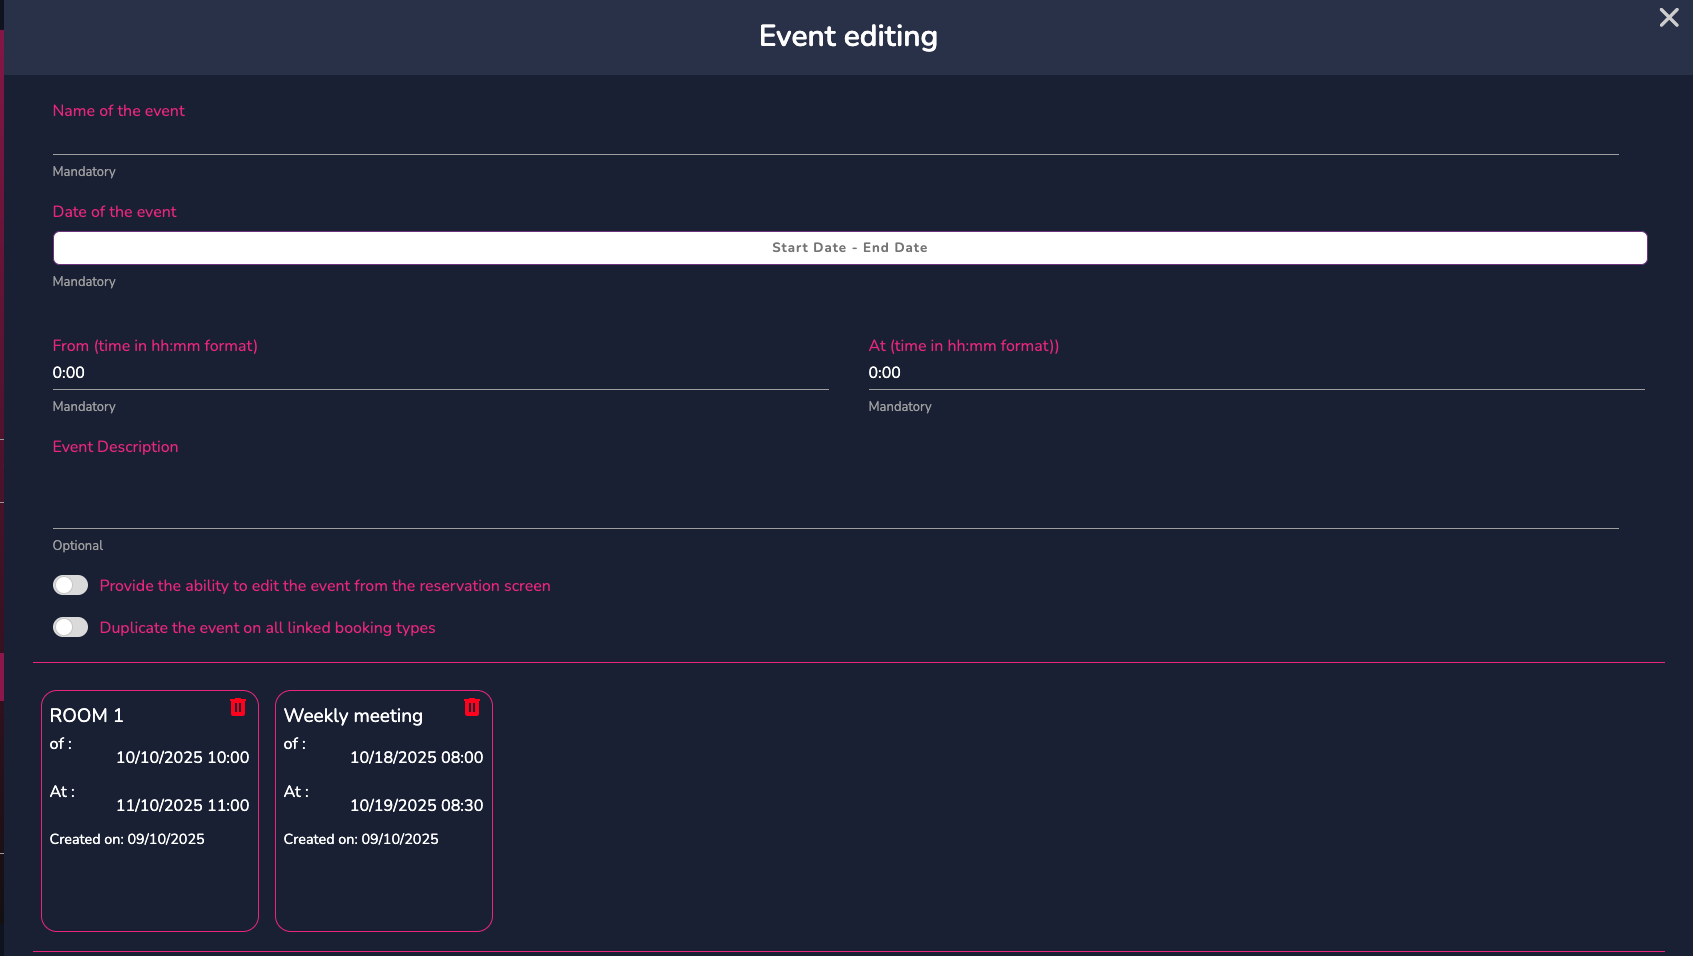
- Click "Create a Reservation"
Click this action to create a reservation directly from the software administration. Select and specify the criteria for your event.
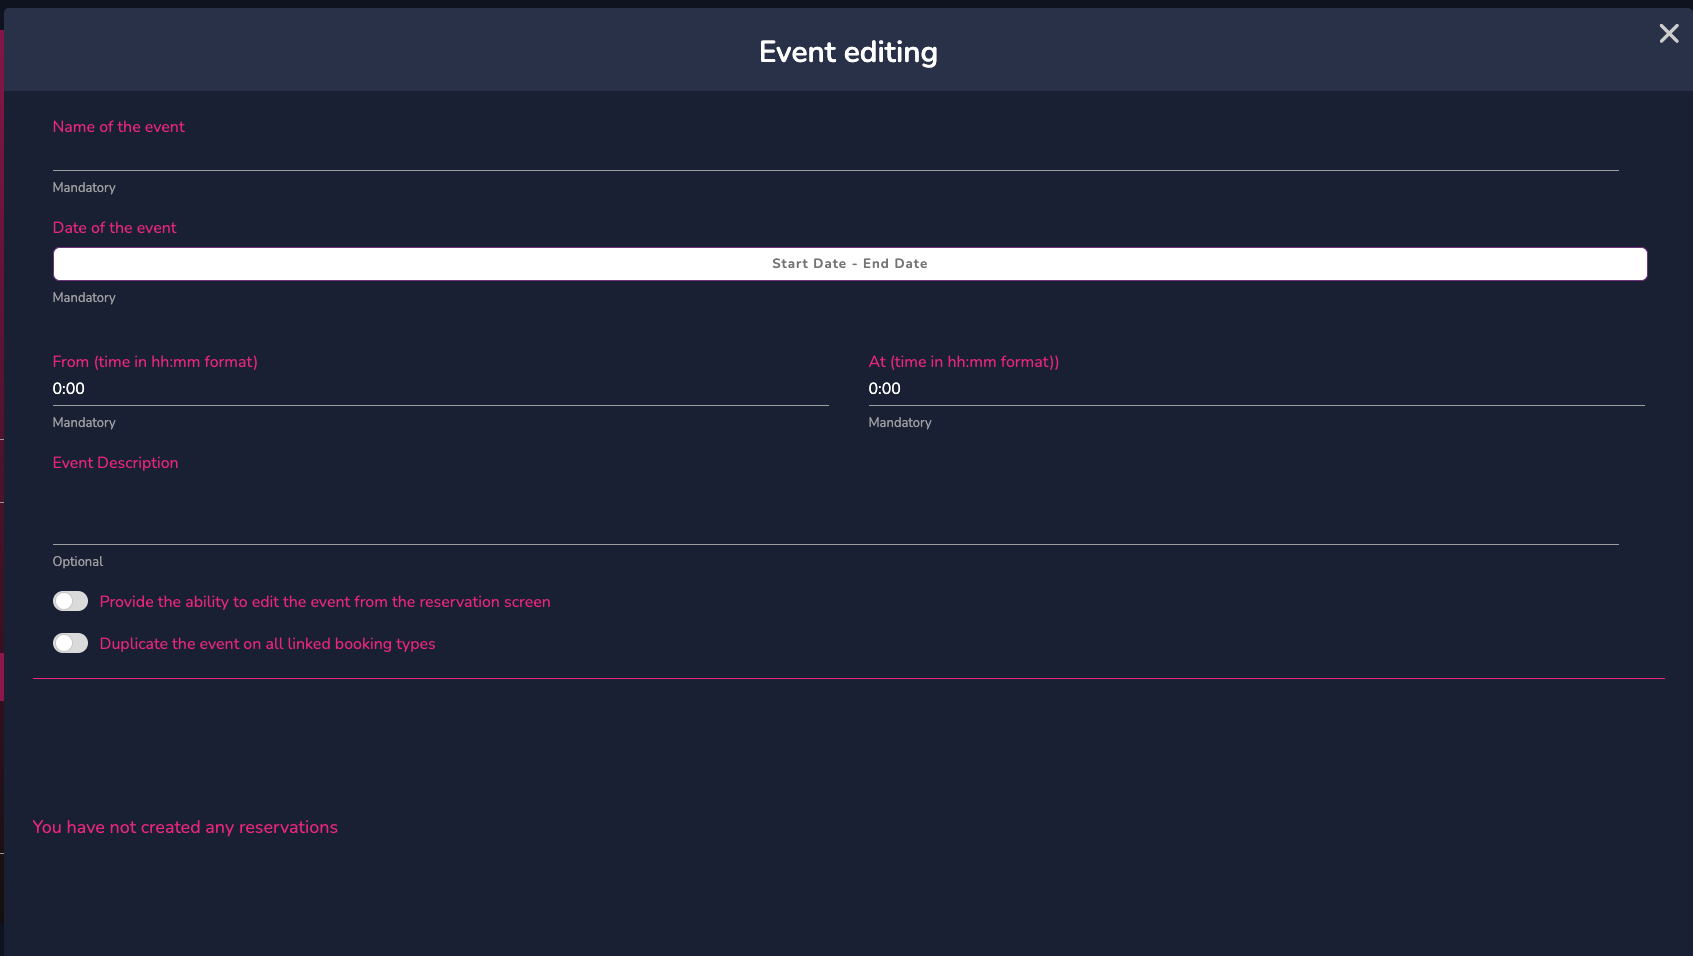
Once the reservation is confirmed, it will appear at the bottom of the modal, and you can then exit these settings.
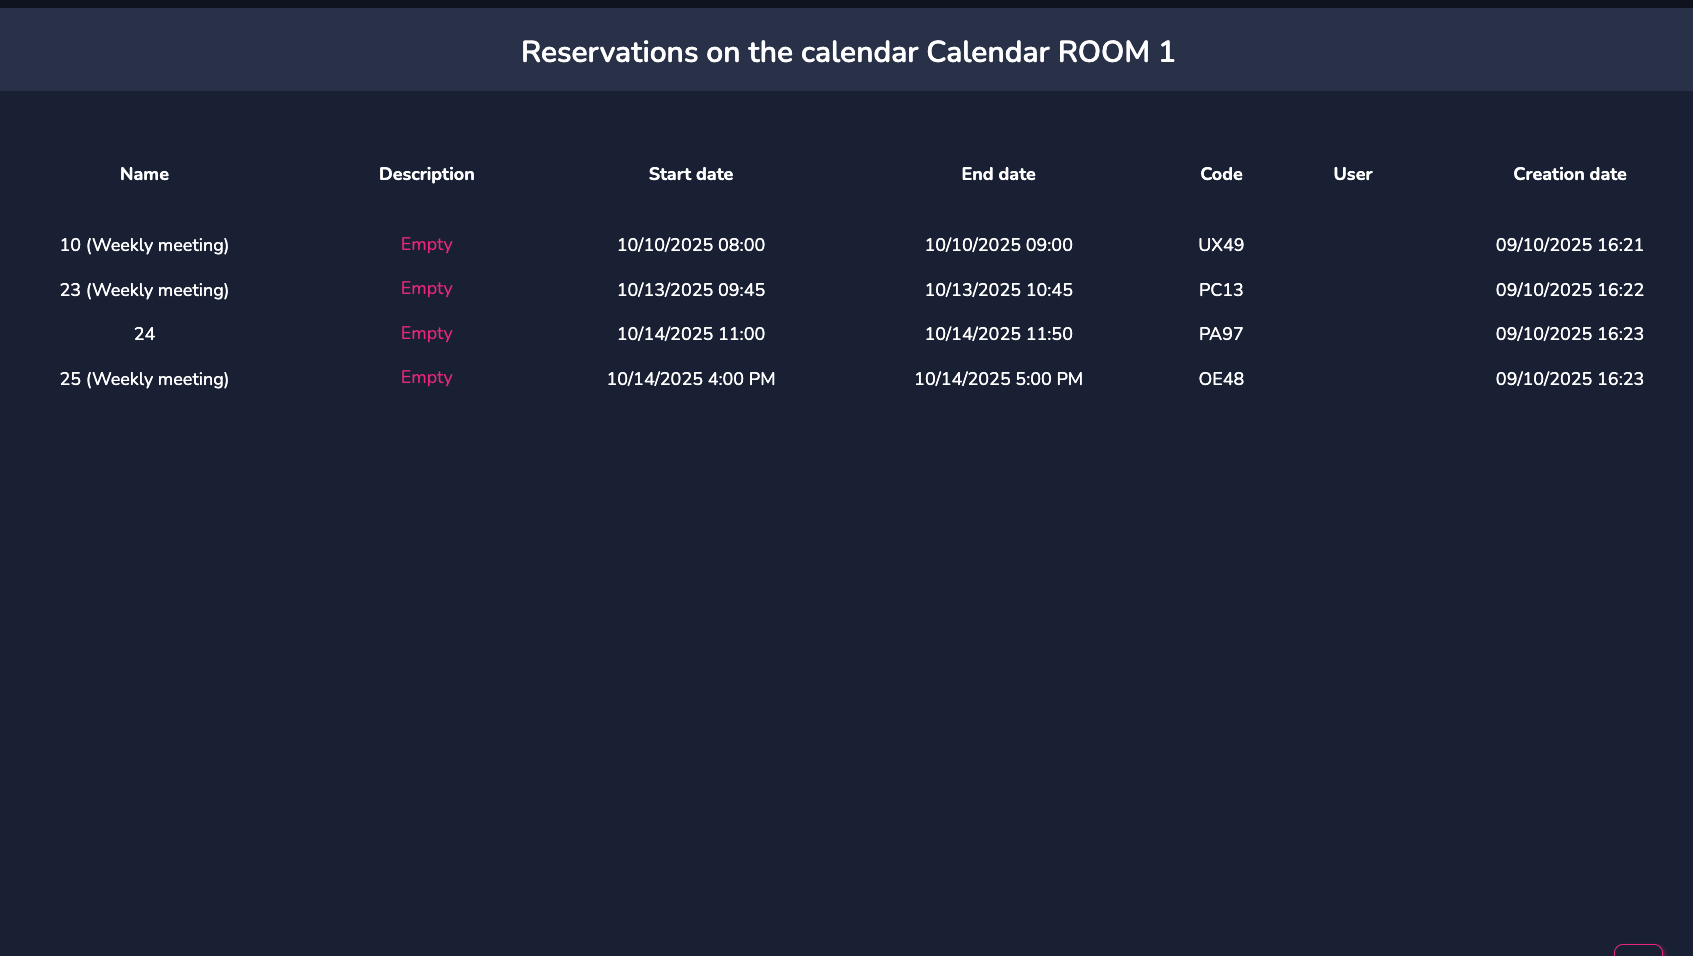
- Click "View Reservations"
This action allows you to quickly view all reservations made for the selected room.
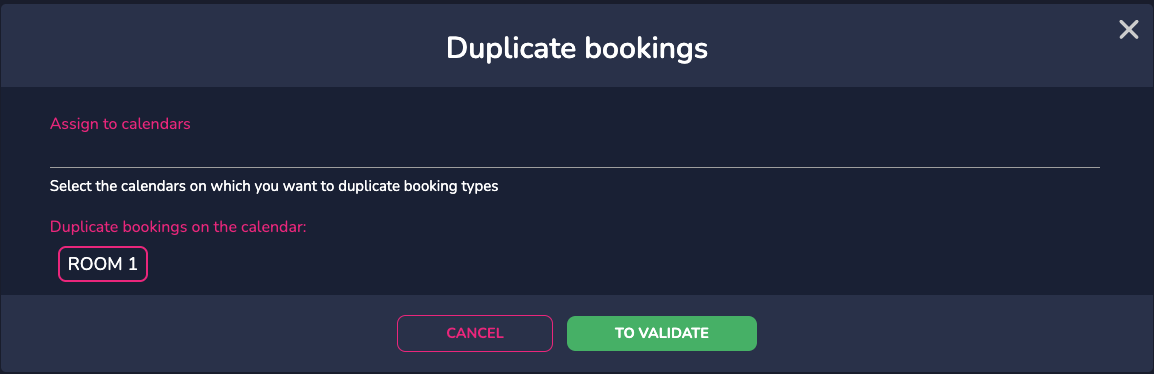
- Click "Duplicate Available Rooms"
Here, you can duplicate the reservations from one room to another room (previously created).
- Click "Synchronize"
This action allows you to synchronize your professional or personal calendars with the calendars of the rooms created in E-CLICK. Once your account is linked, any appointments made in the application will automatically appear on the overall calendar.

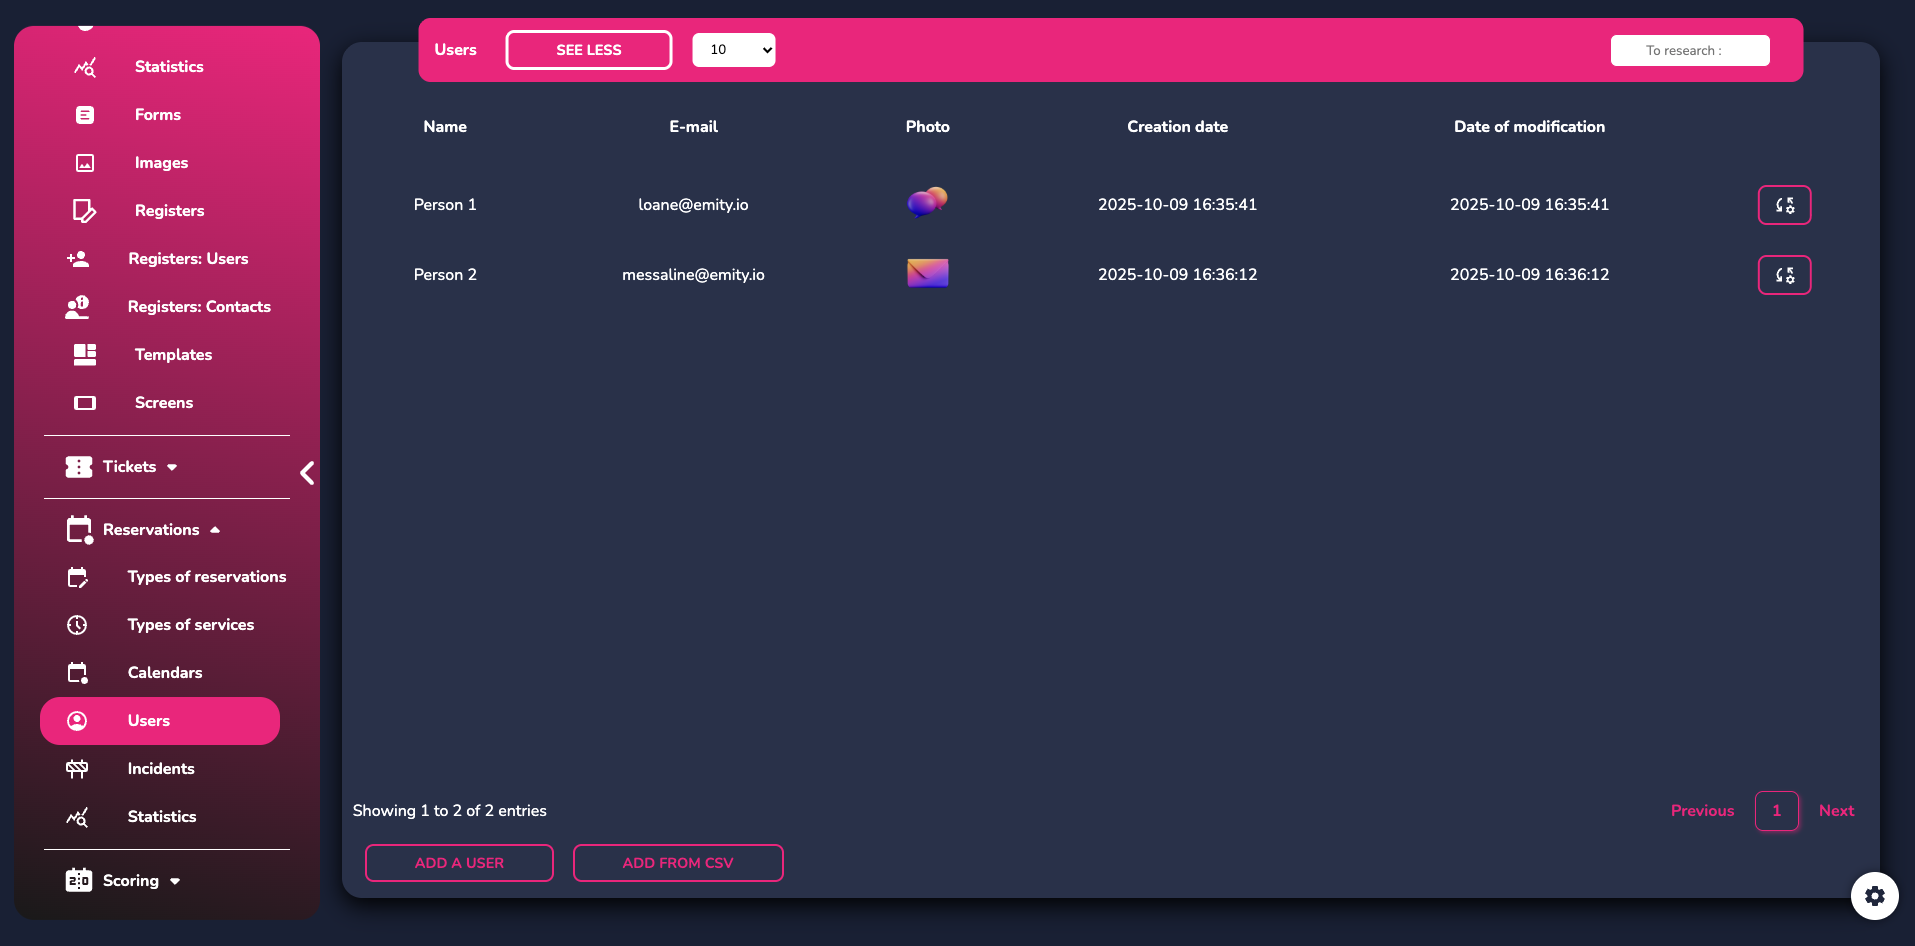
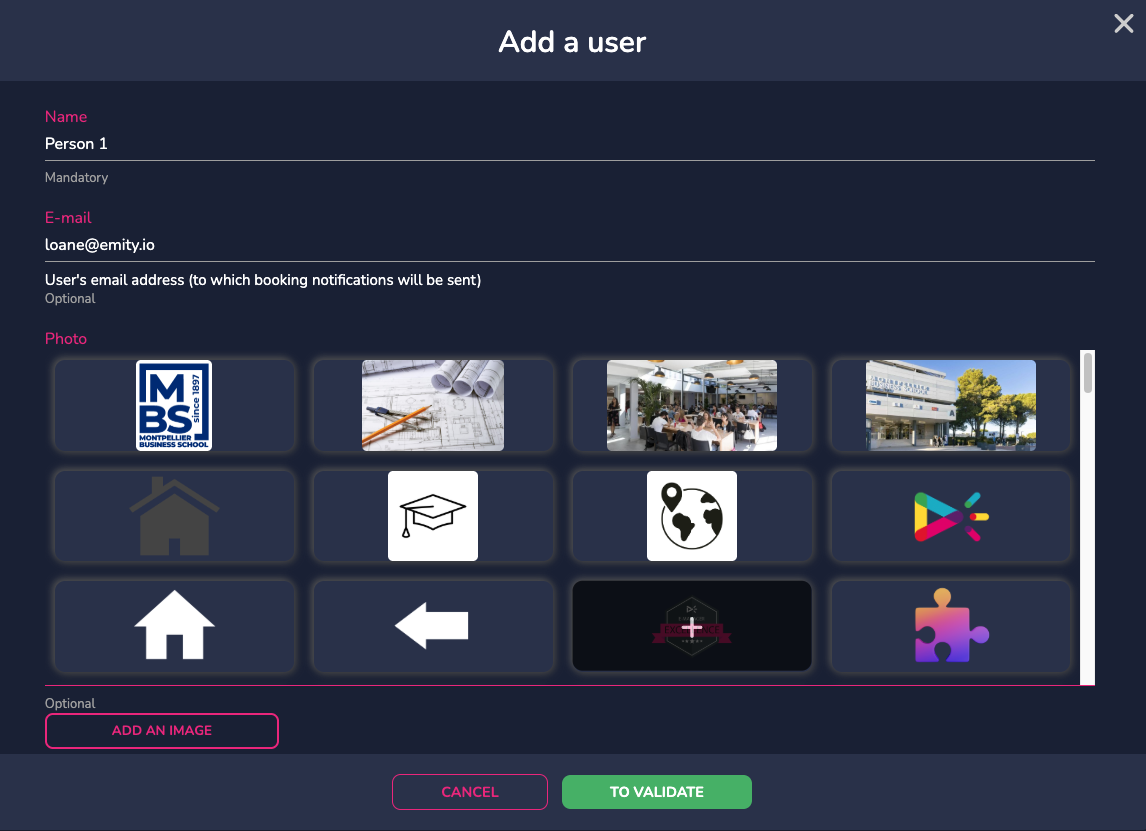
¶ USERS
This tab allows you to add users to your reservations.
Once users are created, you can add them to your time slots so they are instantly notified of your meeting via email.
¶ INCIDENTS
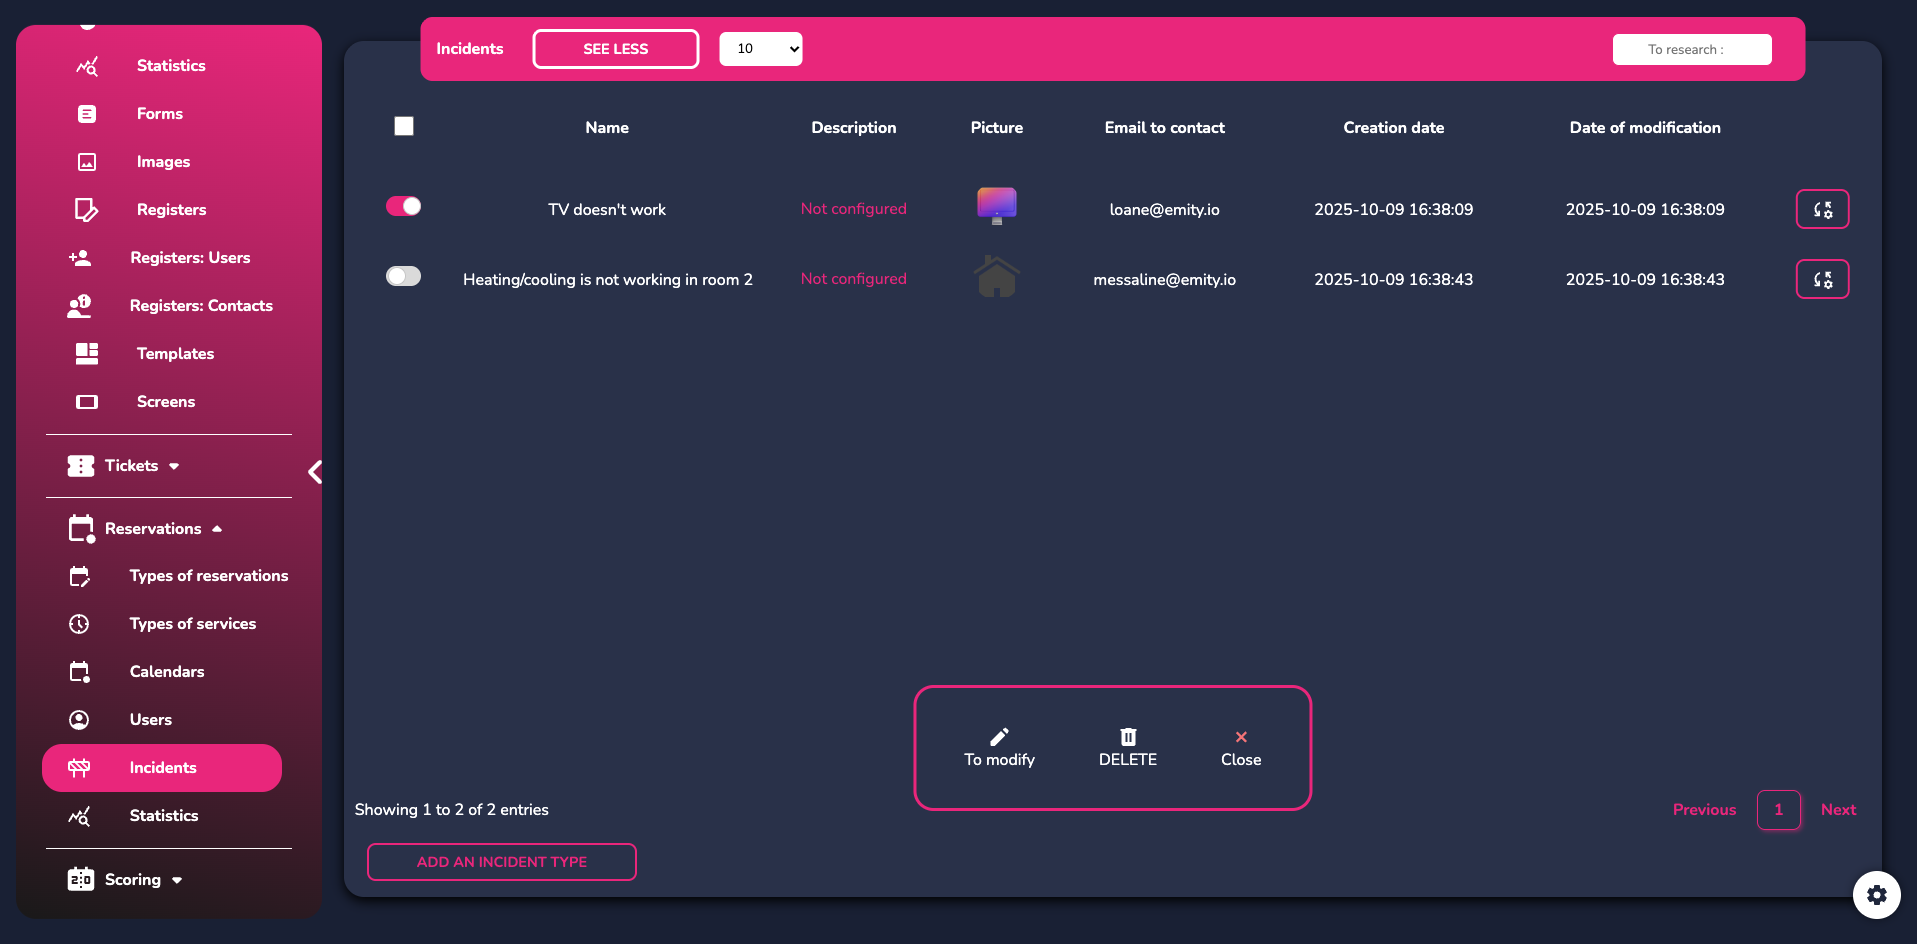
Next, go to the "Incidents" tab, where you can add incident categories to later assign them to a room if needed.

¶ STATISTICS
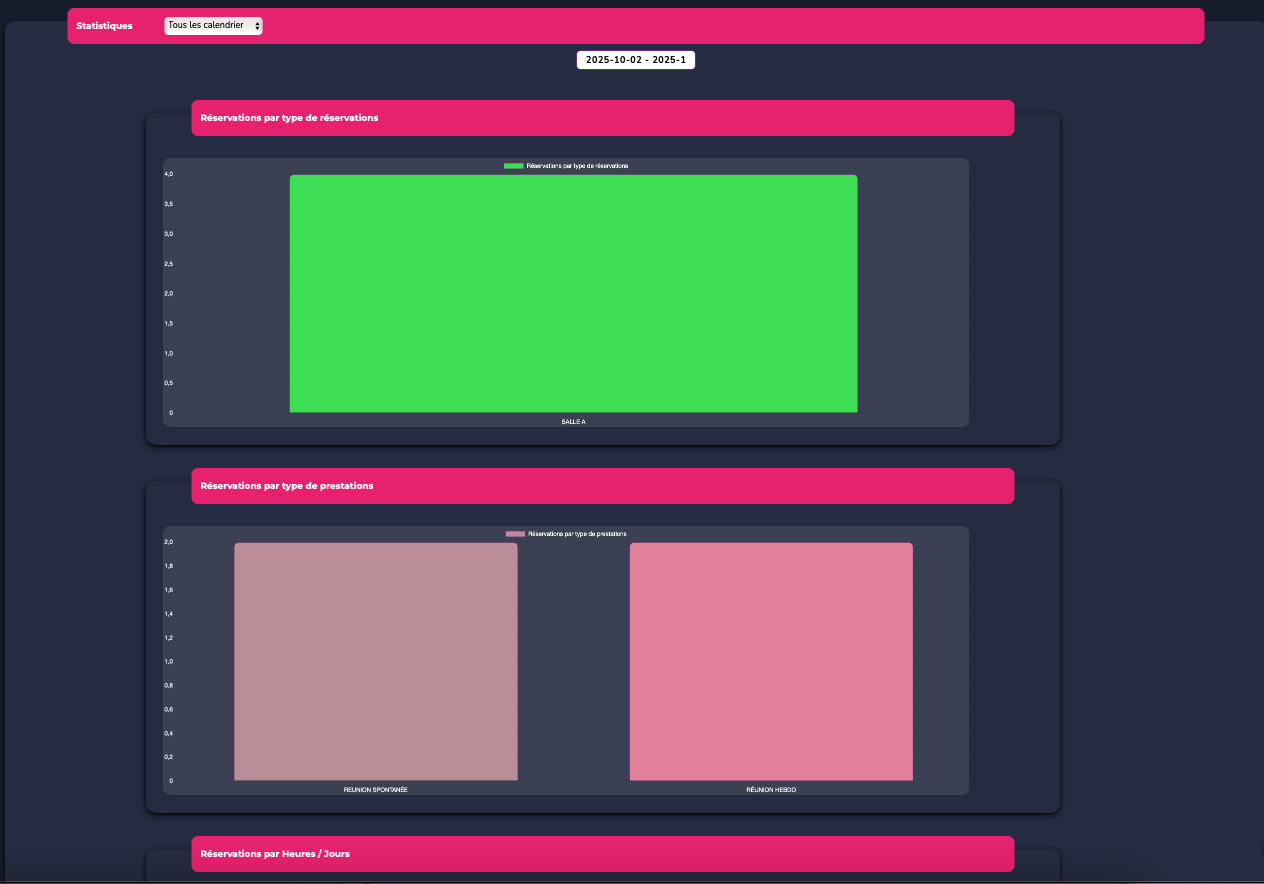
View the statistics of your rooms to optimize your spaces and their usage.
¶ DEPLOYMENT
¶ LINK WITH E-MANAGER
Once back in your E-MANAGER account, go to the "PLAYLIST" tab.
To display on your screen outside the meeting room, copy the link of the calendar "reservation view".
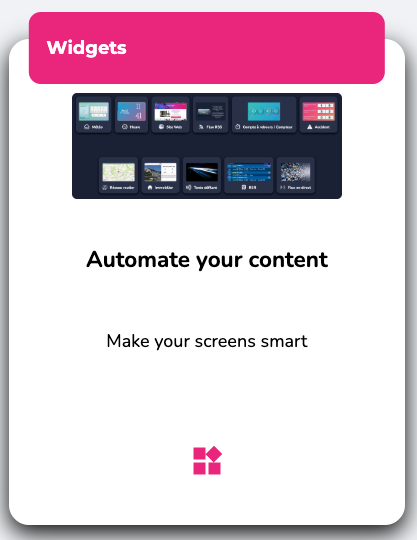
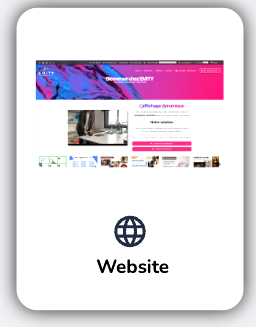
Enter your playlist and click "Add a Display":
Next, select "Widgets" then "Website". Insert the URL and confirm.
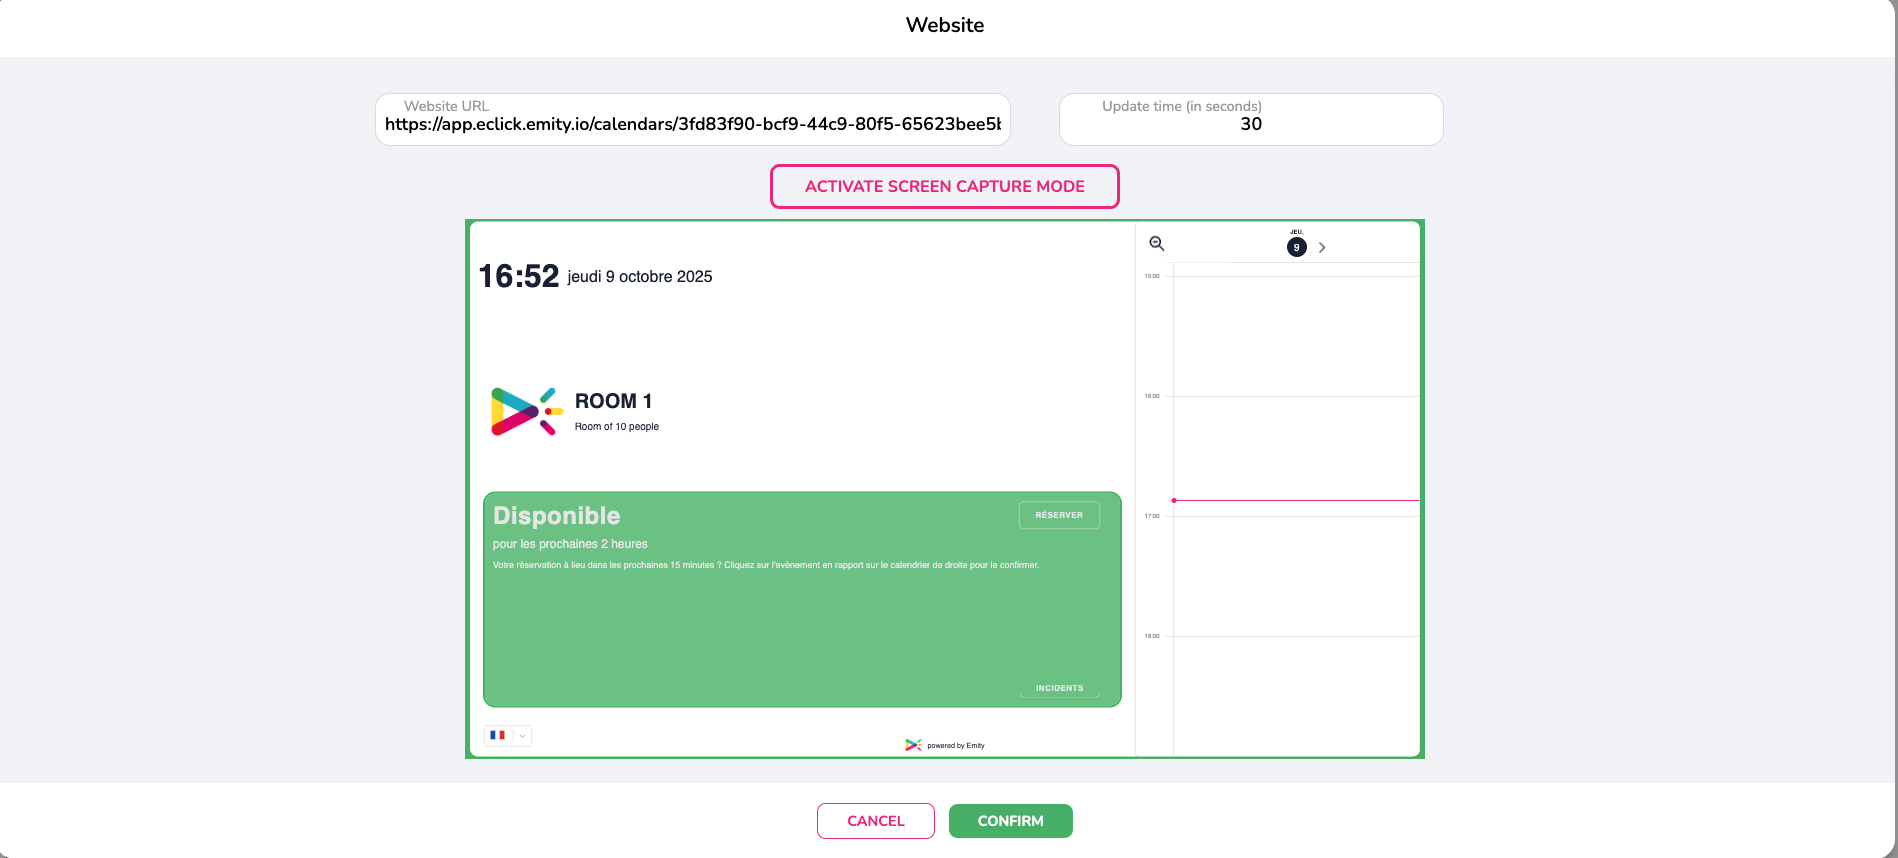
The final step is to save and broadcast your playlist.
¶ CUSTOMER SERVICE
Our customer service team is here to assist you, support you, and answer all your questions as efficiently as possible.
We are available via ONLINE CHAT on our website. You can also contact customer service by email at: support@emity.io
We have also made a video guide available, covering all the different steps for using our platform. You can access it here:https://www.emity.io/tutoriels/
or on our youtube channel : https://www.youtube.com/channel/UCxjAkfG_v0QOr8YtFRCFA9w
A PHONE NUMBER is available for our clients to address all the specific details of your requests: 04 30 00 66 00
To contact Customer Support directly:: 04 30 00 66 01
The switchboard is open Monday to Friday from 9:00 AM to 12:30 PM and 1:30 PM to 5:00 PM.